Getting Started
8 QL-800 User Guide
System Requirements
• Windows® 10/8/7 Server 2012/2008
• Microsoft .NET Framework 3.5 SP1
• 350 MB free hard drive space
• CD/DVD drive (or Internet connection)
• One available USB 2.0 port for USB installation or network connectivity for network
installation
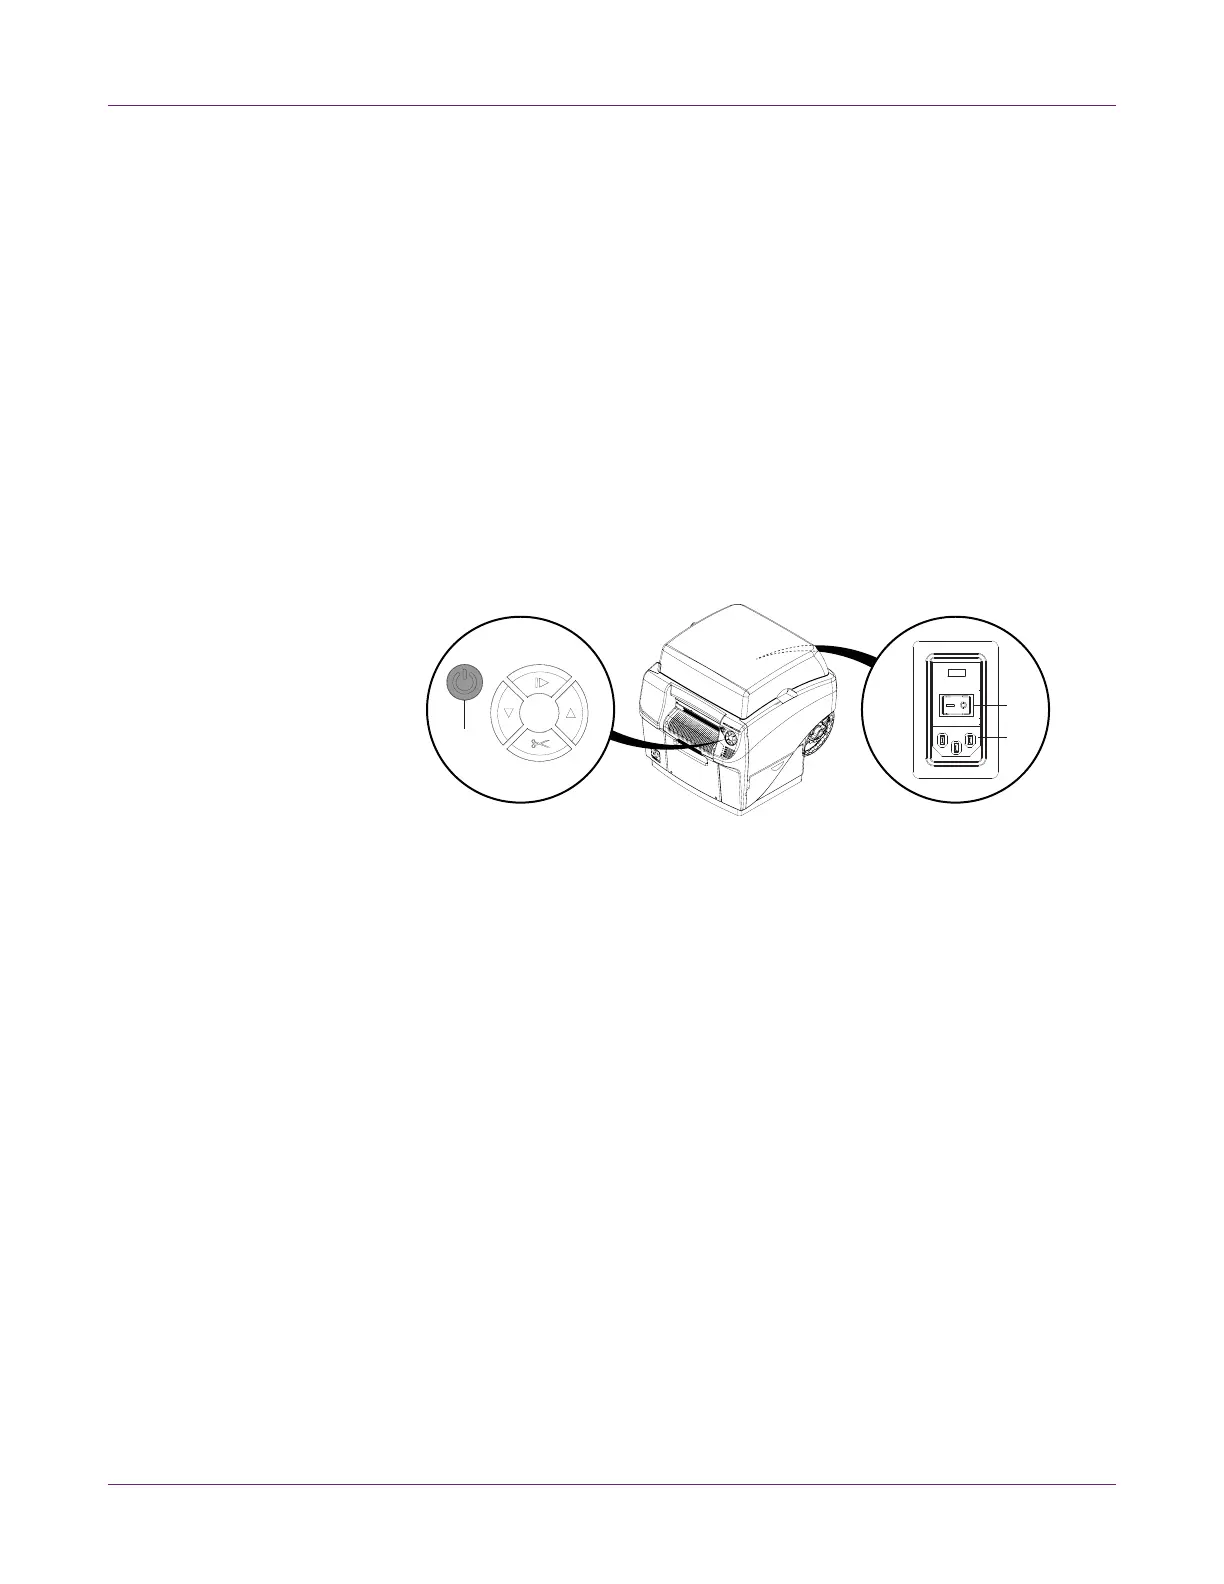
Powering On
1 Connect the power cable to the printer power inlet [1]. Connect the other end of the
power cable to the power source. Then turn on the power via the power inlet switch
[2].
2 Press and hold the power key [3] for one second to turn the printer on.
The printer will begin the power-up process, including opening the printhead latch,
and the green LED will flash momentarily. When the green LED stops flashing and
remains on, the printer will be ready to use.
Note: The red error LED will be on until you use the After Shipping wizard later in
this guide.
Note: If the printer is on, you can press and hold the power key [3] for three
seconds to turn it off.
Related Topics:
- Powering Up After Extended Downtime on page 71
 Loading...