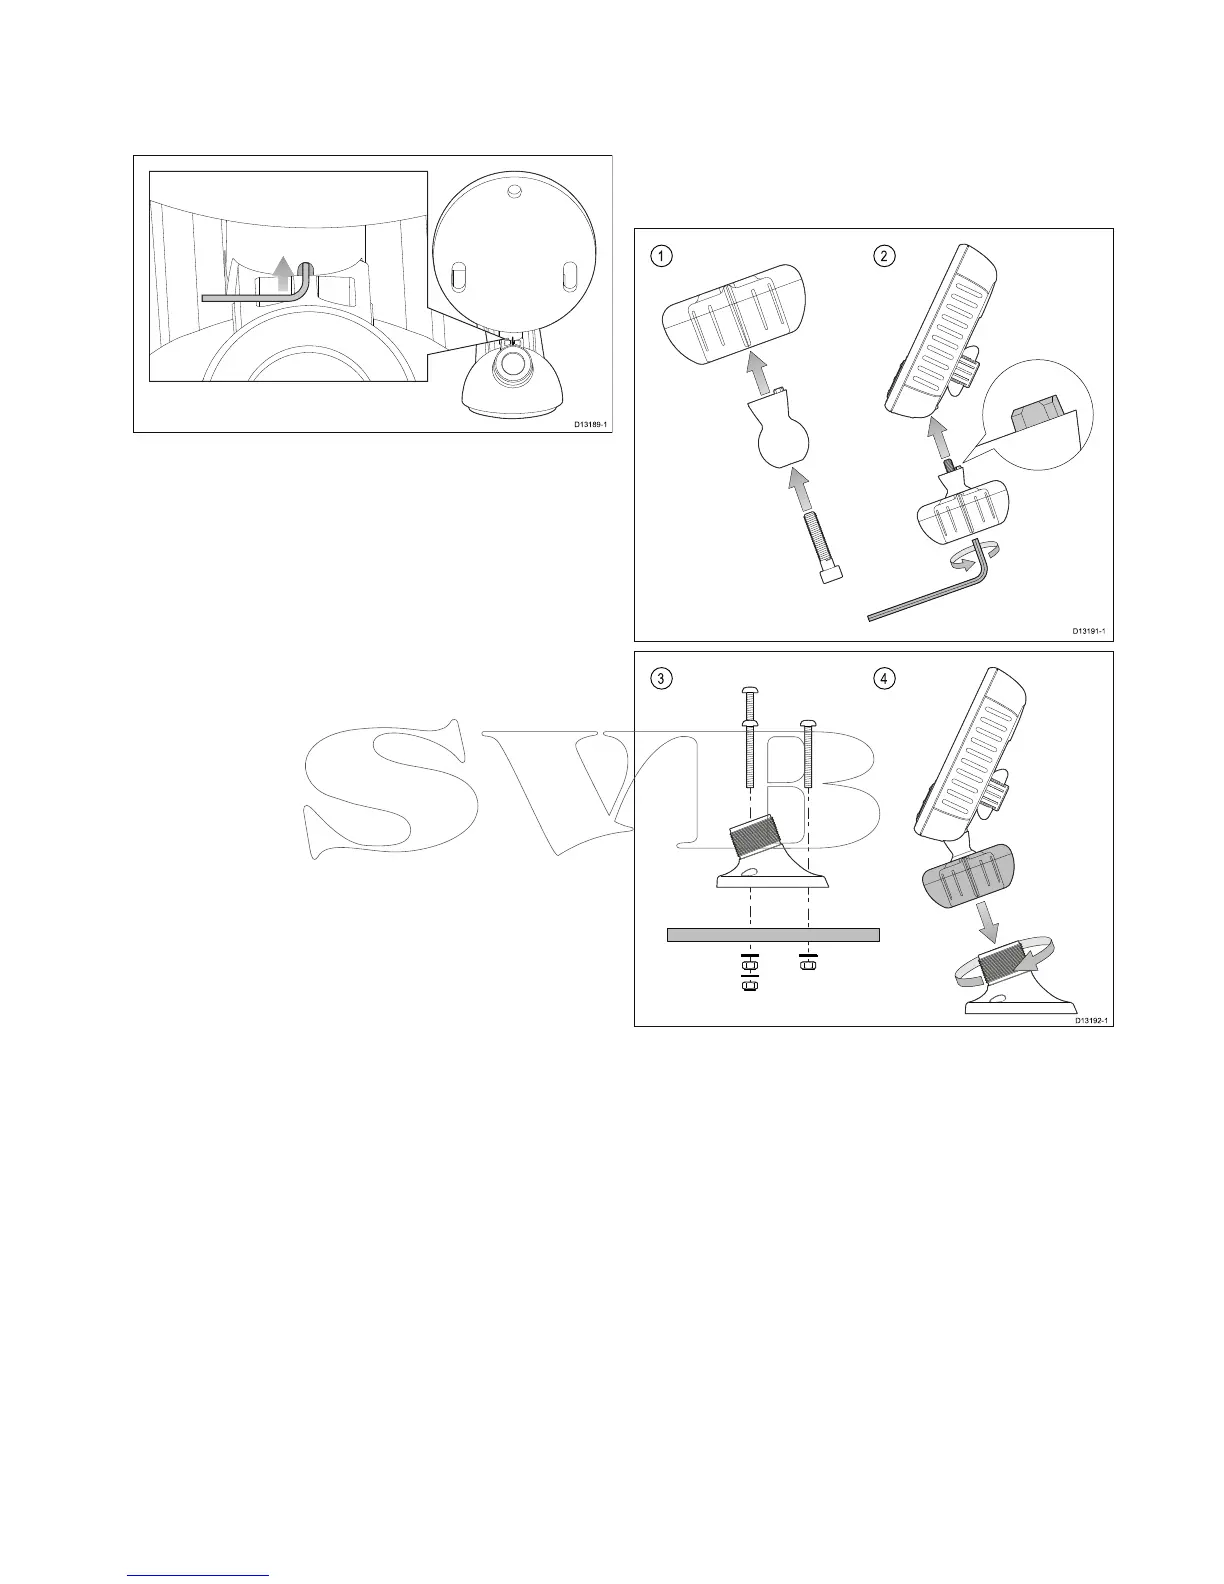
4.3Removingthetransducer
Thetransducercanbereleasedfromthebracketby
insertingasmallmetalrodsuchasapaperclipinto
thetransducerreleaseholelocatedasshown.
1.Insertthemetalrodintothetransducerrelease
hole.
2.Slidethetransduceroffofthebracket.
4.4Mountingtheunit
Theunitismountedusingthebracketprovided.
Beforemountingensurethatyouhave:
•selectedasuitablelocation.
•installedthetransducerandroutedthe
power/transducercabletotheselectedlocation.
1.SlidetheHex(allen)boltthroughthepivotball,
thenslidethepivotballthroughthecenterofthe
bracketlockingcollar.
2.Usinga5mmHex(allen)key(notsupplied),
screwtheHex(allen)boltintotheundersideof
theunit,ensuringthelocatingtabsarecorrectly
aligned.
3.Usingthexingsprovidedmountthebracket
basetothemountingsurfaceasfollows:
i.Markthelocationofthebracketbase’s
mountingholesonthechosenmounting
surface.
ii.Drillholesforthexingsusingasuitabledrill,
ensuringthereisnothingbehindthesurface
thatmaybedamaged.
iii.Useapozi-drivescrewdriverandan8mm
wrench(spanner)toattachthebracketbase
securelytothemountingsurfaceusingthe
xingsprovided.
4.Positiontheunitatthedesiredangleandsecure
bytighteningthelockingcollar.
Mounting
31
 Loading...