• SP4–008 (Sub Scan Mag.)
• SP4–010 (Sub Scan Reg.)
• SP4–011 (Main Scan Reg.)
•
SP4–688 (DF: Density Adjustment). This SP code adjusts the density level if the ID of outputs made
in the DF and Platen mode is different.
For more details, see Image Adjustment: Scanning.
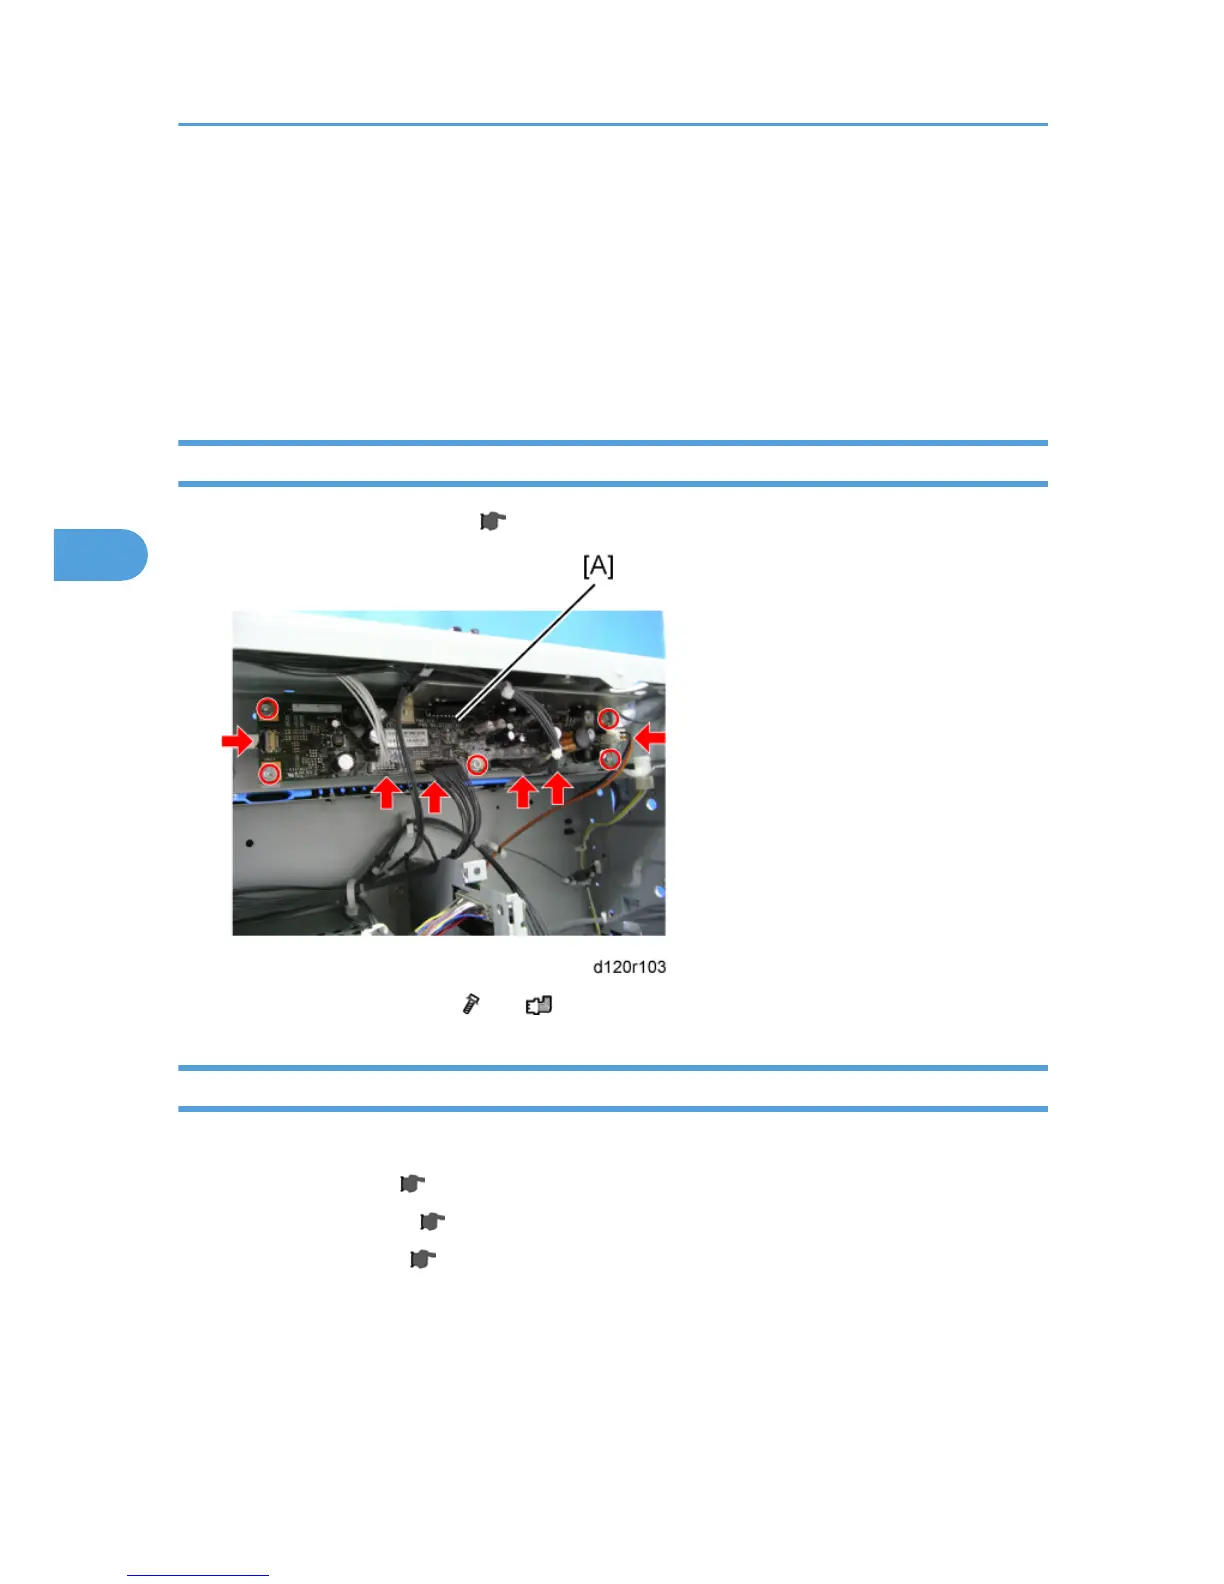
SIO Board
1. Remove the upper rear cover. ( p.181 "Upper Rear Cover").
2. Replace the SIO Board [A] ( x 5, x 6).
Front Scanner Wire
1. Remove:
• Exposure glass ( p.187 "Exposure Glass")
• Upper rear cover ( p.181 "Lower Rear Cover")
• Upper left cover ( p.180 "Upper Left Cover")
4. Replacement and Adjustment
196