Charge Roller, Cleaning Roller
1. Remove:
• PCU ( p.210 "PCU Removal")
• OPC drum ( p.211 "OPC Drum")
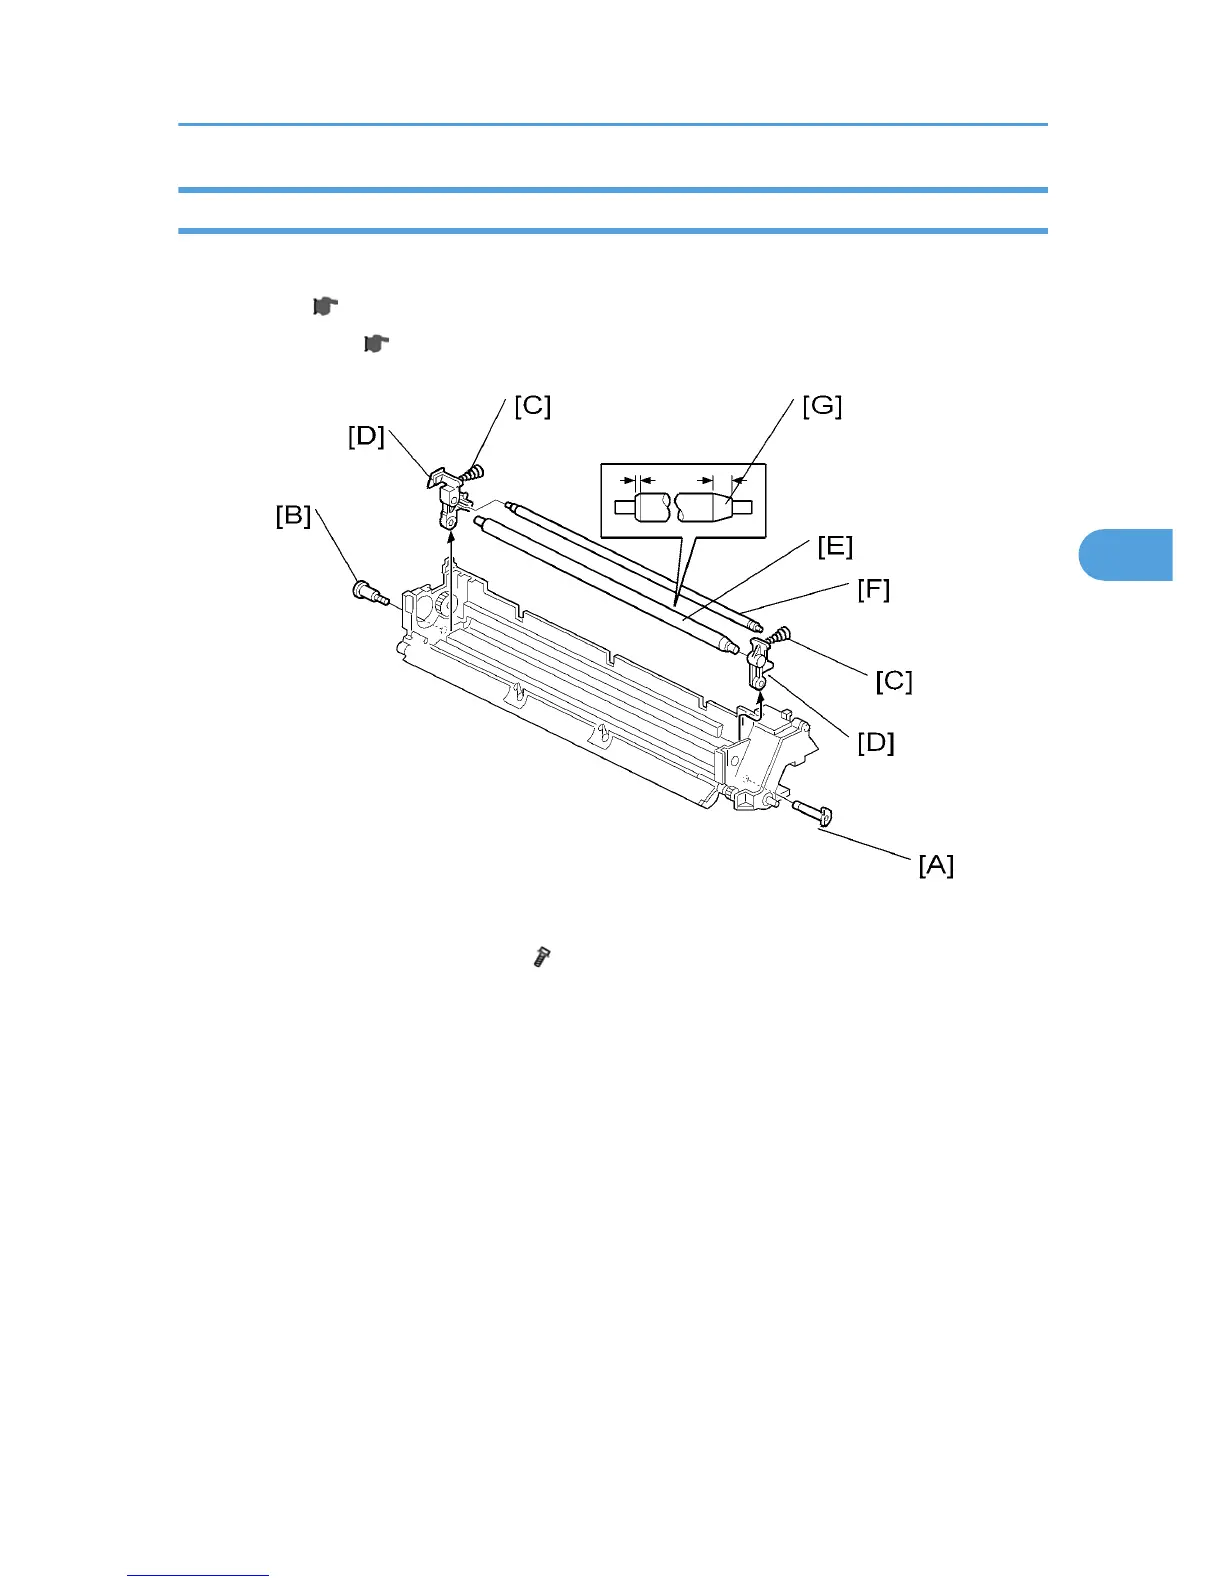
2. Remove the front stud [A].
3. Remove the rear shoulder screw [B] ( x1).
4. Release the front and rear springs [C].
5. Remove the roller assembly [D] (Springs x2, Arms x2, Rollers x2)
6.
Replace the charge roller [E].
7. Replace the cleaning roller [F].
Re-installation: Charge Roller
• Put the end of the charge roller with the wide bevel [G] at the front of the PCU.
• The ends of the cleaning roller [F] are the same (put either end at the front).
• Make sure that the front stud of the roller assembly is put in the correct position.
• Install the front stud before you tighten the rear shoulder screw. Make sure that the head of the stud
is put in the correct position.
Photoconductor Unit (PCU)
213
 Loading...