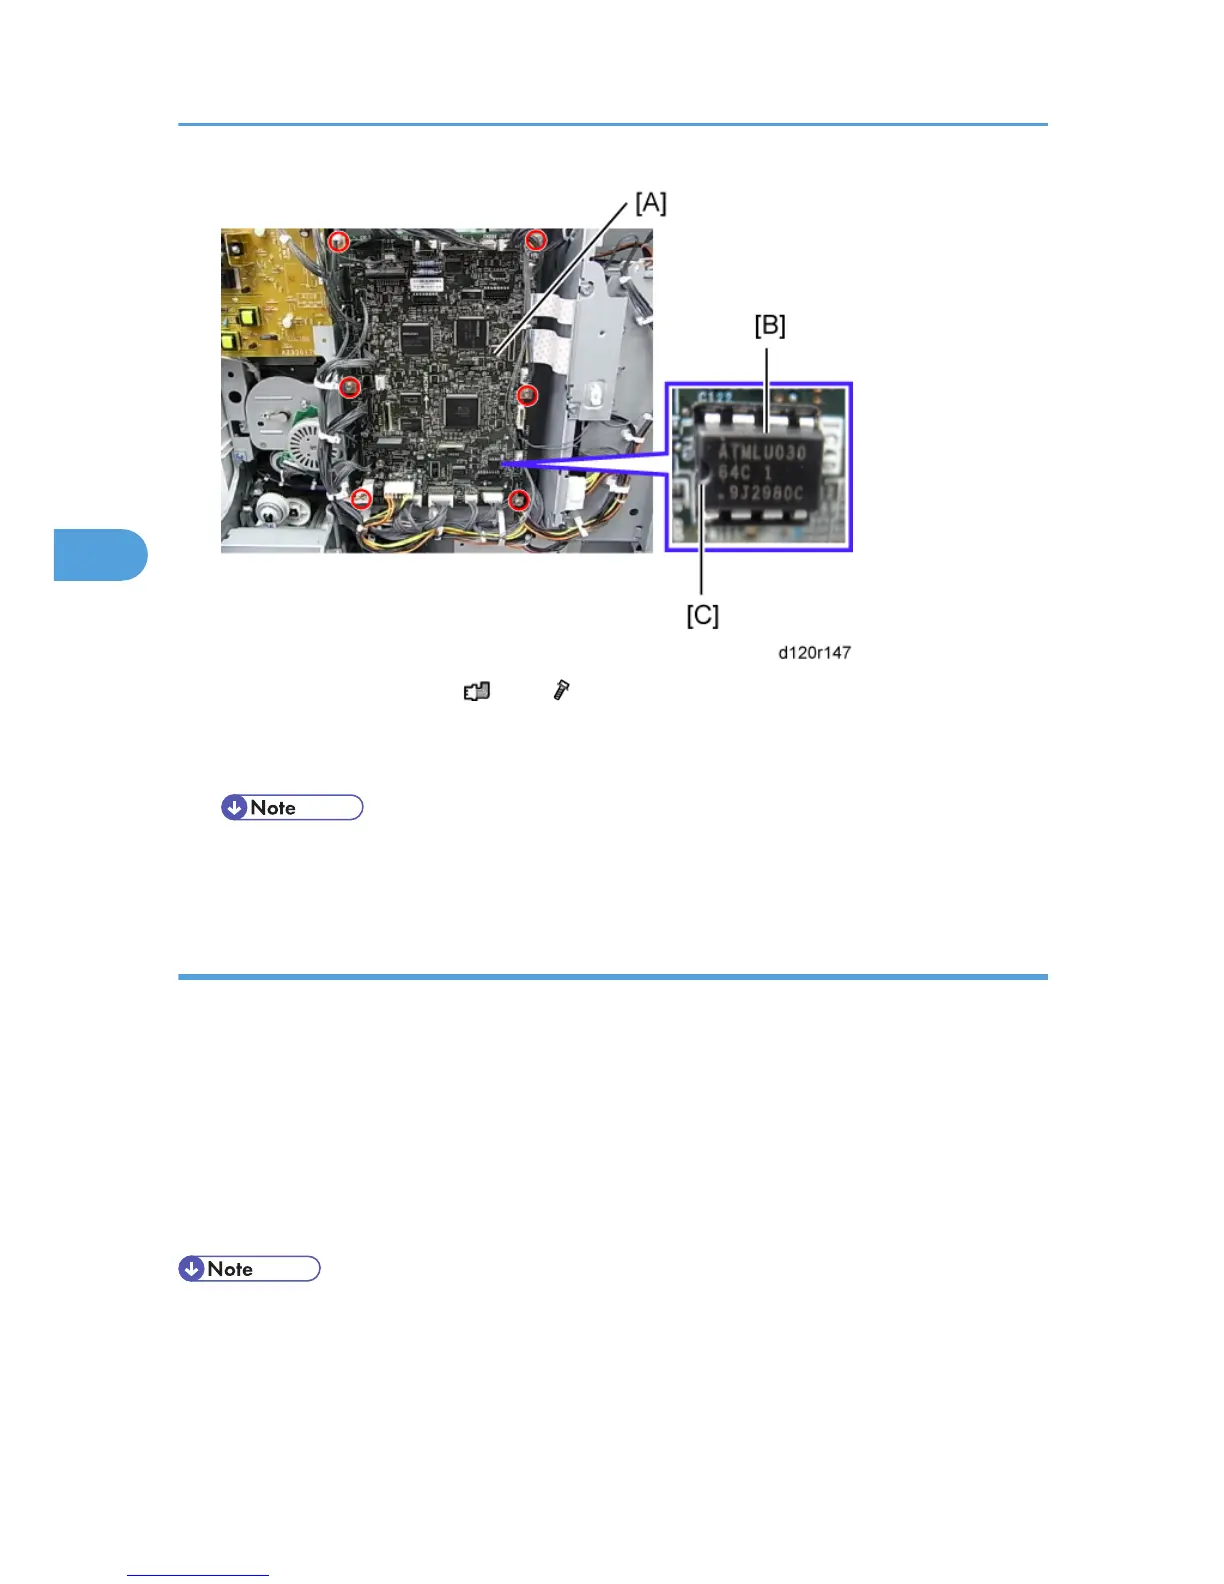
2. Replace the BCU board [A] ( x All, x6).
3. Remove the NVRAM [B] from the old board and install it on the new board.
4. Set the DIP switches on the new BCU board to the same settings as the old board.
• Make sure the NVRAM is correctly installed on the BCU. Insert the NVRAM in the NVRAM
slot with the "half-moon" pointing [C] to the left side.
When installing the new BCU
1. Remove the NVRAM from the old BCU.
2. Install the NVRAM on the new BCU after you replace the BCU.
3. Reassemble the machine.
4.
Turn on the main power switch.
5. "SC995-01" occurs.
6. Enter the serial number with SP5-811-004.
7. Turn the main power switch off and on.
• Make sure you print out the SMC reports ("SP Mode Data" and "Logging Data") before you
replace the NVRAM.
4. Replacement and Adjustment
262
 Loading...