4 Checking and Performing Printer Adjustments
42
CL4NX/CL6NX Service Manual
12
The sensor adjustment result shows. To exit the adjustment, press the right soft button.
13
Set to offline mode. Press the right soft button to confirm that the media feeds correctly.
14
If the media does not feed correctly after the Auto-calibration, clean the sensor portion
and then try again.
If the problem persists, adjust the sensor level manually. Refer to Section 4.3.2 Adjusting the Gap
Sensor Sensitivity and Section 4.3.4 Adjusting the I-mark Sensor Sensitivity.
4.3.2
Adjusting the Gap Sensor Sensitivity
Manually set the Gap sensor level.
1 Perform steps 1 through 6 of Section 4.3.1
Auto-calibration.
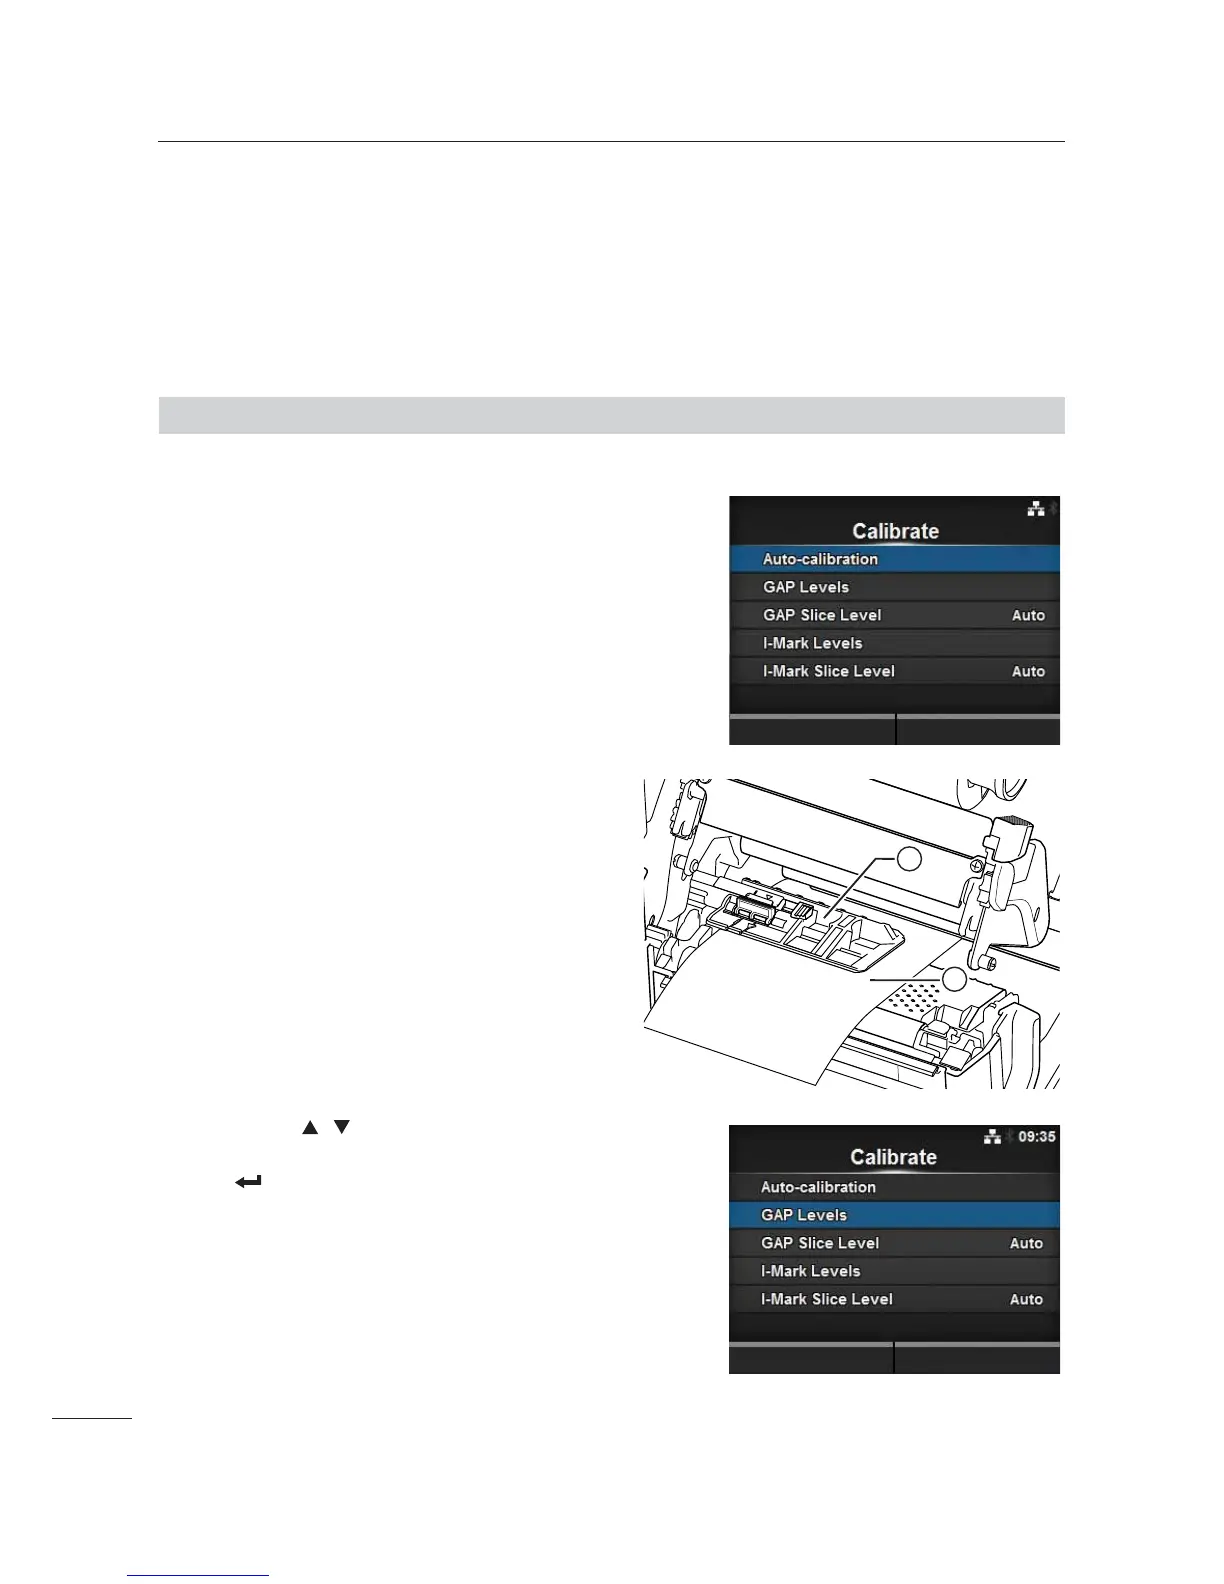
The Calibrate screen shows.
First, adjust the “Low” level (voltage) of the
Gap sensor.
2 Remove the label from the liner.
3 Pass the liner . below the media sensor
guide 3.
Align it so that the media sensor does not sense the
I-mark (black mark).
4 Close the print head.
To get the correct adjustment result, adjust after you
have closed the print head.
5 Press the / buttons to select the GAP
Levels in the Calibrate menu and press
the
button.
2
1
 Loading...