4 Checking and Performing Printer Adjustments
50
CL4NX/CL6NX Service Manual
4.5
Adjusting the Print Darkness
1 Press the power button on the
operator panel for more than one second
to power on the printer.
2 When the printer is in online mode, press
the button on the operator panel to
change to offline mode.
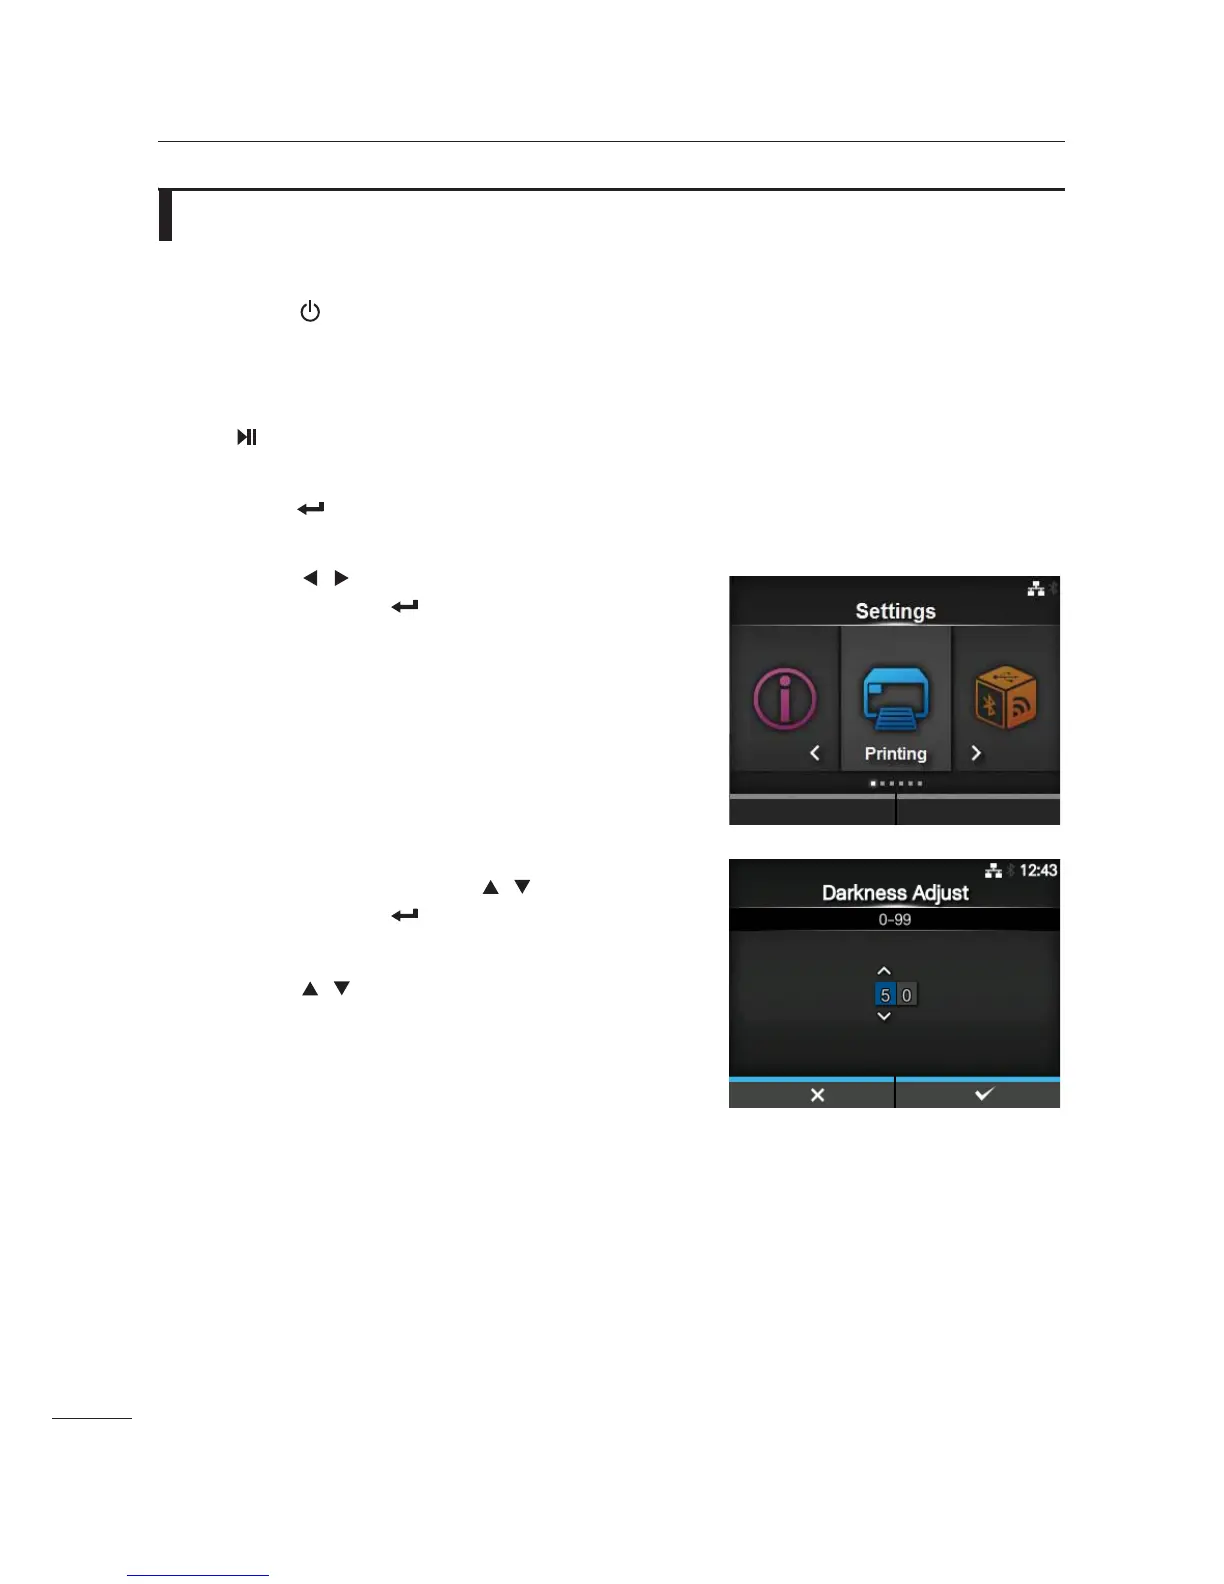
3 Press the button to show the Settings
menu.
4 Press the / buttons to select Printing
and then press the button.
5 Select Advanced > Adjustments >
Darkness Adjust using the / buttons
and then press the button.
The Darkness Adjust screen shows.
6 Press the / buttons to change the
Darkness Adjust value.
The setting range is from 0 to 99.
0 is the lightest and 99 is the darkest.
7 Press the right soft button to save the
setting value.
8 Perform the factory test print.
Refer to Section 4.4 Test Print Check for details.
9 Check to make sure that there are no breaks in the print image or blurring of the bar
code.
10
If you cannot obtain a proper printing result, clean the print head and platen roller.
If the problem persists, replace the print head and platen roller. Refer to Section 5.2 Replacing the Print
Head and Section 5.3 Replacing the Platen Roller for details.
 Loading...