HT-ST9
44
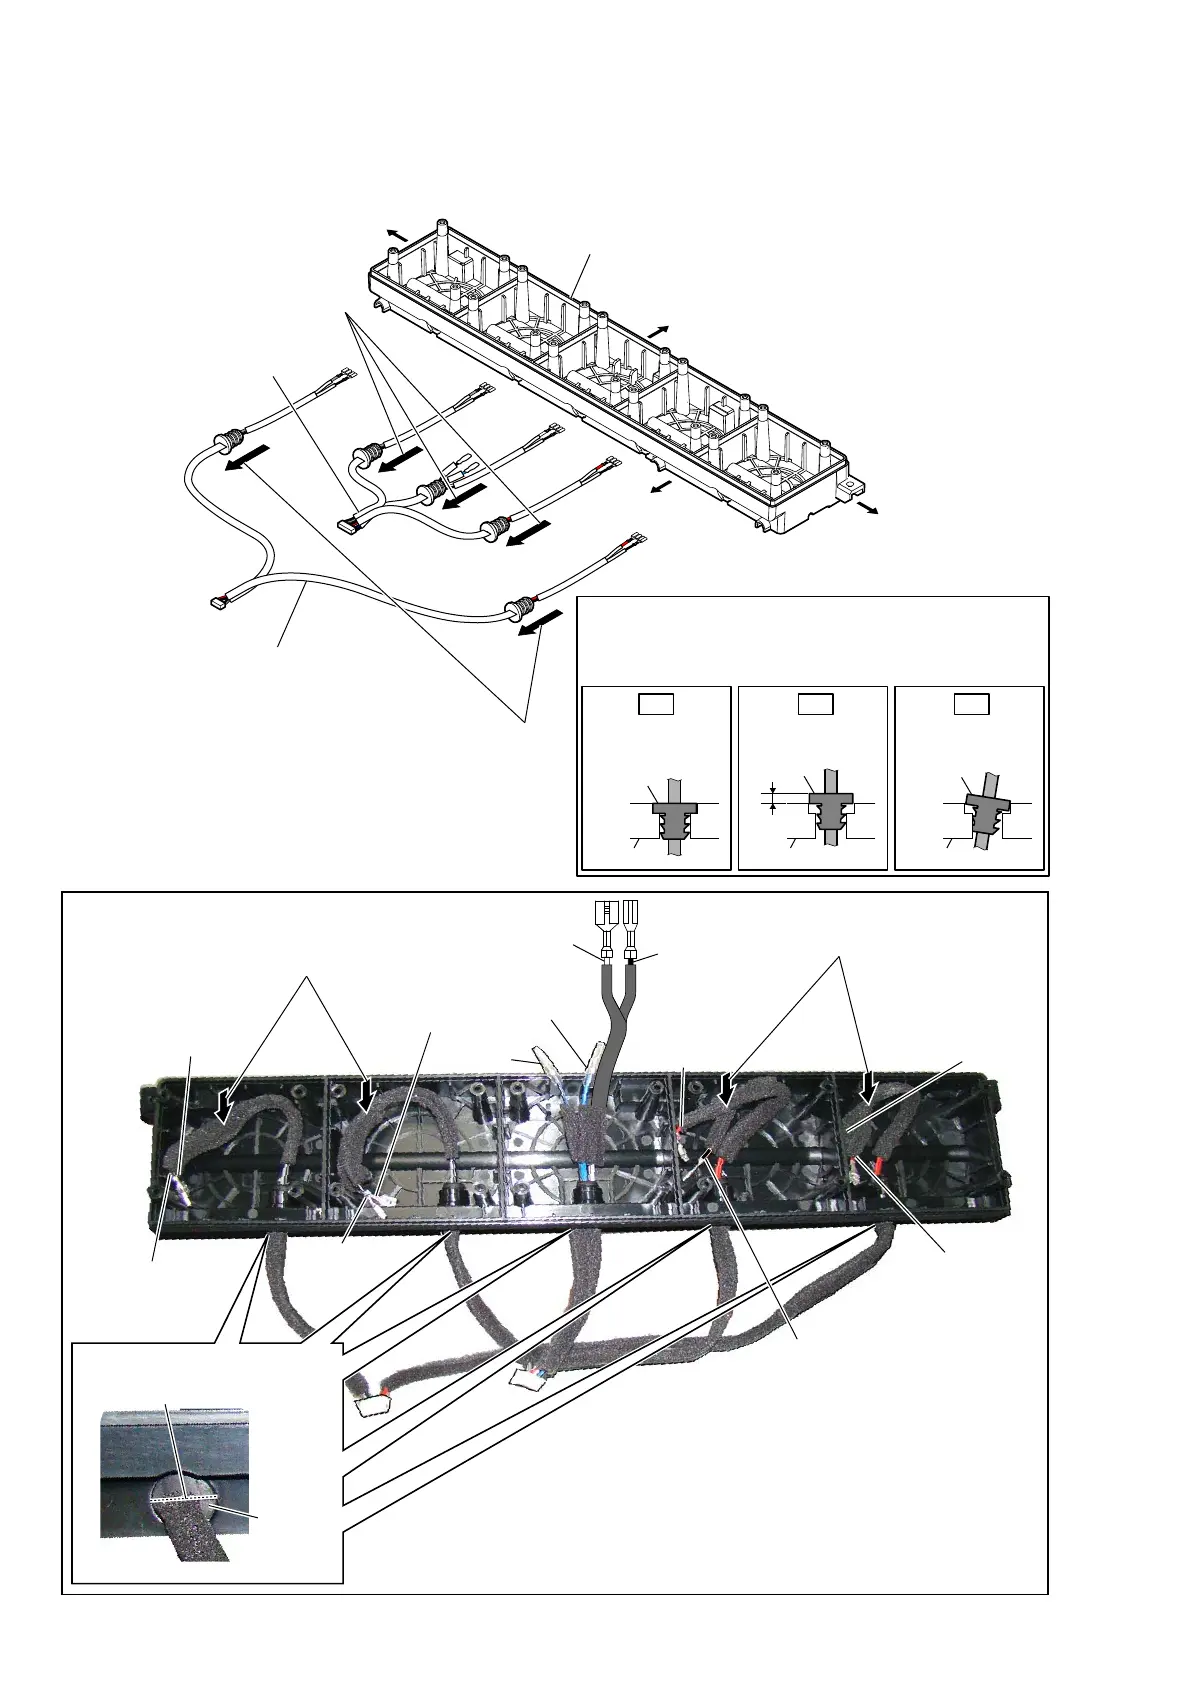
2-36. CONNECTION CABLE WITH SPEAKER (SPC3, SPC4)
– Cabinet (center) block front view –
1 Remove three cord bushings
of connection cable with speaker
in the direction of the arrow.
3 Remove two cord bushings
of connection cable with
speaker in the direction
of the arrow.
2 connection cable with
speaker (SPC4)
4 connection cable with
speaker (SPC3)
:LUHVHWWLQJ
Insert only part way.Insert straight into
the interior.
cabinet
Insert at a slant.
bushing
cabinet
bushing
cabinet
bushing
OK NG NG
+RZWRLQVWDOOWKHFRUGEXVKLQJ
Insert the cord bushing straight into the interior.
There is a possibility that using this unit without
the cord bushing correctly installed will damage it.
terminal
(narrow side)
[black]
terminal
(narrow side)
[black]
terminal
(narrow side)
[black]
terminal
[black]
terminal
[blue]
terminal
(wide side)
[white]
terminal
(wide side)
[gray]
terminal
(wide side)
[gray]
cord
bushing
terminal
(wide side)
[red]
terminal
(wide side)
[red]
terminal
(narrow side)
[black]
terminal
(narrow side)
[black]
Right side
Top side
Left side
Bottom side
cabinet (center)
Note 2:
When installing the cord
bushing, install so that the
line is horizontal.
Note 1:
Press the connection cable with
speaker into the cabinet (center).
Note 1:
Press the connection cable with
speaker into the cabinet (center).
– Cabinet (center) block top view –
– Bottom view –
 Loading...