Arrow Manual Getting Started 22
Audio Setup
Connect to Input Sources and Monitor System
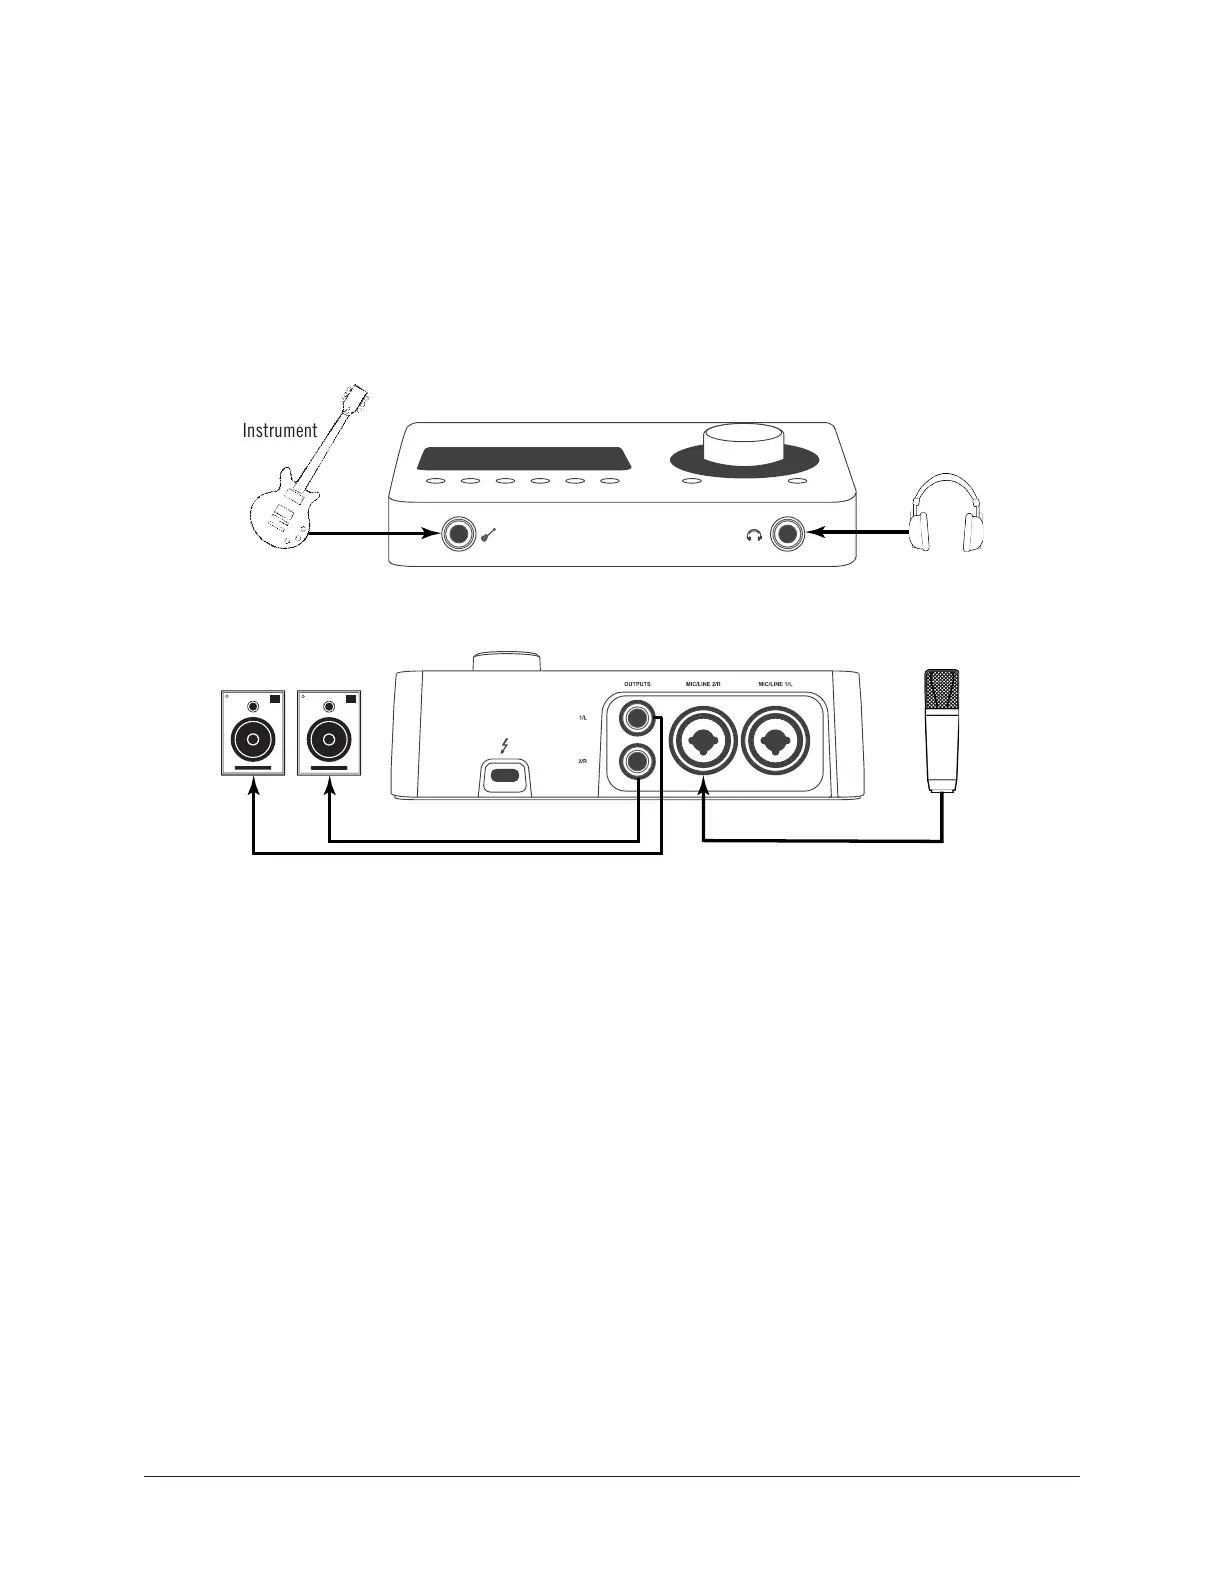
One typical Arrow audio setup is illustrated below. For complete details about all of
Arrow's connectors and controls, see the Hardware Controls & Connectors chapter in this
manual.
Typical Arrow audio connections
Audio Connection Notes
• Important: When plugging into a rear panel combo jack input, the input source
jack (either XLR or ¼” phone) must be manually selected with the top panel
INPUT button when in PREAMP Mode. Select MIC when connecting XLR plugs,
and LINE when connecting ¼" phone plugs. See Controls Overview for details.
• When an instrument is plugged into the front panel Hi-Z jack, channel 1
automatically switches to the Hi-Z input. To use a MIC or LINE input with channel
1, the Hi-Z instrument jack must be disconnected.
• The main outputs are line level. Connect the main outputs to the line level inputs
of powered monitors or an amplifier+speaker system. Balanced TRS or unbalanced
TS cables with ¼" plugs may be used.
• In the illustration above, the microphone is plugged into input 2 so the mic
(channel 2) can be used at the same time as the Hi-Z instrument (channel 1).
• For optimum sonic performance, always use high-quality shielded audio cables.
Speaker
System
Instrument
Headphones
Microphone
 Loading...