EasyManuals Logo
Home>Utax>All in One Printer>CD 1018

Utax CD 1018 User Manual

Utax CD 1018
198 pages
To Next Page IconTo Next Page
To Previous Page IconTo Previous Page
Page #122 background imageLoading...
Page #122 background image
2GM
1-6-29
Screws
Screws
Screw
Connectors
Screw
LSU shield
1
3
4
2
1-6-11 Removing the laser scanner unit and the eraser lamp
1. Remove the scanner unit (see page 1-6-27).
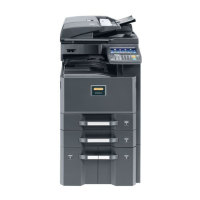
2. Remove two screws and then remove
grounding plate.
3. Remove each two screws and then remove
the right and left scanner stays.
Figure 1-6-32 Removing the right and left stays
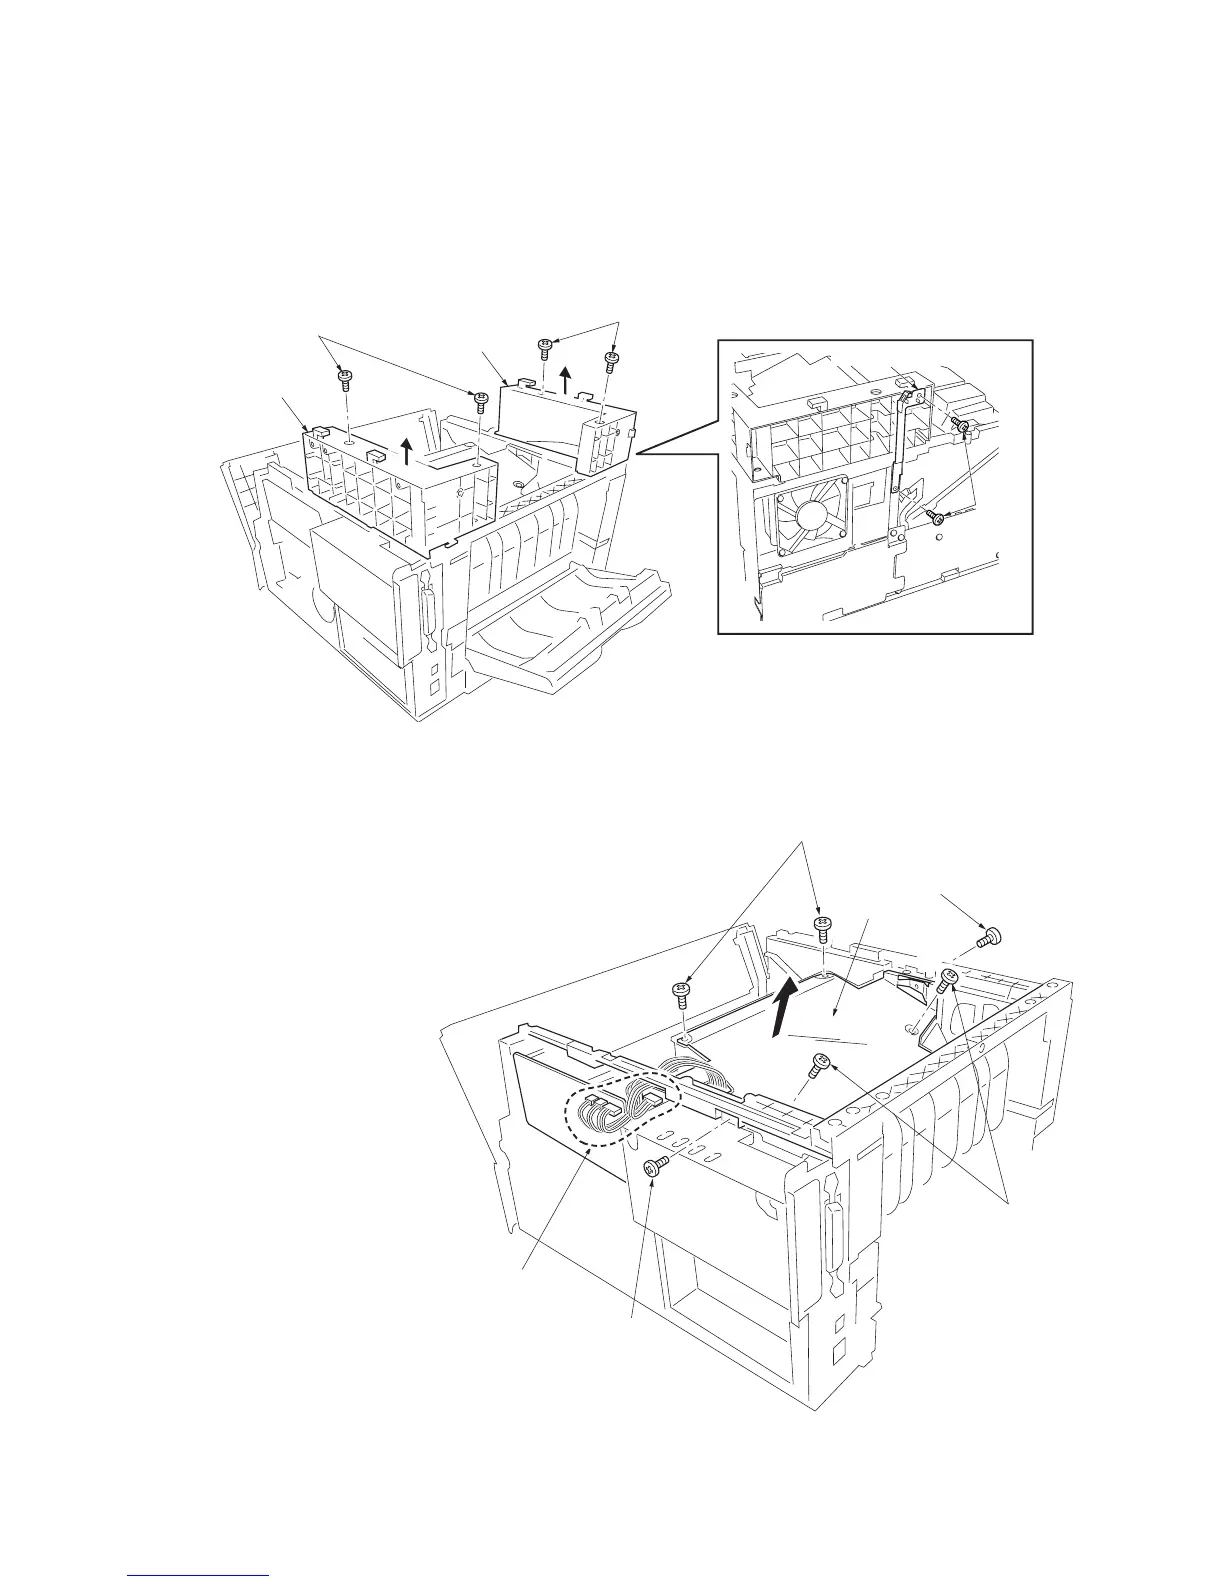
4. Remove four connectors.
5. Remove six screws and then remove the LSU
shield.
* When refitting the LSU shield, tighten a
screw in order of 4 from 1.
Figure 1-6-33 Removing the LSU shield
Screws
Right scanner stay
Left scanner stay
Screws
Screws
Grounding plates

Table of Contents

Other manuals for Utax CD 1018

Questions and Answers:

Question and Answer IconNeed help?

Do you have a question about the Utax CD 1018 and is the answer not in the manual?

Utax CD 1018 Specifications

General IconGeneral
BrandUtax
ModelCD 1018
CategoryAll in One Printer
LanguageEnglish

Related product manuals