5-4
MOUNTING THE METERS
The meters can be installed to electrical start models because power source is required for the
operation.
METER MOUNTING PROCEDURE
Follow the procedures below for mounting the gauges.
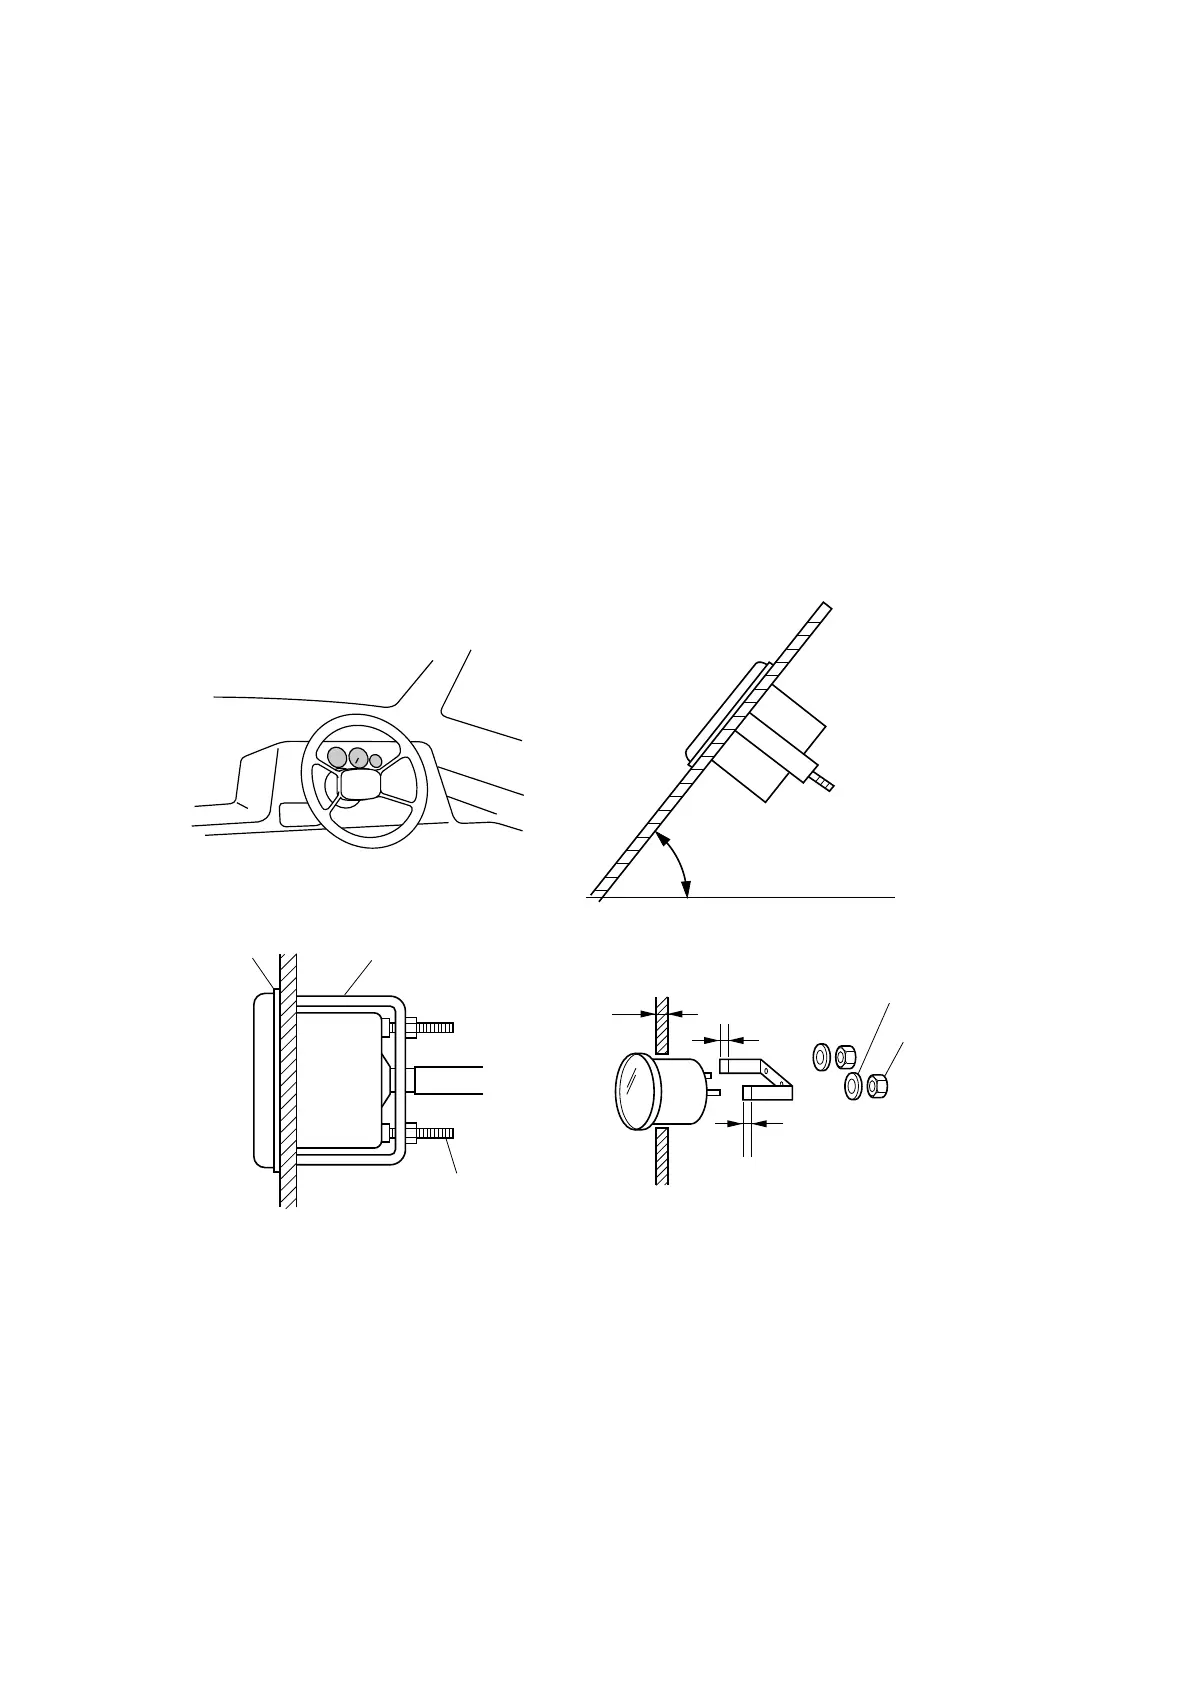
1. Select a mounting location so that the meter is easy to read from the operating position.
Be sure that there is sufficient clearance behind the panel for the meter.
For analog meters, be sure that the angle for mounting the meter is 65 to 90 degrees.
If the analog gauge is mounted onto horizontal surface, the pointer may not return to the zero po-
sition after the engine has stopped.
2. Make a hole at the desired position.
3. Remove the fitting plate from the meter, fit the meter into the panel, and install the fitting plate
over the mounting studs.
4. Place the washers over the studs, and then evenly tighten the mounting nuts until the meter can
no longer be rotated by hand.
5. Connect the wire-harnesses to the gauges, and secure them into a boat.
* If the gauge is mounted onto a 13 mm (0.5 in) or thicker board, cut out the fitting plate end so that the mount
nut is enough tightened.
ANALOG GAUGE ILLUMINATION (6Y7 TYPE)
For black-face analog gauge, the faceplate is illuminated with permeation light for nighttime opera-
tion.
The white-face analog gauge used an indirect clear lighting.
65˚ – 90˚
[Analog meter]
Gasket Fitting plate
Panel
thickness
Cutting area
(for thicker panel)
Nut
Wave washer
Mounting stud
 Loading...