Setting Up the Machine 27
1
——————————————————————————————————————————————————————
————————————————————————————
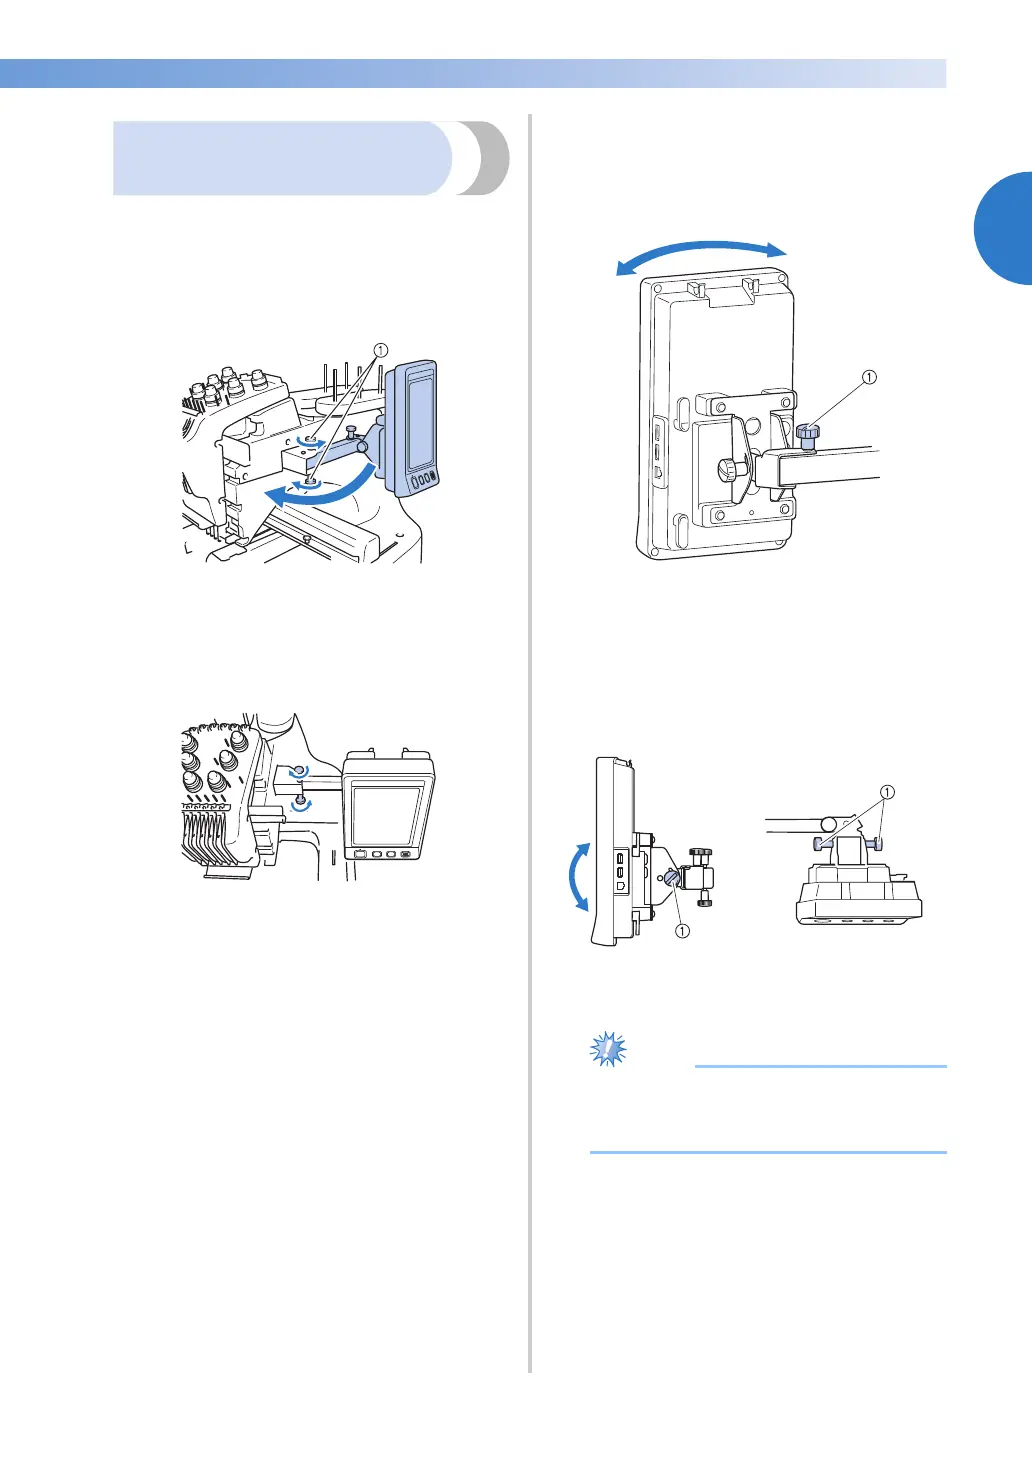
Adjusting the operation
panel position
Adjust the orientation and angle of the operation
panel so it can easily be operated.
1
Loosen 2 thumb screws to bring the
operation panel forward.
1 Thumb screws
2
Adjust the operation panel to an easy-to-
operate position, and then tighten the thumb
screws.
3
Adjust the orientation of the operation
panel.
Loosen the thumb screw, adjust the operation
panel to an easy-to-view orientation, and
then tighten the thumb screw.
1 Thumb screw
4
Adjust the angle of the operation panel.
Loosen the 2 thumb screws behind the
operation panel, adjust the operation panel to
an easy-to-view angle, and then tighten the
thumb screws.
1 Thumb screws
● Using the disc-shaped screwdriver
included, loosen and firmly tighten the
five thumb screws.
(Side view) (Top view)

 Loading...