GETTING READY ——————————————————————————————————————————————————————————————————————
28
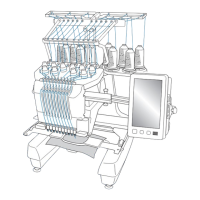
Preparing the thread guide
assembly
Raise the thread guide assembly. Locate the
included Phillips screwdriver.
1
Using the Phillips screwdriver, loosen the
screws on the left side of the thread guide
assembly support so that the thread guide
assembly can be raised.
Remove screw 1, and then turn screw 2 three or
four times to loosen it.
1 Remove the screw.
2 Turn the screw three or four times to loosen it.
2
Raise thread guide into position and tighten
screw 2 on the left. Insert screw 1 into
right side of the thread guide assembly
support and tighten.
1 Insert screw and tighten.
2 Tighten screw.
3
Using the Phillips screwdriver, loosen the
screws on the left and right sides of the
thread guide assembly and lift up the thread
guide so that it is level.
1 Loosen Screws
4
Tighten the screws on the left and right sides
of the thread guide assembly.
● If the screws are not loosened enough, it
may not be easy to move the thread guide
assembly support and the thread guide.
Do not apply extreme force when moving
the thread guide assembly support and the
thread guide. Be sure that the screws are
loosened well enough before moving
these parts.
● Be sure to tighten each screw well enough
that the thread guide assembly support
and the thread guide are secured.
 Loading...

