OTHER BASIC PROCEDURES
——————————————————————————————————————————————————————————————
86
Changing the Needle
If the needle is bent or the tip of the needle is broken, replace the needle with a new one. Use the included
Allen screw driver to replace the needle with one that is designed specifically for this machine and that
passes the test described in “Checking the needle” on page 33.
Replacing the needle
1
Turn off the embroidery machine.
CAUTION
2
Loosen the needle set screw and remove the
needle.
Hold the needle with your left hand, and then
hold the Allen screw driver in your right hand
and turn the needle set screw
counterclockwise.
● Be sure to use the included Allen screw
driver to replace the needle, otherwise too
much force may be applied to the needle,
causing it to break.
• Do not apply extreme force when
loosening or tightening the needle set
screw, otherwise the machine may be
damaged.
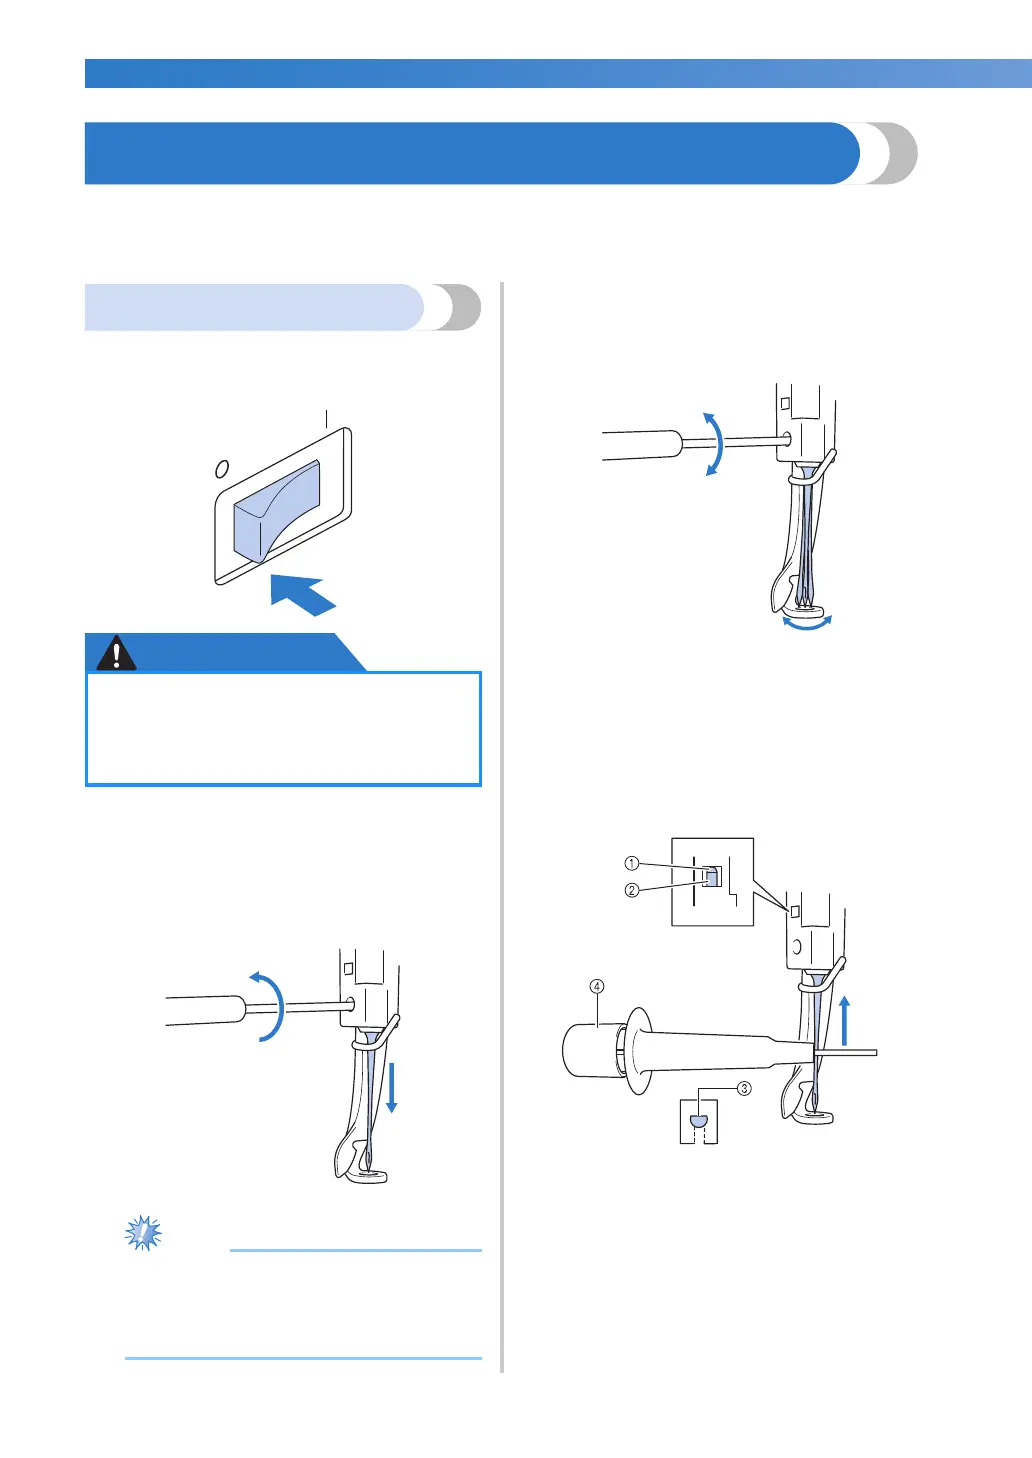
3
With the flat side of the needle toward the
back of the machine, insert the needle all the
way up until it touches the needle bar
stopper.
Pass the needle through the hole in the
presser foot, and then use the needle
changing tool to lift up the needle.
1 Needle bar stopper
2 Needle
3 Flat side of needle
4 Needle changing tool
● Be sure to turn off the embroidery
machine before replacing the needle,
otherwise injuries may result if the
machine starts sewing.

 Loading...