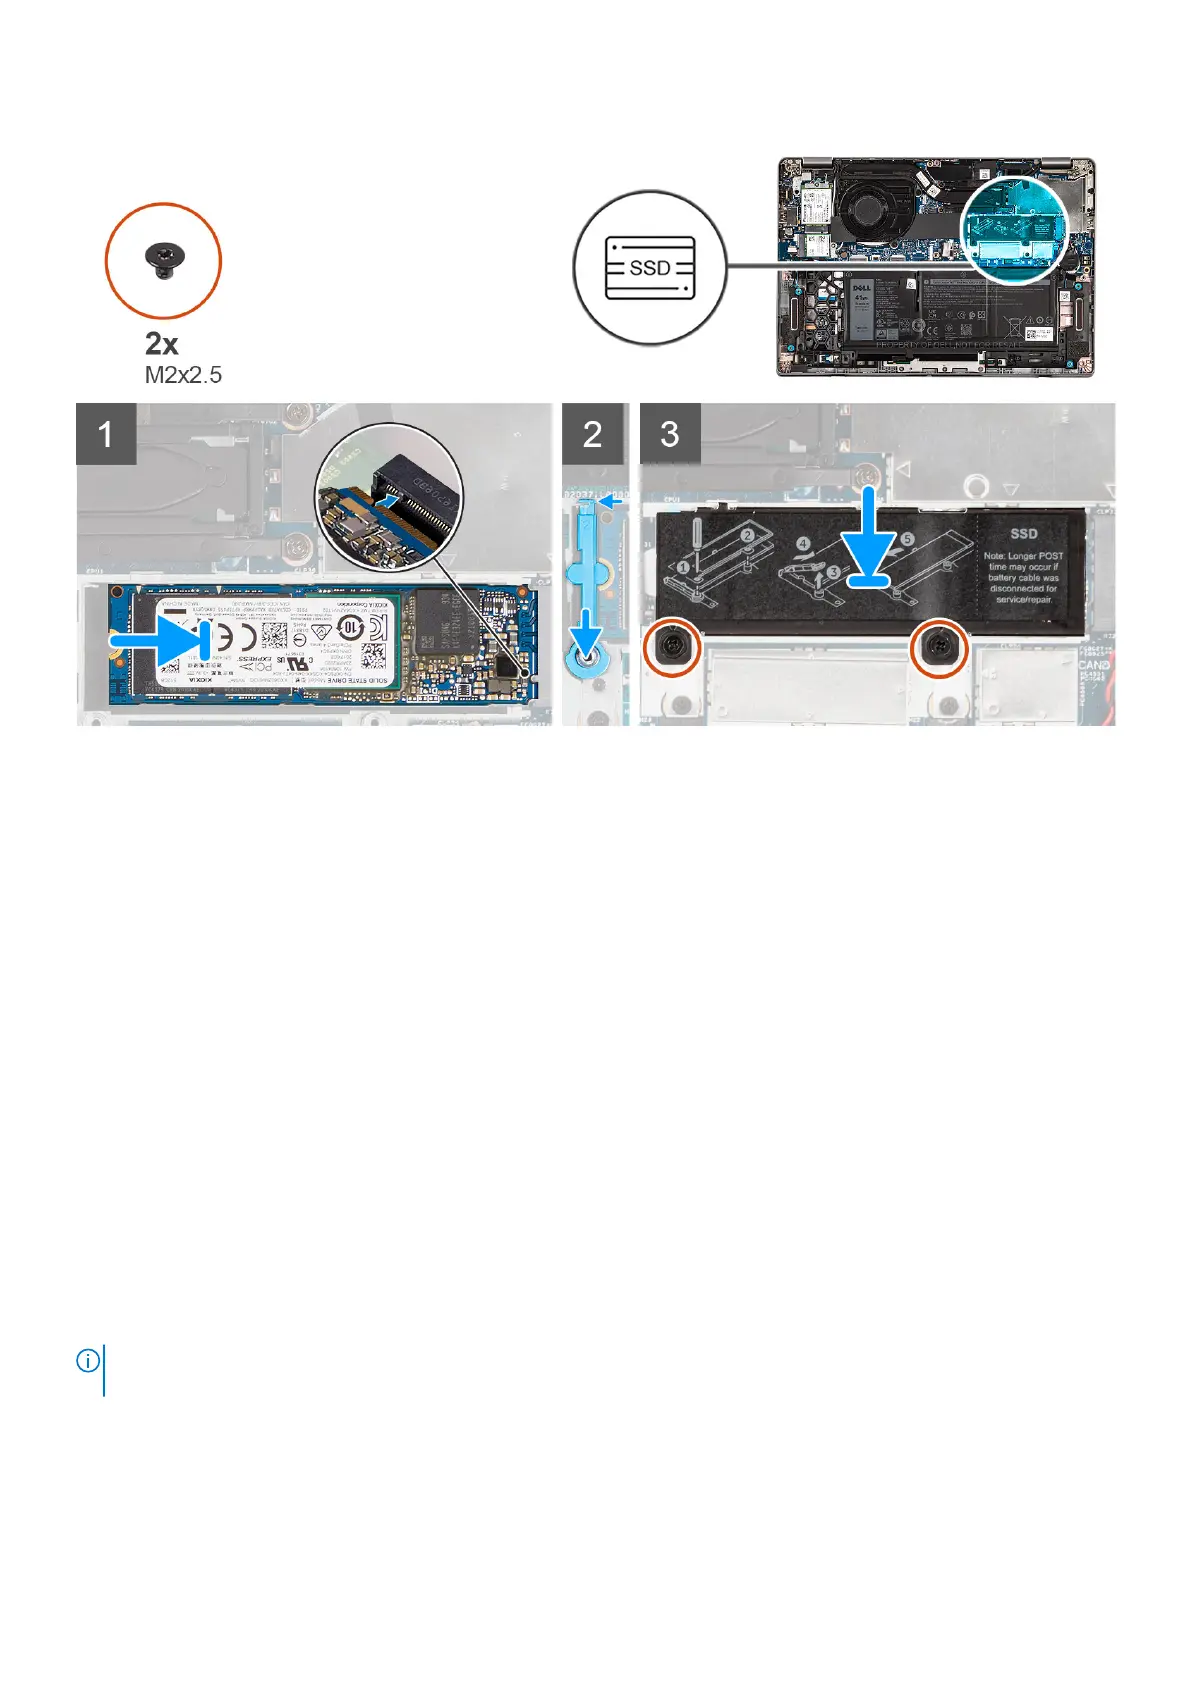
Steps
1. Align the notch on the solid-state drive with the tab on the M.2 card slot.
2. Slide the solid-state drive into the M.2 card slot on the system board.
3. Slide the solid-state drive holder over the hook and press it down to secure the solid-state drive.
4. Align the solid-state drive thermal plate and firmly press to cover the solid-state drive.
5. Replace the two (M2x2.5) screws to secure the solid-state drive thermal plate to the system board.
Next steps
1. Install the base cover.
2. Follow the procedure in after working inside your computer.
Replacing the solid-state drive holder
Prerequisites
1. Follow the procedure in before working inside your computer.
2. Remove the base cover.
3. Enter service mode if solid-state drive card has been installed and you are removing solid-state drive card before replacing
the solid-state drive support bracket.
About this task
The figure provides a visual representation if you are replacing a M.2 2280 solid-state drive with a M.2 2230 solid-state drive.
NOTE:
Ensure the M.2 2280 solid-state drive is removed first. See the procedure for removing the M.2 2280 solid-state
drive.
38 Removing and installing components
 Loading...