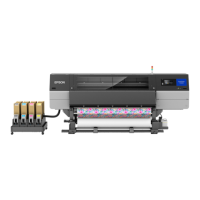
B
Remove the screw.
C
Remove the parts.
Slide in the direction shown in (1), and then
remove it.
You need the removed screw and parts when
loading polo shirts and so on. Store them in a safe
place. We recommend keeping the screw
attached to the platen.
To install the parts, perform the removal
procedure in reverse.
Note:
When installing, align the protruding section with the
hole as shown in the following illustration.
Replacing Platens and
Removing/Attaching Spacers
Prepare a cross-head screwdriver before removing the
spacers.
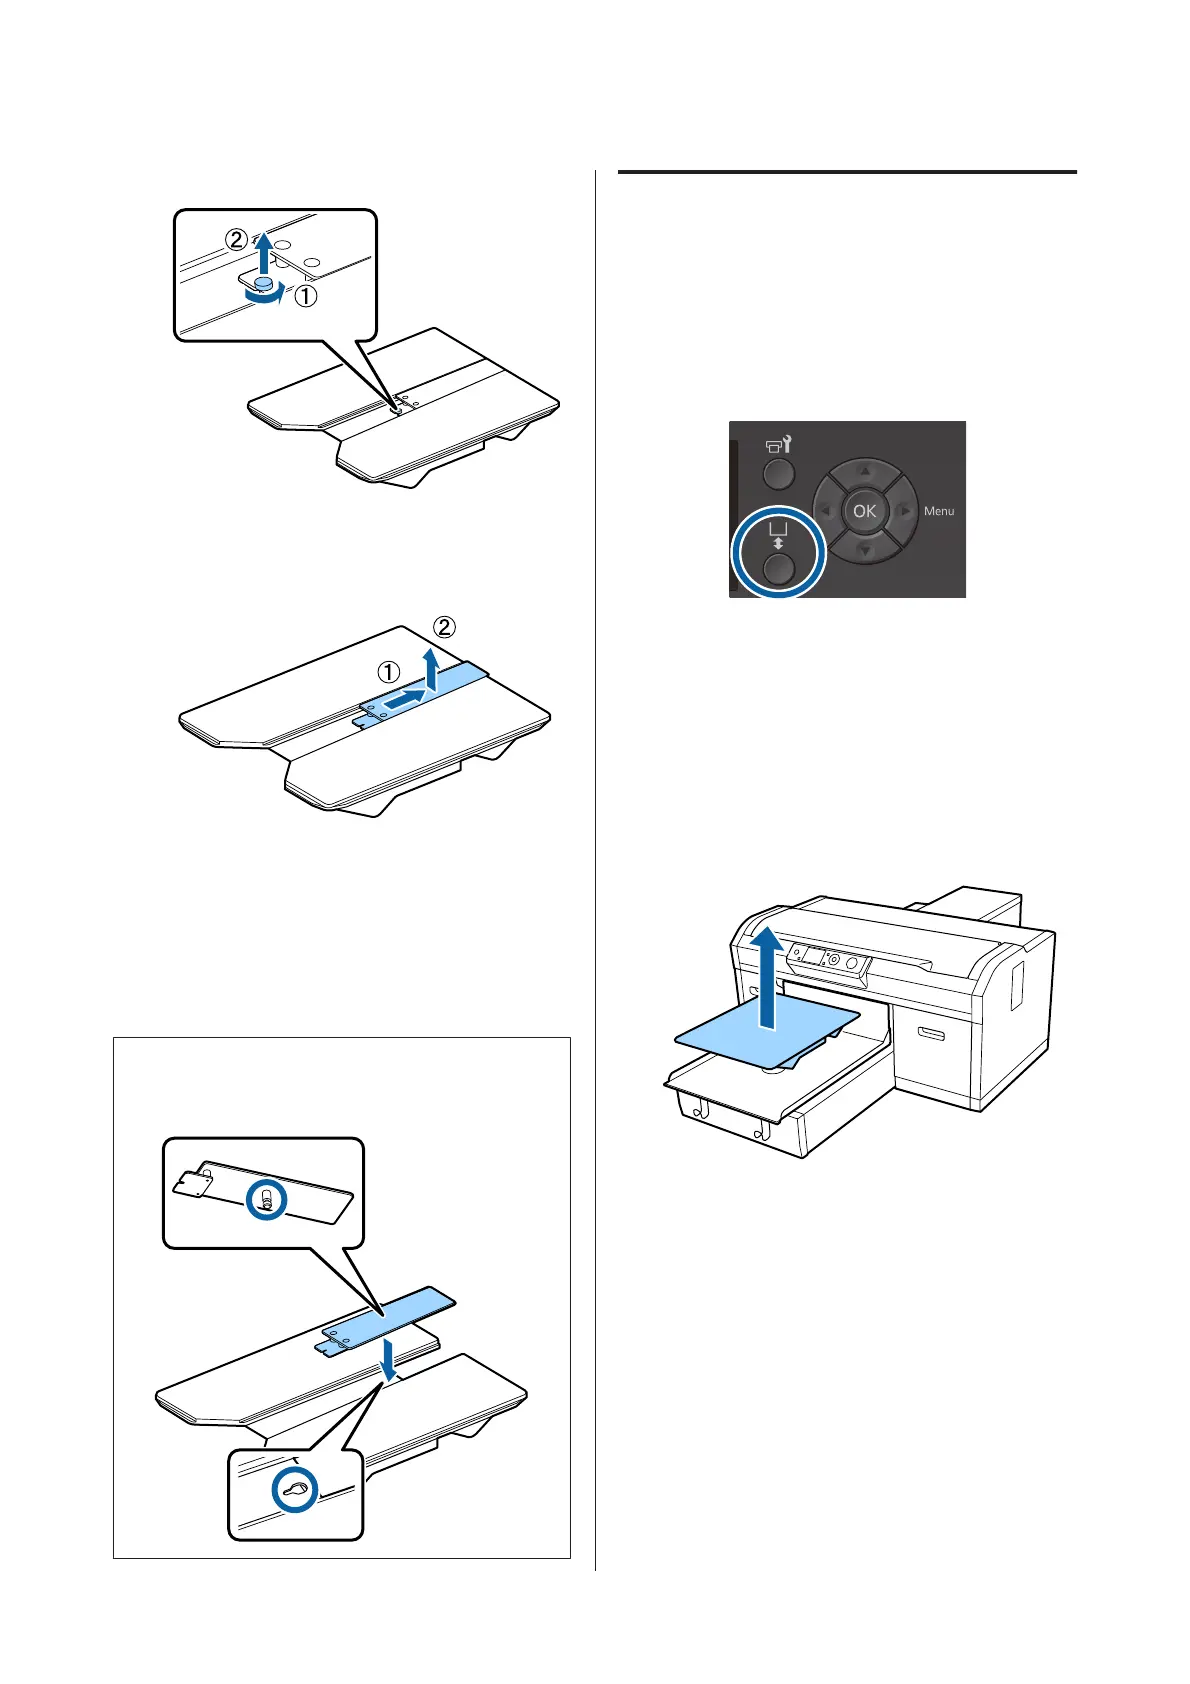
Buttons that are used in the following operations
A
Check that the platen is ejected forward.
If it is not ejected, press the } button to move the
platen forward.
B
Turn off the printer.
C
Grip the left and right of the platen, and lift it
straight up to remove it.
D
Check the condition of the spacers.
The type and number of spacers to be removed
differs as shown below depending on the type of
platen installed and the thickness of the fabric to
be printed on.
SC-F2100 Series User's Guide
Basic Printing
40
 Loading...