DS-7700NI-SP/9000/9600 Series HDVR/NVR User’s Manual
41
To set the camera order:
1. Enter the Live View menu, shown in Figure 33 by going to Menu > System Configuration > Live
View.
2. Select the View tab.
3. Select the Video Output Interface to configure camera order for.
4. Select the Screen Configuration you would like to use in Live Feed by clicking .
The preview of the screen configuration on the right will change depending on the option
selected.
5. Click to select a screen in the right region and double-click to select a channel in the left region.
Thus the selected channel will be displayed in the corresponding screen.
Note:
means no channel will be displayed in this screen.
6. Click to start live view of all channels and click to stop live view all channels. Click
or to go to the previous or next page. For example, in 2x2 screen configuration mode,
pressing the Next button will bring up the next set of 4 displays.
7. Click the Apply button to save settings.
8. Click to exit out of the menu.
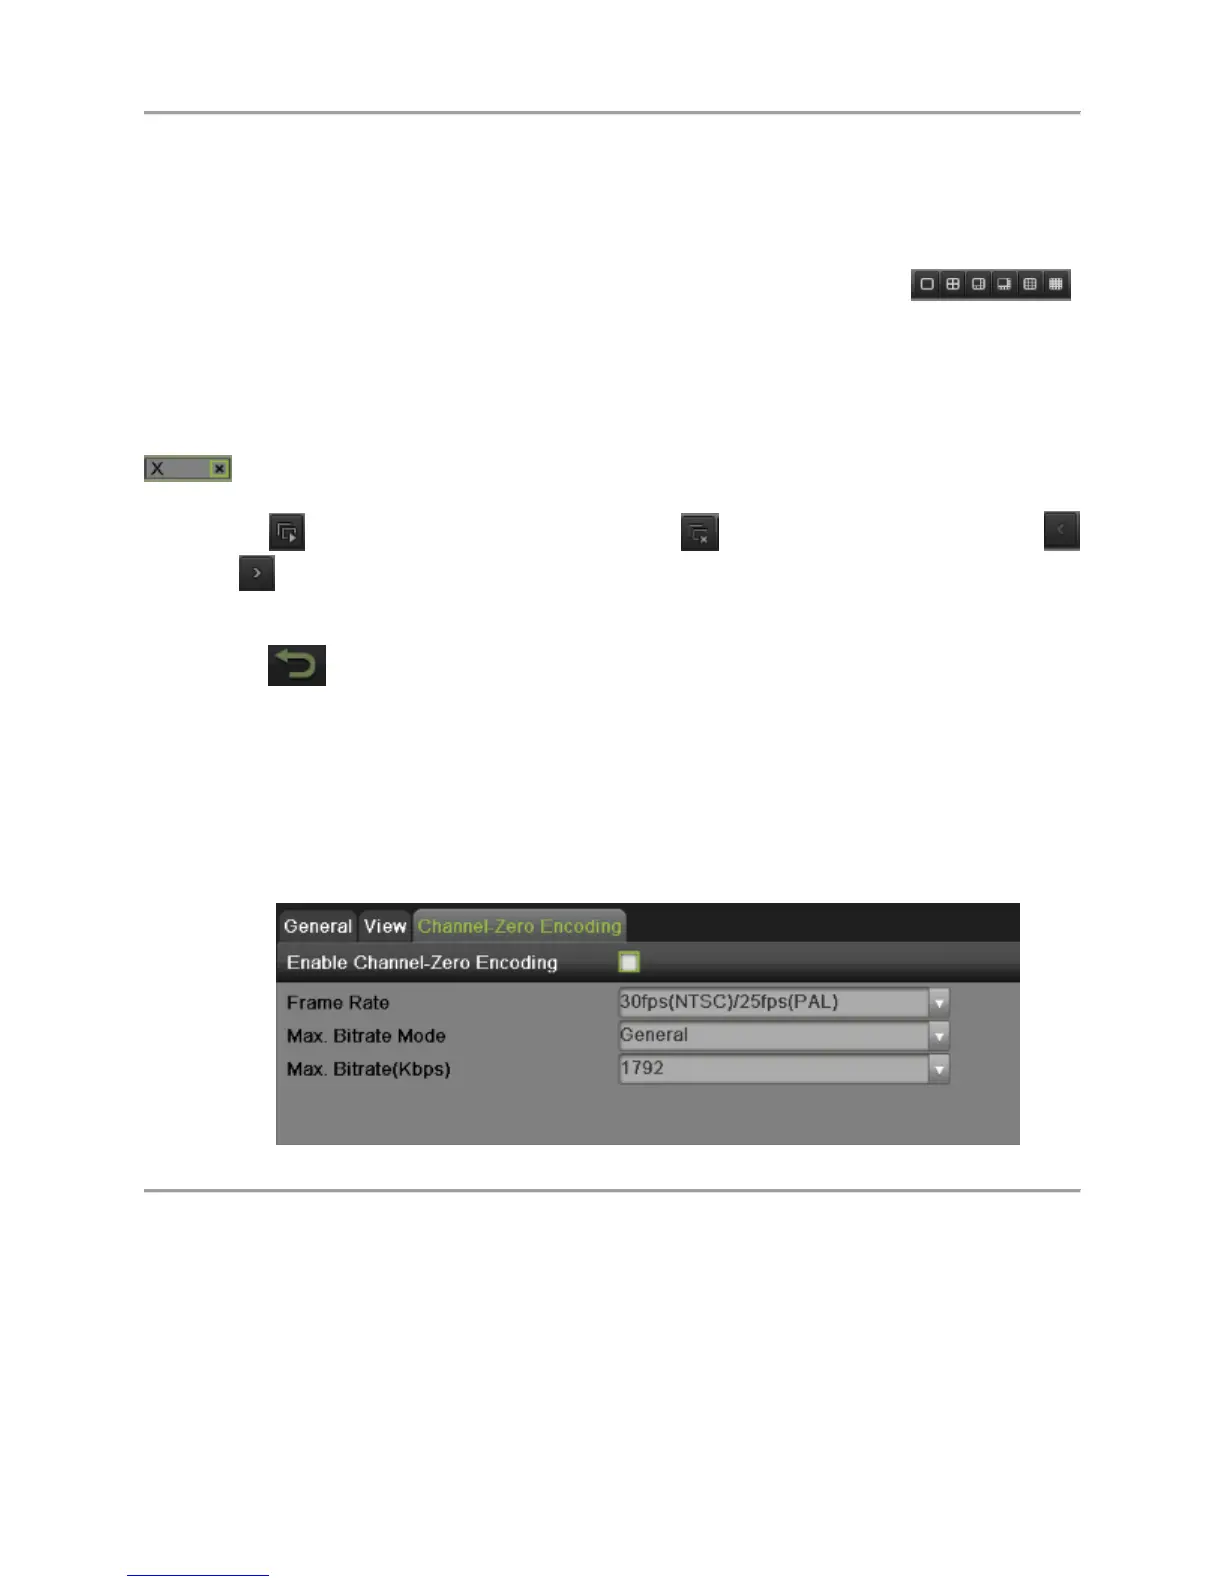
Channel-Zero Encoding
Channel-Zero Encoding can be chosen to decrease the bandwidth requirement without affecting the image
quality when you need to get a remote view of many channels in real time from web browser or remote
client. To setup channel-zero encoding as following steps:
Steps:
1. Enter the Live View menu by going to Menu > System Configuration > Live View
2. Select the Channel-Zero Encoding tab, as shown in Figure 34.
Figure 34 Channel-Zero Encoding Menu
3. Check the checkbox to enable channel-zero encoding.
4. Set the Frame Rate, Max. Bitrate Mode and Max. Bitrate.
After you set the channel-zero encoding, you can get a view in the remote client or IE browser of all the
channels in one screen.
Event Hint
Event hint allows display the event information in the live view interface when there is an event. To setup
event hint as following steps:
Steps:
 Loading...