DS-7700NI-SP/9000/9600 Series HDVR/NVR User’s Manual
62
4. Click the Start button.
5. Select the ending position of the video clip, the same as starting position.
6. You can click to zoom in/zoom out the timeline and select the exactly time.
7. Click the Stop button.
8. The selected video clip time range will be shown at the bottom of the Playback Interface, as seen
in Figure 58.
Figure 58 Video Clip Time Range
9. You may play the video clip using the Play button or use the arrow
keys , which are shown below the timeline to progress through
the video one second, minute or hour at a time.
10. Click the Save button to save clip to the DVR. Clip must be first saved to the DVR before it can
be backed up to an external USB storage device or to a DVD writer. Clicking the Clear button
will remove the video clip.
11. Repeat steps 2-10 to select additional clips. If you would like to backup video clips at this point,
click the Clips Export button.
Note:
The Play, Save and Clear buttons are not available unless a completed video clip is selected. A completed
video clip has a start and end point marked by using the Start and Stop button.
Note:
The Start button is not available when there is still a video clip that has not been saved or cleared.
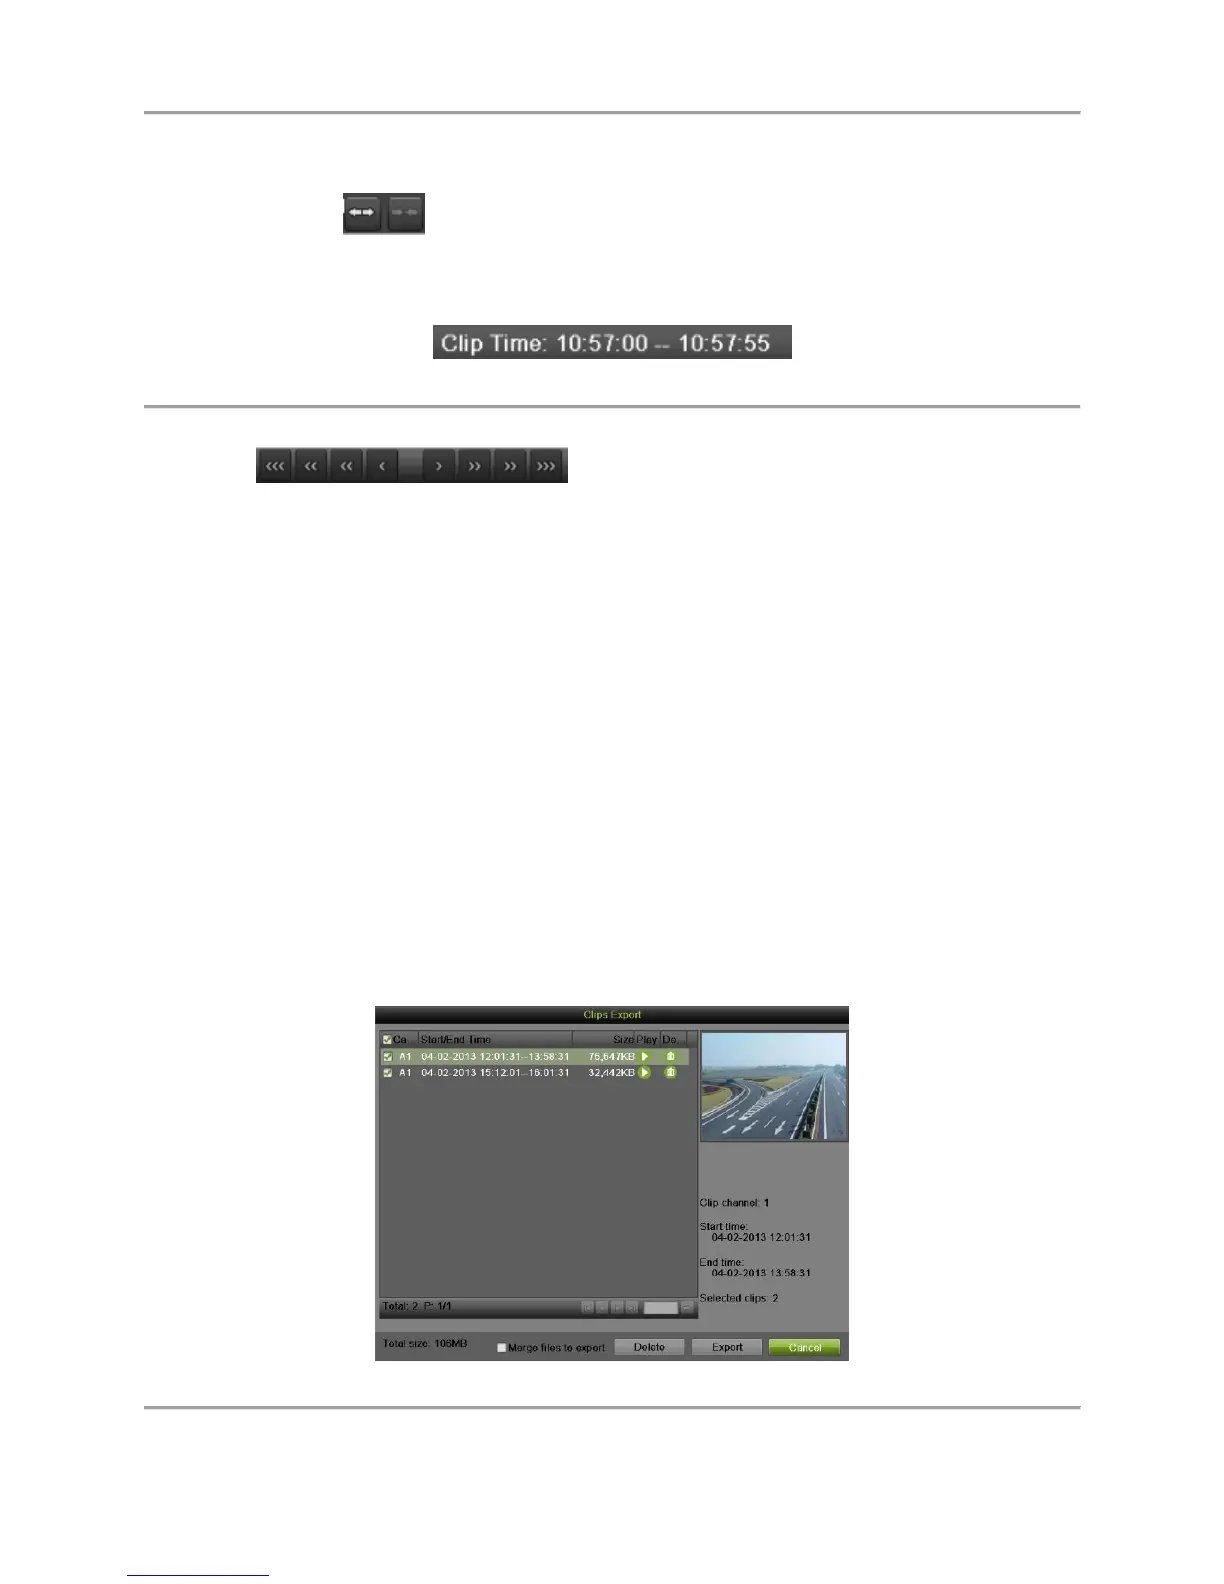
Backing up Video Clips
After video clips have been selected in the Playback Interface, you may back them up to an external USB
storage device or DVD writer by going to the Export menu.
To backup video clips:
1. Enter the Clips Export menu, shown in Figure 59 by first going to Menu > Playback. In the
Playback menu, click the Clips Export button.
Figure 59 Clips Export Interface
 Loading...