DS-7700NI-SP/9000/9600 Series HDVR/NVR User’s Manual
97
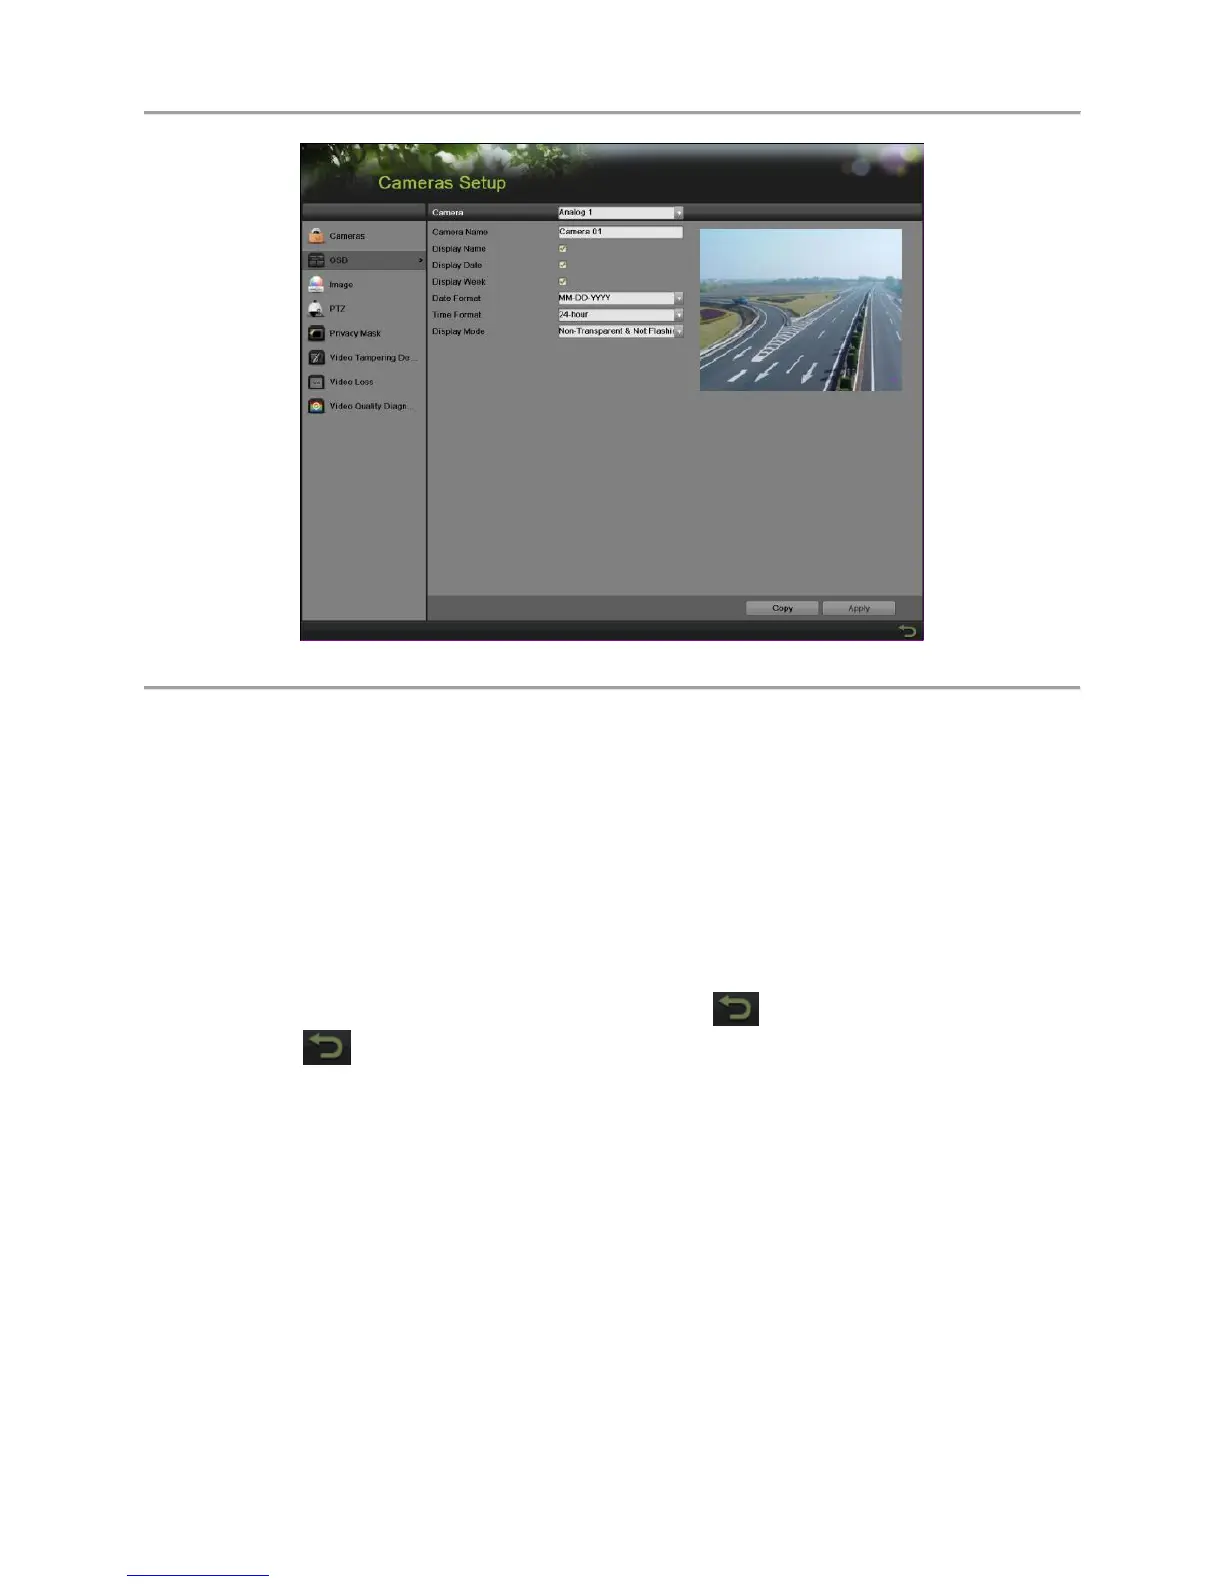
Figure 101 OSD Configuration Menu
2. Select the camera to setup OSD configuration in using the camera dropdown list.
3. Configure OSD settings, including:
Camera Name: Name of selected camera.
Display Name: Enable to display camera name in OSD.
Display Date: Enable to display date in OSD.
Date Format: Format of date.
Time Format: Format of time.
Display Mode: Display style for OSD.
4. Using the mouse, click and drag OSD elements on preview screen to desired location.
5. If the same configurations can be applied to other channels, click Copy to copy the settings to
other channels.
6. Select the Apply button to save these settings and select to return to the previous menu.
Selecting without clicking Apply will quit out of the menu without saving settings.
Configuring Video Quality Diagnosis
Video Quality Diagnosis settings can be enabled on any of the channels on your DVR to diagnose the
change of video quality. If the video quality turns bad to a certain extent, this function will alarm to users.
To configure video quality diagnosis settings:
1. Enter the video quality diagnosis menu, shown in Figure 102 by going to Menu > Cameras Setup
> video quality diagnosis.
 Loading...