105
4.2 XNX
®
EC Sensor Cartridge Replacement
Caution: For toxic sensors, remove the shorting clip from the bottom of the
sensor prior to installation. No shorting clip is provided with oxygen sensors.
Theserviceablesensorallowsreplacementofthecellinside
thesensor�Thesensorcellcanbereplacedwithacellofthe
sametypeorchangedtodetectadifferenttargetgas�Both
proceduresfollow�
Whenreplacingoxygen(O
2
)sensorcells,theinitialwarm-uptime
isbetween10and15minutes�Thiswarm-upisrequiredonly
aftersensorcellreplacement�
4.2.1 Replacing with the Same Cartridge Type
Toreplacethecellfollowthisprocedure:
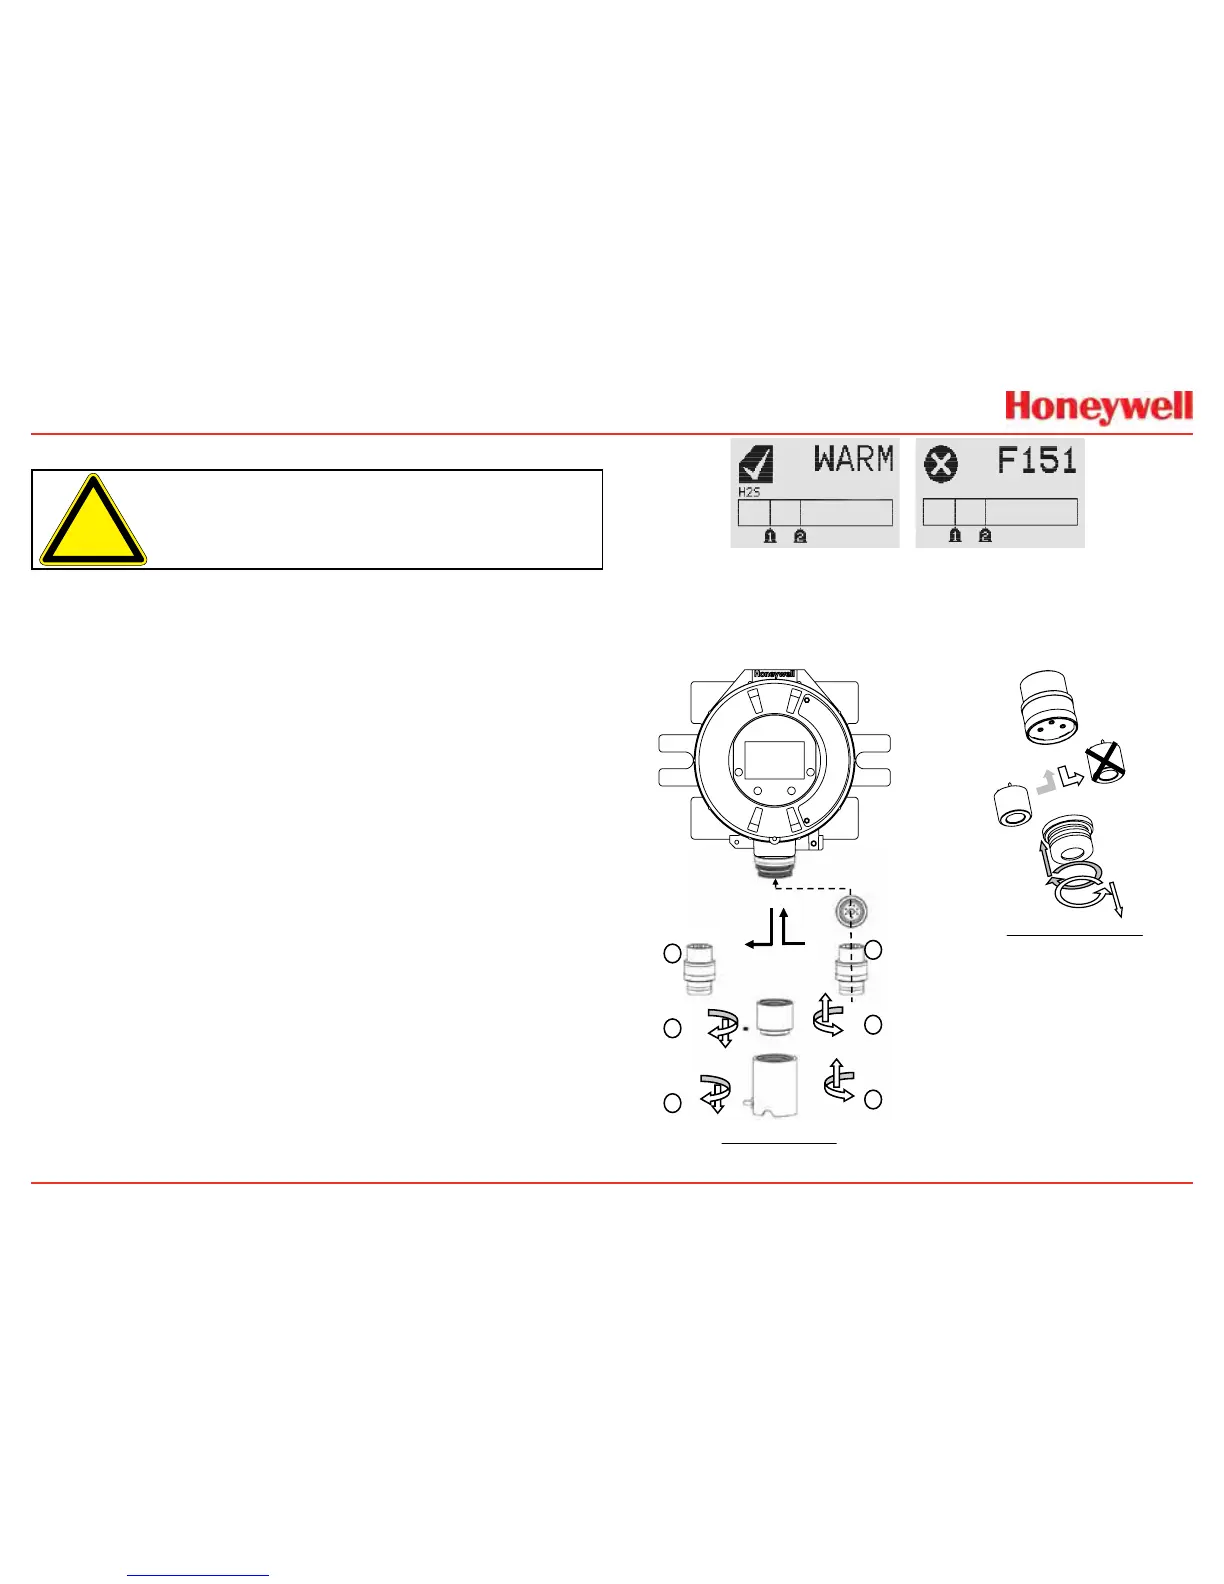
1�Unscrewtheweatherproofcover,loosenthesensor
retainerlockingscrew,andunscrewthesensorretainer�
2�Removetheoldsensorbypullingwithouttwisting�
3�Unscrewthesensorcap�
4�Removetheoldcellbypullingwithouttwisting�
5�Verifythatthenewcellisthesametypeastheoldone�
6�Plugthenewcellintothesensor,takingcaretoalignthe
sensorpinswiththeconnectorholesinthePCB�
7�Retthesensorretainer,tightenthelockingscrew,and
rettheweatherproofcover�
8�Sensorwarm-upwillbeginandtheXNXdisplaywill
alternatebetweentwoscreens:“Fault151”and“WARM�”
Figure 227. Sensor screens during warmup
9�FollowtheproceduretoacceptthenewsensorinAccept
NewSensorType�
10� RecalibratethesensorfollowingtheproceduresinSection3�2�1�
 Loading...


