XNX Universal Transmitter
Section 2 - Installation and Operation
72
days(orfewer,inaccordancewithcustomersiteprocedures)to
assurethehighestlevelofsafety�
Usethe
switchestohighlightthecurrentintervalanduse
✓
toselectit�
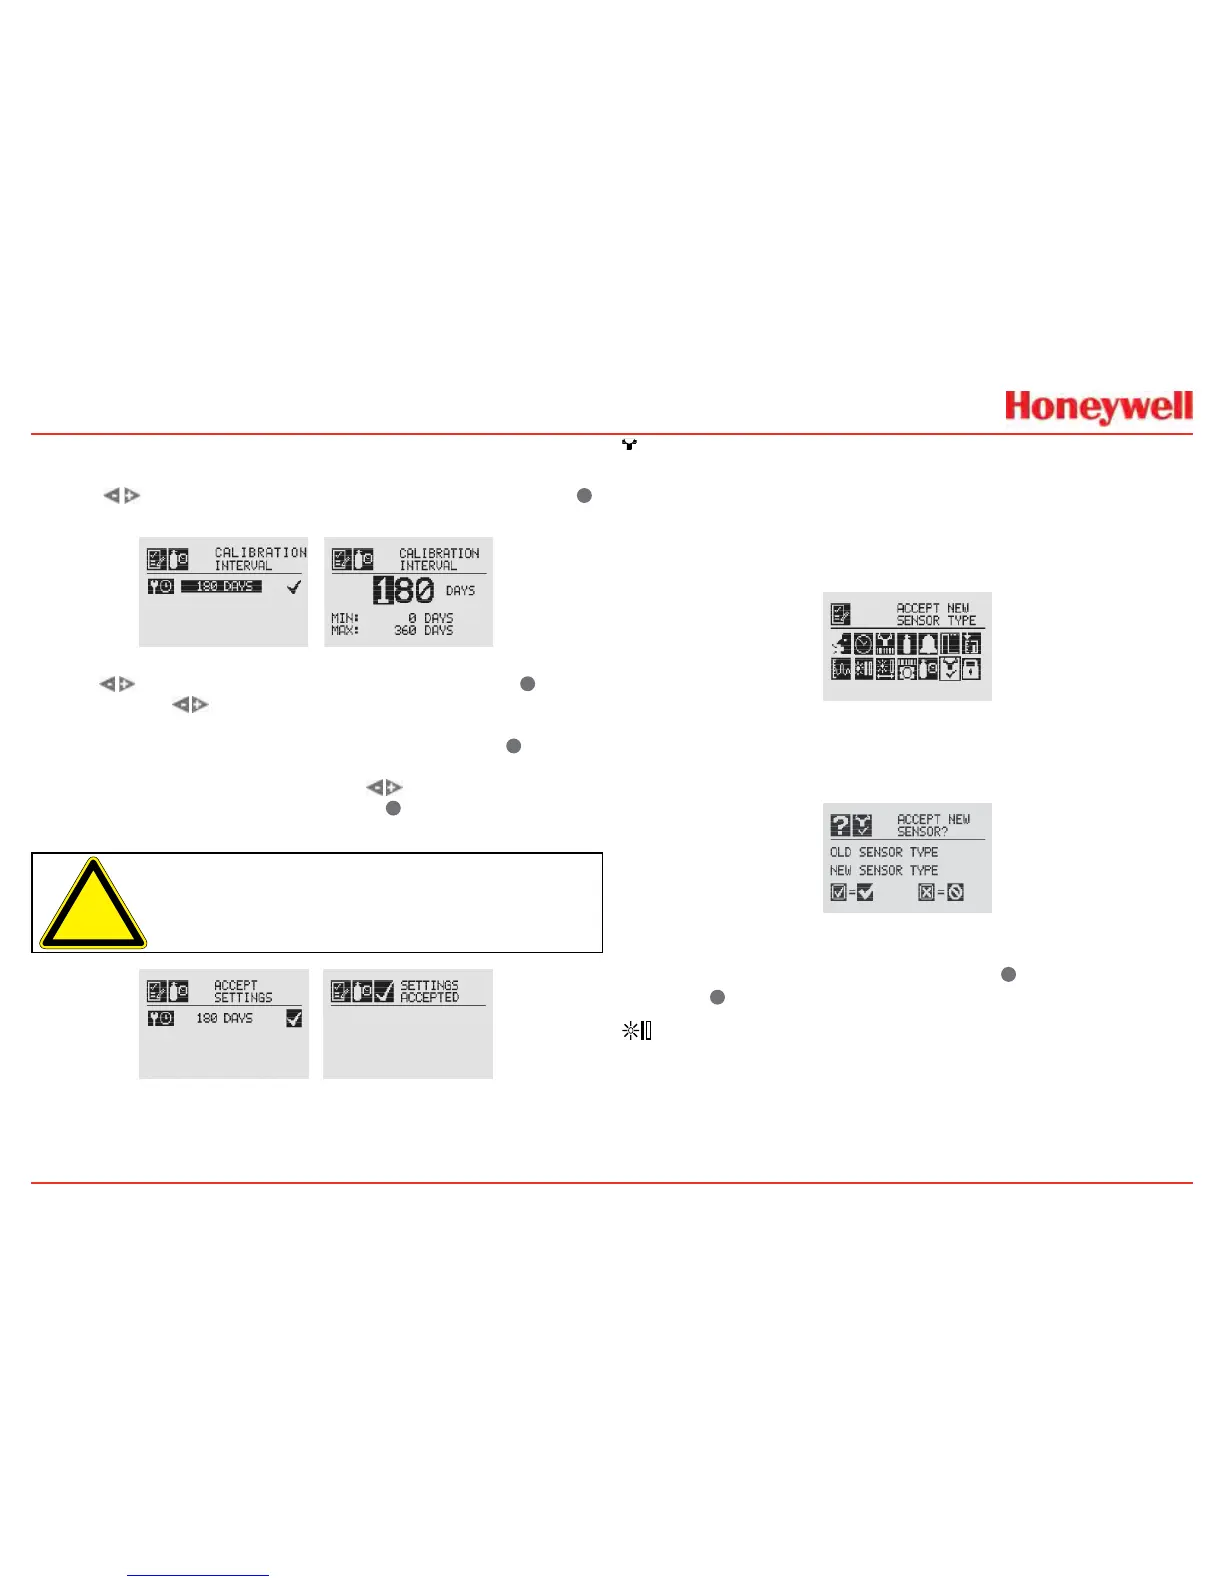
Figure 107. Edit Interval and Setting Interval Value Screens
Usethe switchestomovetothedesiredposition�Use
✓
to
selectit�Usethe
switchestodecrementorincrementthevalue
untilthedesiredvalueisreached�(Theminimumnumberofdaysis0;
themaximumnumberisdenedbythesensortype�)Use
✓
toselect
thevalueandmovetothenexteld�Repeatforeacheld�Whenall
oftheeldshavebeenupdated,usethe
switchestohighlight
the
‘ü’
ontherightsideofthedisplay�Use
✓
onthefrontpanelto
savethesettings�
Caution: SettingtheCalibrationIntervaltozeroturnsoffthe
calibrationnotification.Thiscanseriouslyaffectsensorperformance.
Figure 108. Saving New Interval and New Interval Accepted Screens
Accept New Sensor Type
WhenreplacingECcellsormVsensors,useAcceptNewSensor
TypetoloaddefaultparametersintotheXNXtransmitterfor
calibrationandsensorlife�AcceptNewSensorTypeisalsoused
whenreplacinganECcellwithanotherECcellforadifferent
targetgas�(SeeSection4�2�2)�
Figure 109. Accept New Sensor Type Menu
Whenchangingthetargetgasbyinsertinganewsensor,the
transmitterwillprompttheuserforaconrmationofthechange
beforeadjustingtothepropertiesofthenewsensor�
Figure 110. Select New Sensor
InthedisplayoftheXNXtransmitter,theoldsensortypeand
thenewsensortypewillbedisplayed�Use
✓
toacceptthenew
sensoror
✖
torejectit�
Beam Block Options
TheBeamBlockOptionsmenuisavailableonlyiftheXNX
transmitterisconnectedtoaSearchlineExcelsensor�
 Loading...


