195
Transducer Setup
SET UP OR CHANGE TRANSDUCER SETTINGS (OPTIONAL)
T
he ONIX control head will default to the transducer that was included with your control head. If you connect an accessory transducer
t
o the control head, the unit will recognize the new transducer.
The instructions in this section are optional and can be used to address the following situations:
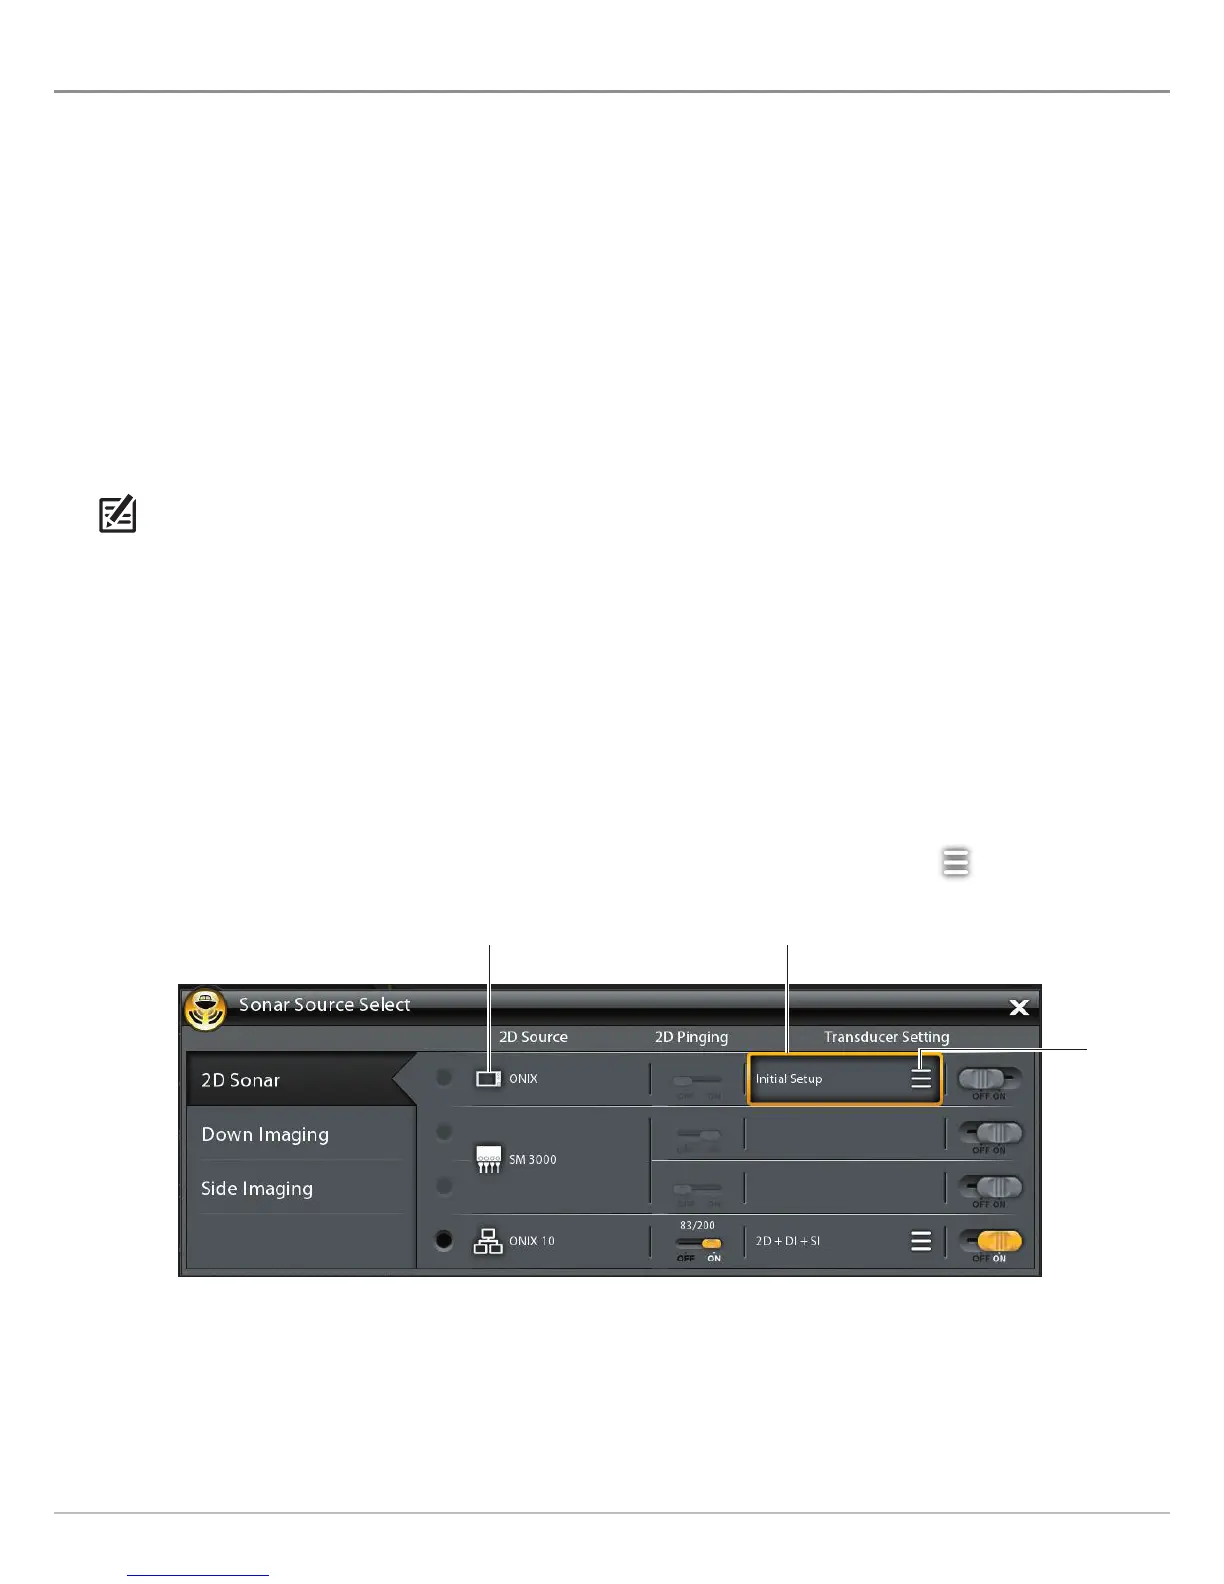
Initial Setup: If a transducer is connected to a control head but not detected, Initial Setup will be displayed under Transducer
Setting (see the illustration below). If the transducer is detected, the transducer type is displayed under Transducer Setting
(for example: 2D + DI + SI), and the transducer is already setup in the system, and no further action is required.
Review the Transducer Capabilities (optional): The Transducer Setup menu is used to activate the full functionality of the
transducer. Make sure the transducer functions include a check mark. Add a check mark next to the transducer type, beams,
and temperature probe (if included).
Adjust the Depth Offset (optional)
Adjust the Max Depth (optional)
NOTE: For black box sonar and sonar networking information, see Set up your Humminbird Network.
Set up or Change Transducer Settings (optional)
Use the instructions in this section to enable a transducer with its complete functionality.
1. Press the HOME key.
2. Select Settings.
3. Select Sonar.
4. Select Sonar Source.
5. Select Initial Setup.
If the transducer has been setup, but you want to change a transducer setup setting, select the menu icon.
transducer connection location
(connected to the selected ONIX control head)
initial setup
Transducer
setup menu
 Loading...