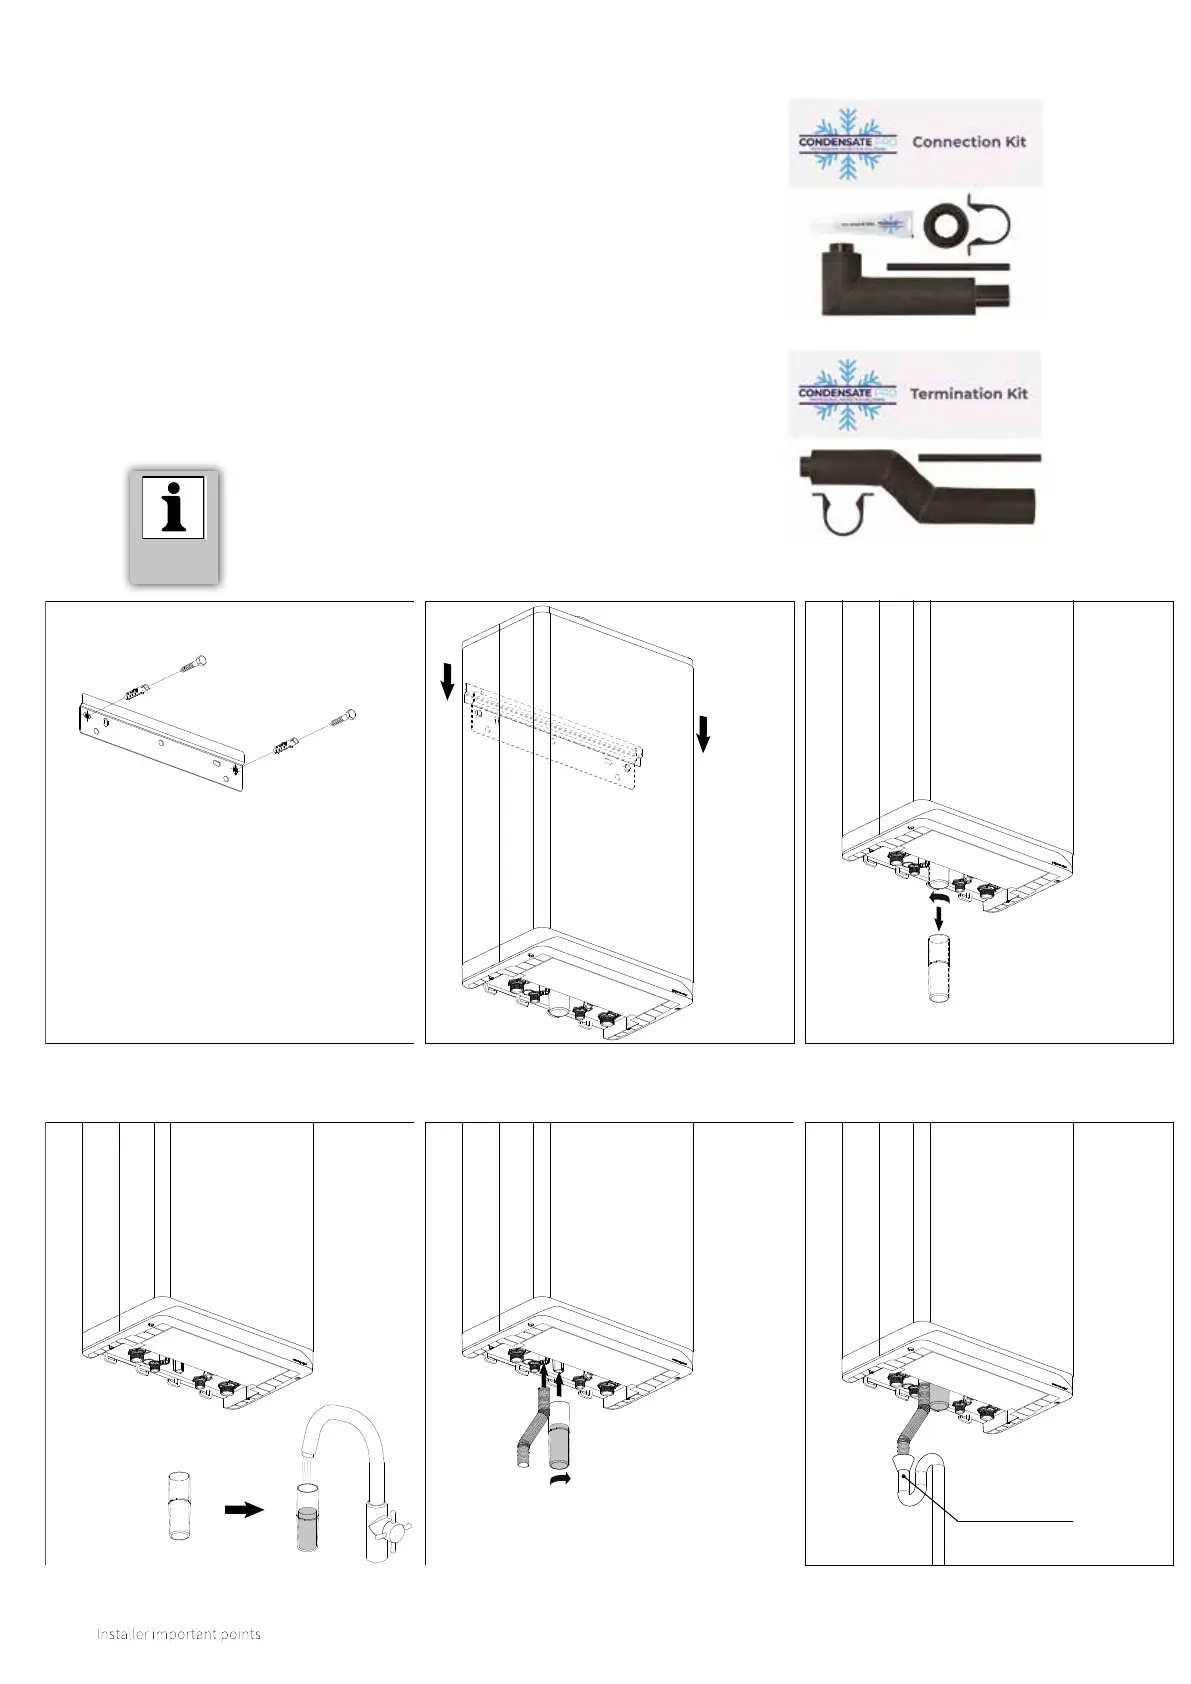
18
6.3 Installing the boiler
COMMENT
► The Intergas Xclusivehas a boiler-
specific siphon cup. Ensure that
the correct version is ordered upon
replacement. (Item no 510054)
1. Mount the wall bracket (ensure its level)
4. Fill the condense syphon cup 5. Replace the condense syphon cup
and attach the supplied flexible hose
6. Connect the flexible hose to the waste
system via a tundish or similar.
2. Hang the boiler onto the wall bracket 3. Twist and pull to remove the condense
syphon cup
Open connection
to waste system
1. Attach the wall bracket.
2. Li the boiler (2 person li) and slide it down onto the wall bracket.
3. Remove the syphon cup.
4. You must fill the syphon cup just over half full with water.
5. Replace the cup and install the supplied black flexible hose onto boiler
outlet union.
6. Connect the flexible hose to a 22 mm O.D solvent weld pipe. To minimize
the risk of freezing the condensate pipe should be connected internally
and terminate to an internal soil stack, (ref.: TB115 Gas Safe & HHIC).
7. Install the flue system (see §7.6).
8. Install the required pipework as per the following sections.
9. Should the condensate be terminated to an external soil pipe, drain,
rainwater system or soakaway we only recommend the Condensate PRO
system which is available from our normal stockists or heating supplies.
https://condensatepro.co.uk
 Loading...