Chapter 5 Disassembly and Assembly
5-88
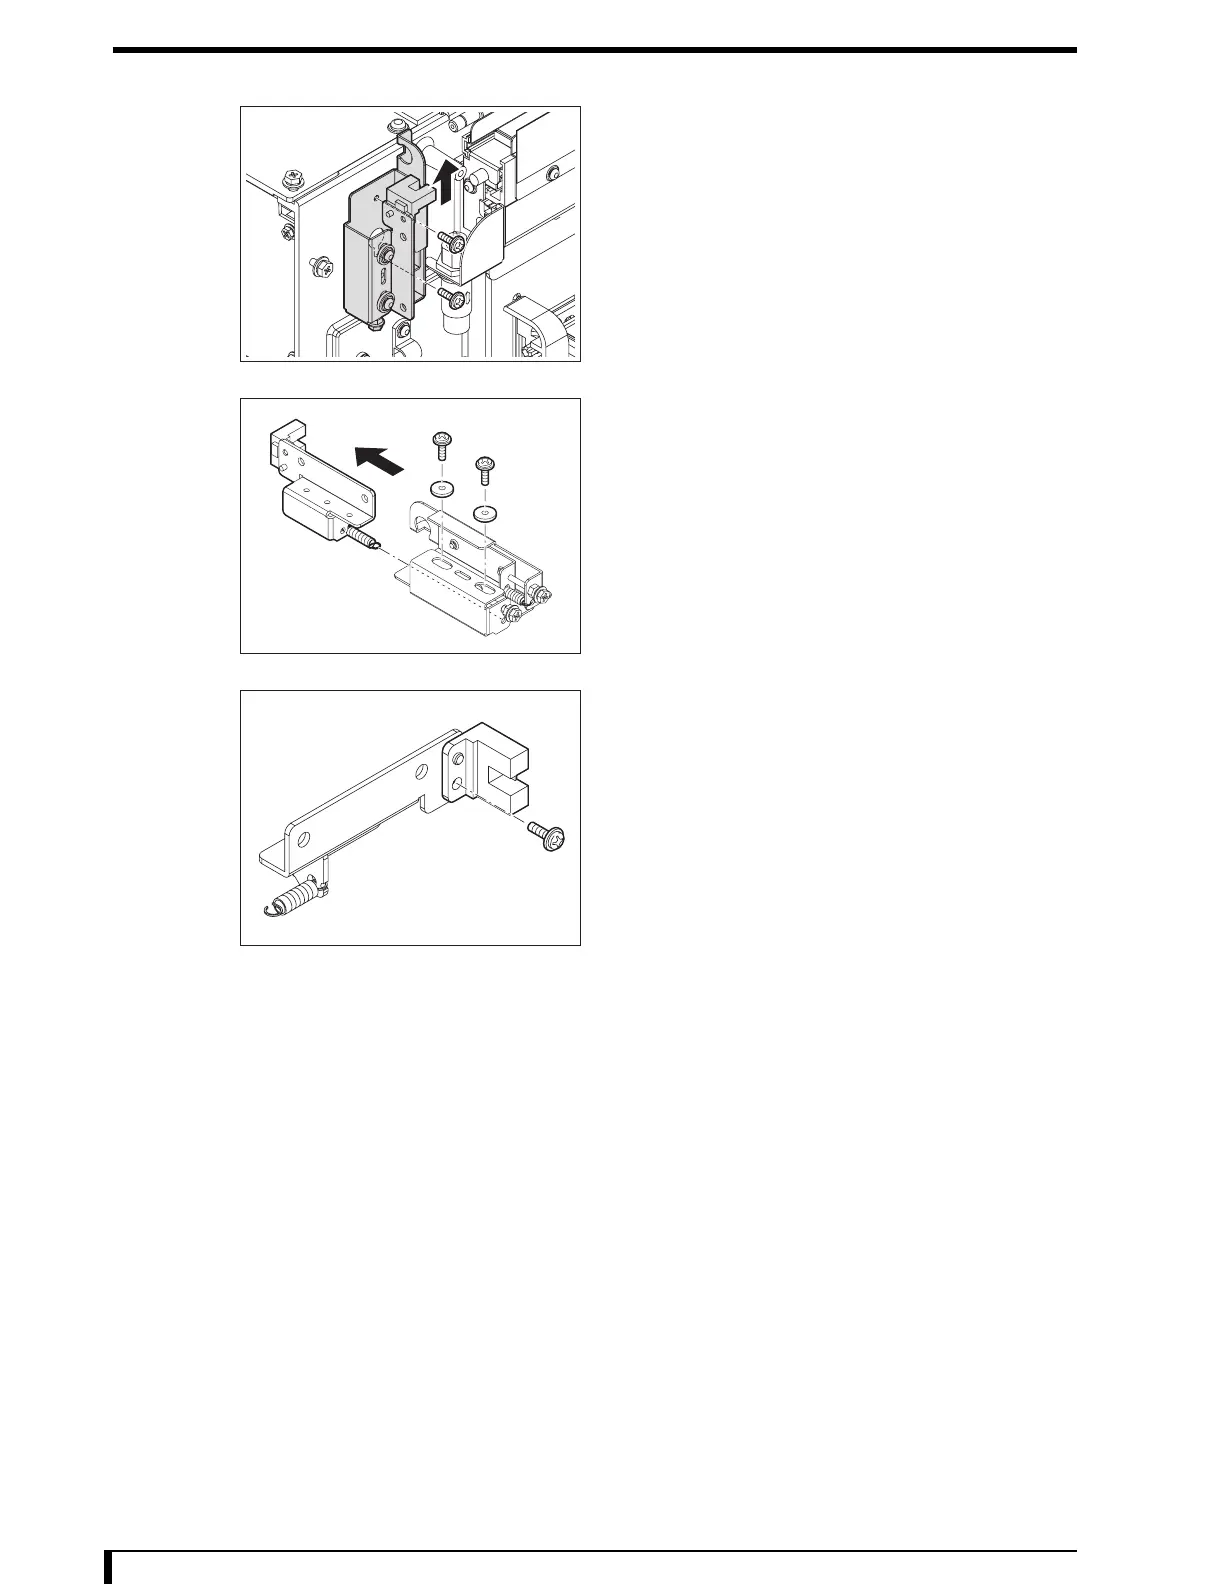
7 Remove the roller retention lower unit assembly.
•
2 screws (M3 x 6)
To access the screws, slide the sensor mount board
upward.
8 Disconnect the spring connected to the sensor
mount board, from one end of the spring.
9 Remove the sensor mount board.
•
2 screws (M3 x 6)
• 1 guide spacer for each
10 Remove the detach detection sensor (lower).
•
1 screw (M3 x 6)
11 Install the new detach detection sensor (lower).
12 See Step 9 and Step 8 to install the sensor mount
board.
•
2 screws (M3 x 6)
• 1 guide spacer for each
• Spring
The setscrew removed in Step 6 will be installed later
when the sensor position will be adjusted (Step 15).
13 Install the roller retention unit lower assembly that
was removed in Step 7.
•
2 screws (M3 x 6)
14 Install the detach detection roller that was
removed in Step 3.
15 See "6.5 Adjust Position of Detach Detection Roller/Sensor (Page 6-12)" to adjust the roller
and sensor positions.
16 See " Installation Procedures (Page 5-14)" in "5.2.5 Removing/Installing the Optical Unit" to
install the optical unit.
Now, you have finished with the procedures to replace the detach detection sensor (lower).

 Loading...