2-50 Service Manual
5025-2xx, 4xx
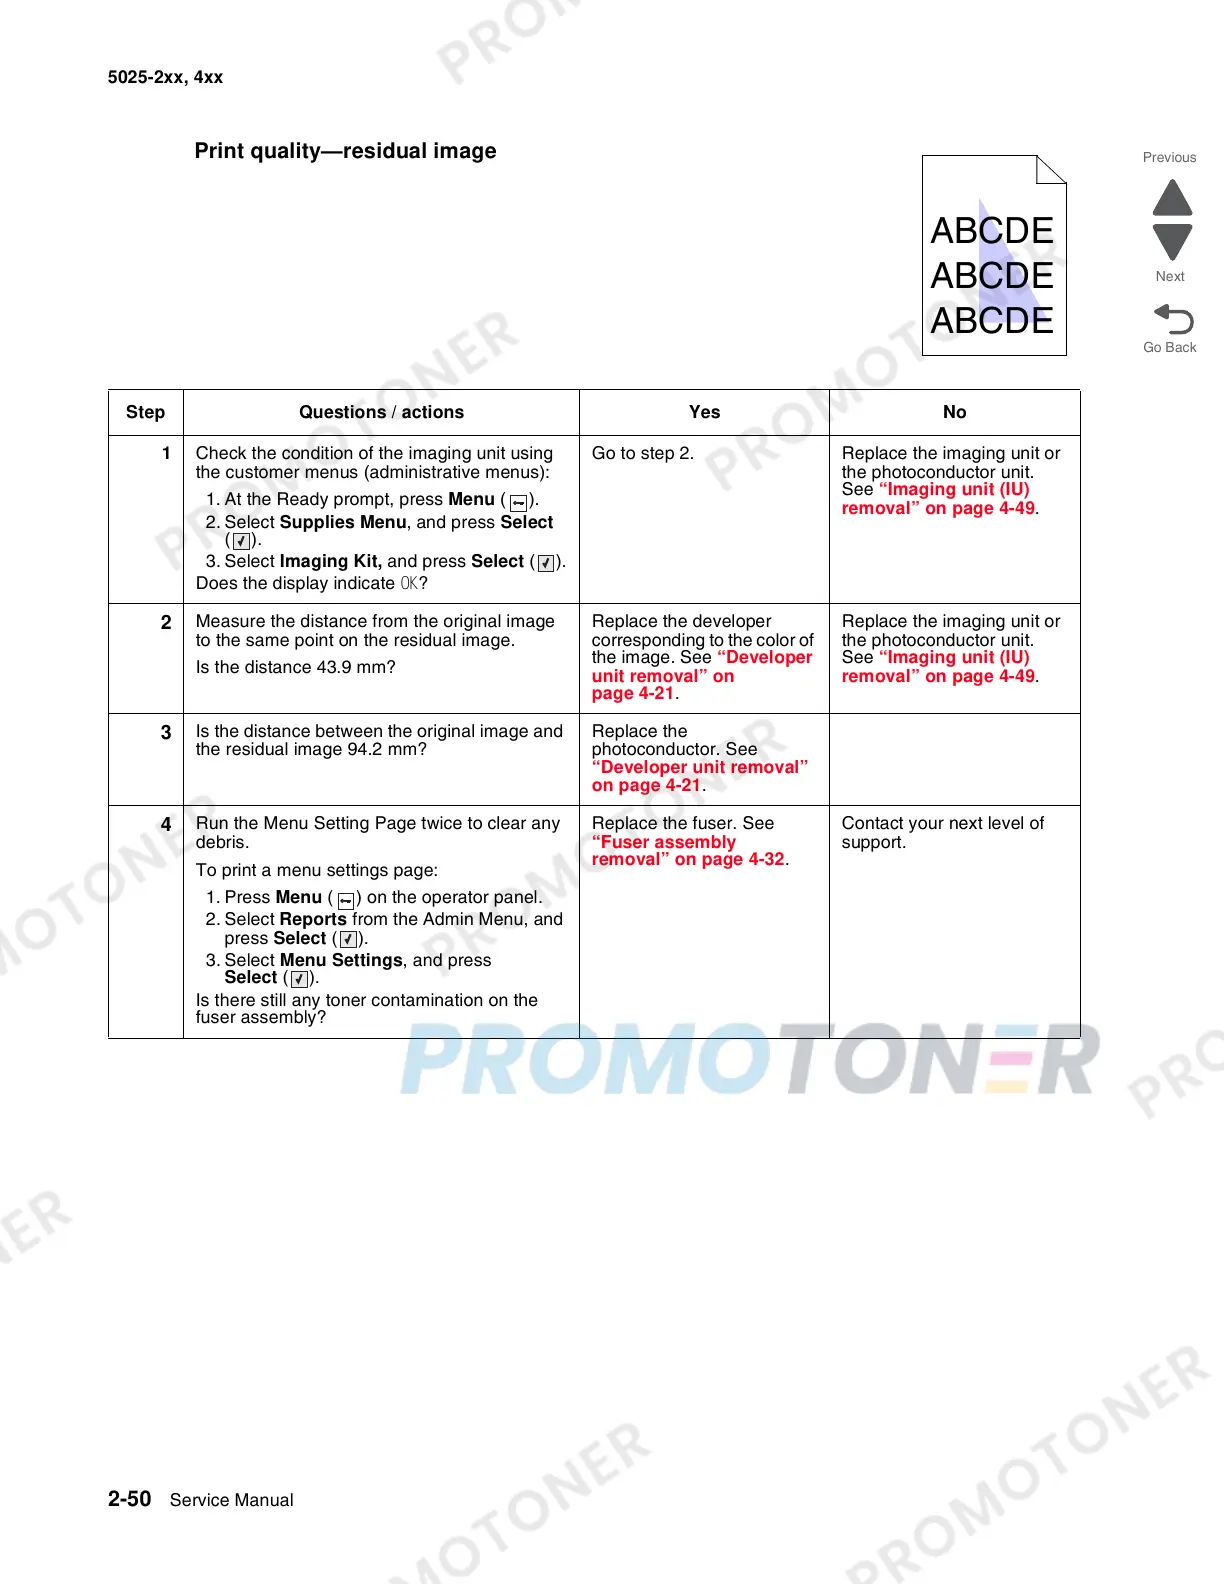
Print quality—residual image
Step Questions / actions Yes No
1 Check the condition of the imaging unit using
the customer menus (administrative menus):
1. At the Ready prompt, press Menu ().
2. Select Supplies Menu, and press Select
().
3. Select Imaging Kit, and press Select ().
Does the display indicate OK?
Go to step 2. Replace the imaging unit or
the photoconductor unit.
See “Imaging unit (IU)
removal” on page 4-49.
2
Measure the distance from the original image
to the same point on the residual image.
Is the distance 43.9 mm?
Replace the developer
corresponding to the color of
the image. See “Developer
unit removal” on
page 4-21.
Replace the imaging unit or
the photoconductor unit.
See “Imaging unit (IU)
removal” on page 4-49.
3
Is the distance between the original image and
the residual image 94.2 mm?
Replace the
photoconductor. See
“Developer unit removal”
on page 4-21.
4
Run the Menu Setting Page twice to clear any
debris.
To print a menu settings page:
1. Press Menu ( ) on the operator panel.
2. Select Reports from the Admin Menu, and
press Select ().
3. Select Menu Settings, and press
Select ().
Is there still any toner contamination on the
fuser assembly?
Replace the fuser. See
“Fuser assembly
removal” on page 4-32.
Contact your next level of
support.
 Loading...