Repair information 4-53
5025-2xx, 4xx
Lower frame removal, right and left
See “Lower left frame and lower right frame with cable cover” on page 7-5 for the part number.
The right and left lower frames are in the same FRU.
Left lower frame
1.
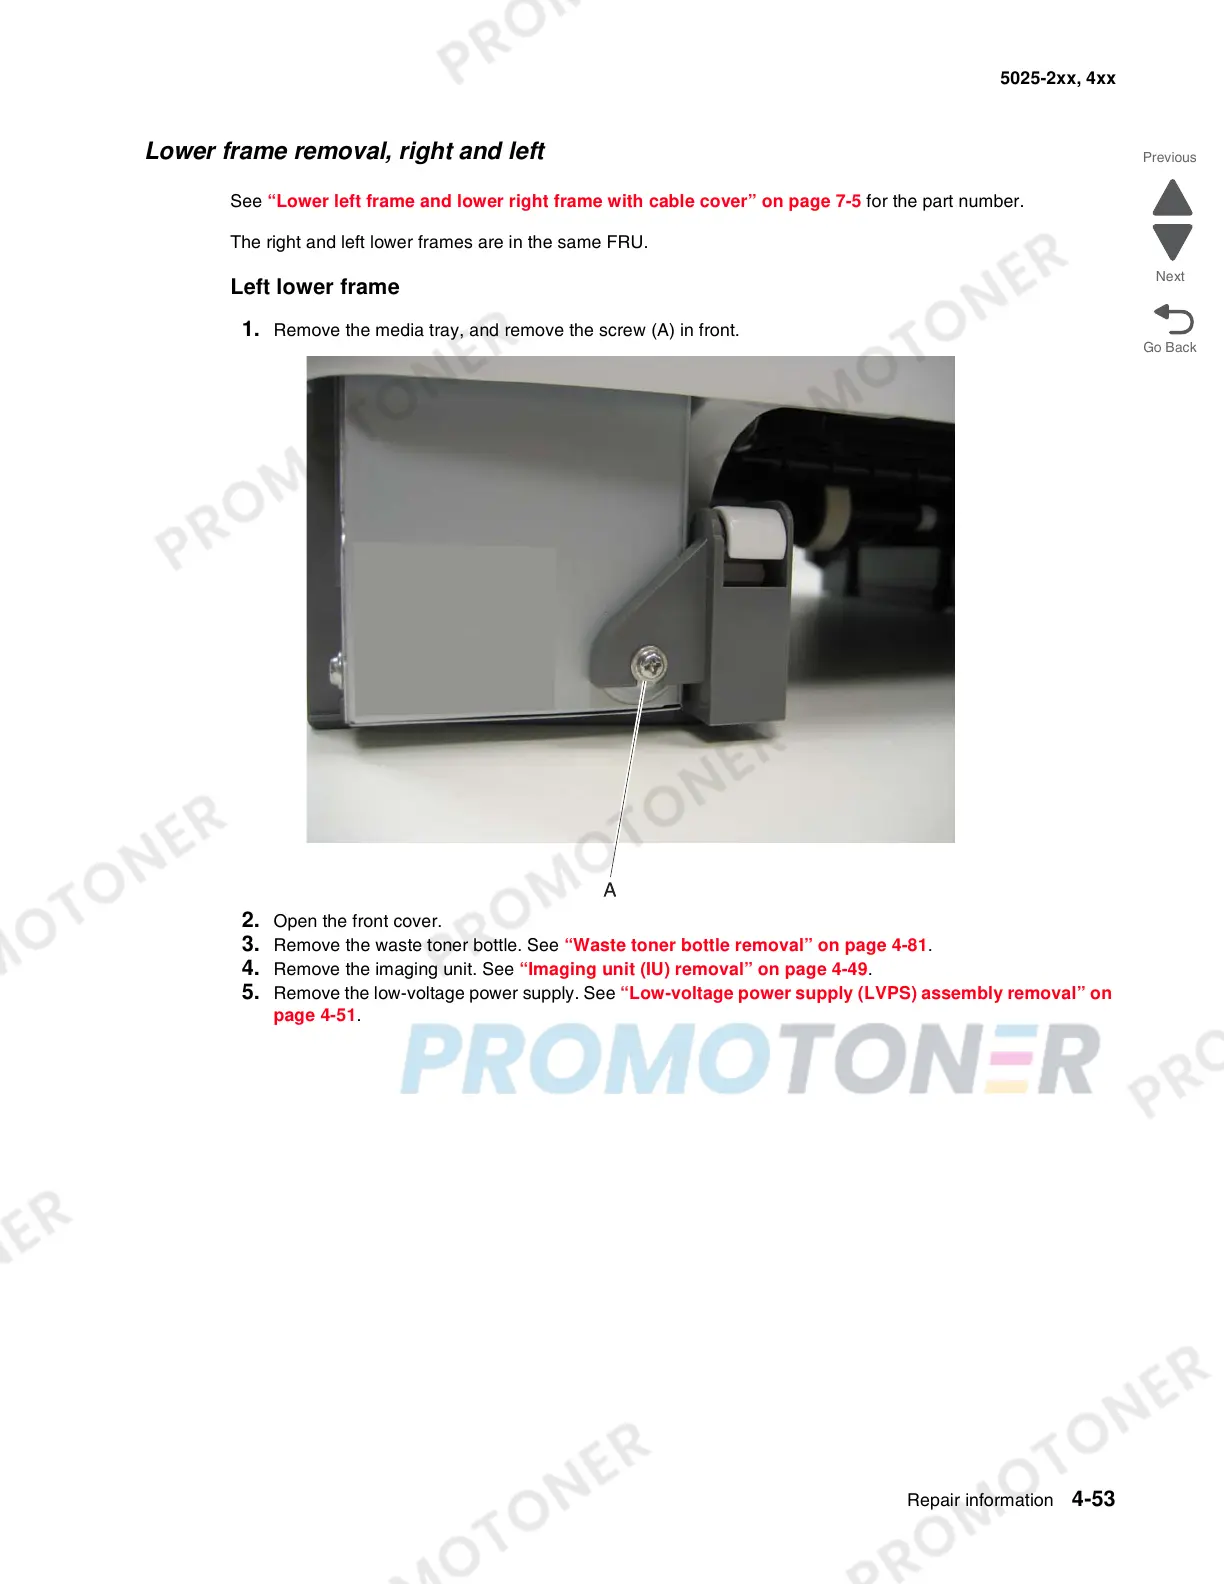
Remove the media tray, and remove the screw (A) in front.
2. Open the front cover.
3. Remove the waste toner bottle. See “Waste toner bottle removal” on page 4-81.
4. Remove the imaging unit. See “Imaging unit (IU) removal” on page 4-49.
5. Remove the low-voltage power supply. See “Low-voltage power supply (LVPS) assembly removal” on
page 4-51.
 Loading...