Diagnostic information 2-53
5025-2xx, 4xx
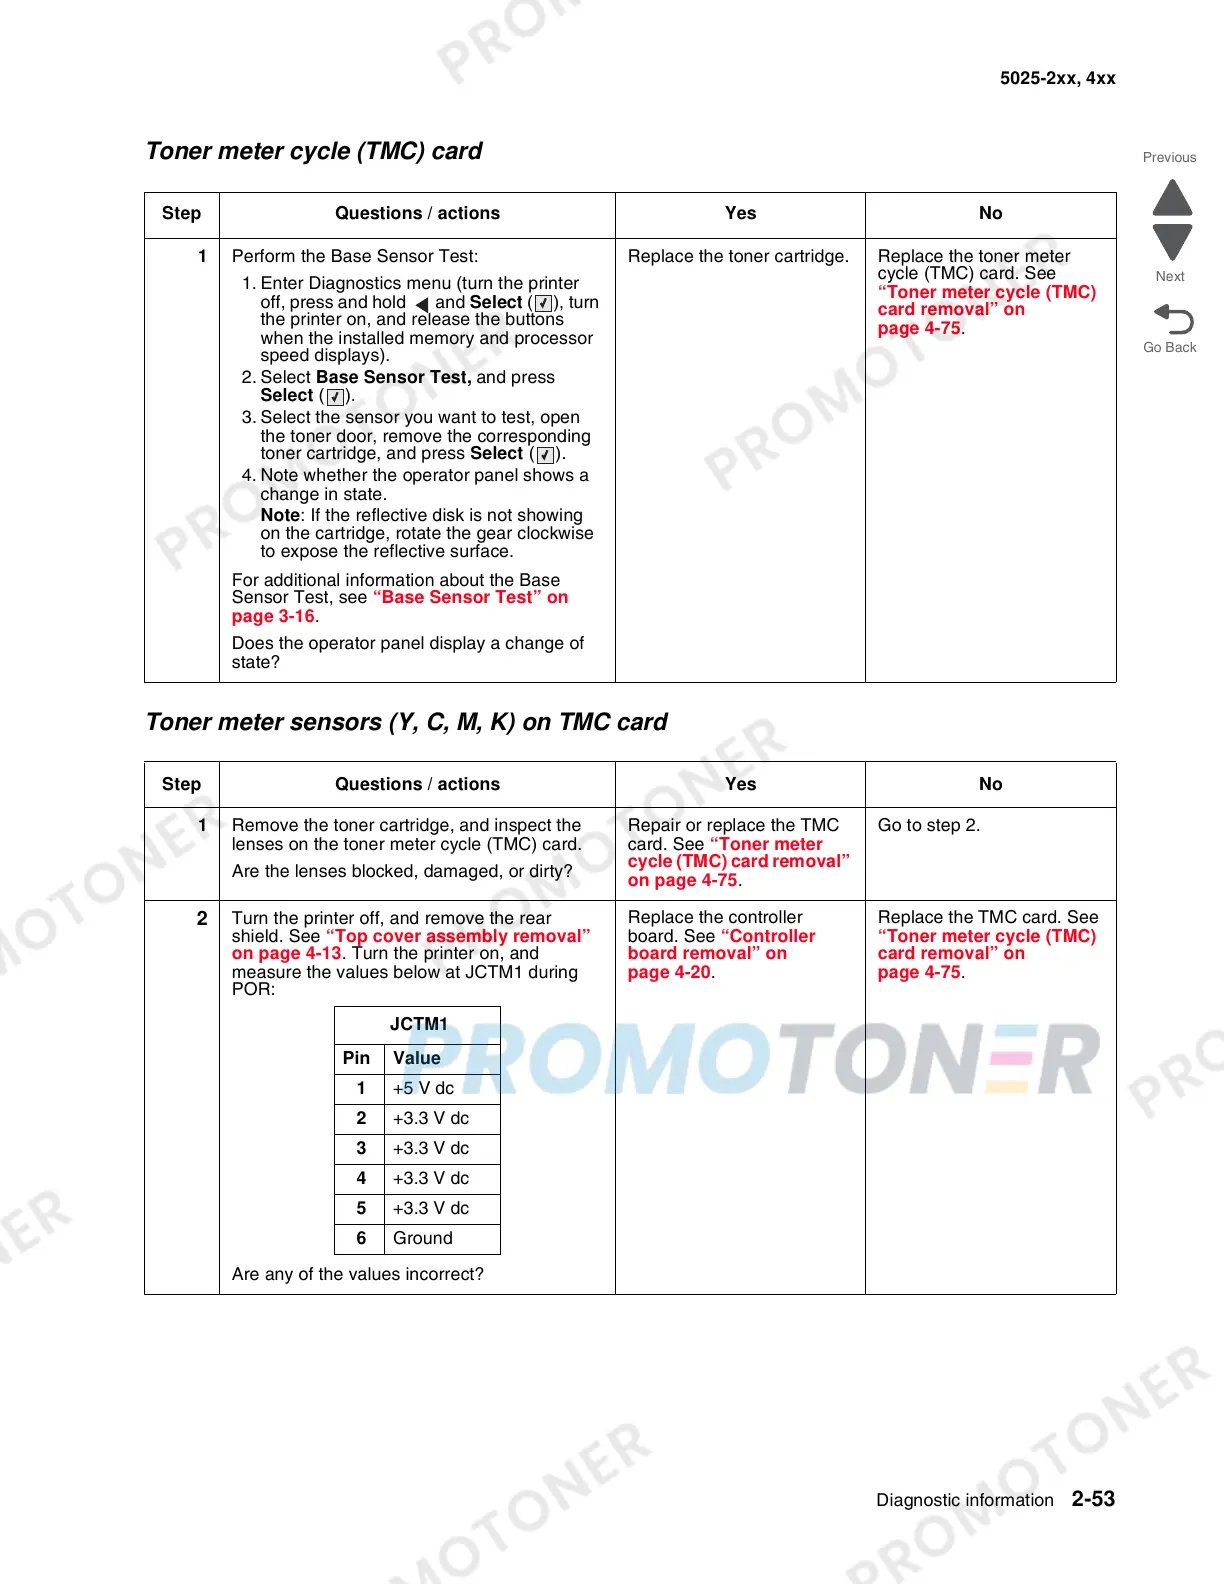
Toner meter cycle (TMC) card
Toner meter sensors (Y, C, M, K) on TMC card
Step Questions / actions Yes No
1 Perform the Base Sensor Test:
1. Enter Diagnostics menu (turn the printer
off, press and hold and Select (), turn
the printer on, and release the buttons
when the installed memory and processor
speed displays).
2. Select Base Sensor Test, and press
Select ().
3. Select the sensor you want to test, open
the toner door, remove the corresponding
toner cartridge, and press Select ().
4. Note whether the operator panel shows a
change in state.
Note: If the reflective disk is not showing
on the cartridge, rotate the gear clockwise
to expose the reflective surface.
For additional information about the Base
Sensor Test, see “Base Sensor Test” on
page 3-16.
Does the operator panel display a change of
state?
Replace the toner cartridge. Replace the toner meter
cycle (TMC) card. See
“Toner meter cycle (TMC)
card removal” on
page 4-75.
Step Questions / actions Yes No
1 Remove the toner cartridge, and inspect the
lenses on the toner meter cycle (TMC) card.
Are the lenses blocked, damaged, or dirty?
Repair or replace the TMC
card. See “Toner meter
cycle (TMC) card removal”
on page 4-75.
Go to step 2.
2
Turn the printer off, and remove the rear
shield. See “Top cover assembly removal”
on page 4-13. Turn the printer on, and
measure the values below at JCTM1 during
POR:
Are any of the values incorrect?
Replace the controller
board. See “Controller
board removal” on
page 4-20.
Replace the TMC card. See
“Toner meter cycle (TMC)
card removal” on
page 4-75.
JCTM1
Pin Value
1 +5 V dc
2 +3.3 V dc
3 +3.3 V dc
4 +3.3 V dc
5 +3.3 V dc
6 Ground
 Loading...