DICOM 11-13
d) Click [Exit] to exit the page and return to Setup menu, then click [Save] on the
Setup menu to make the preset to take effect.
(3) After finishing presets, you can perform image scanning, each time you press <End
Exam> on the control panel, the system will send the image to the default DICOM
print server for printing.
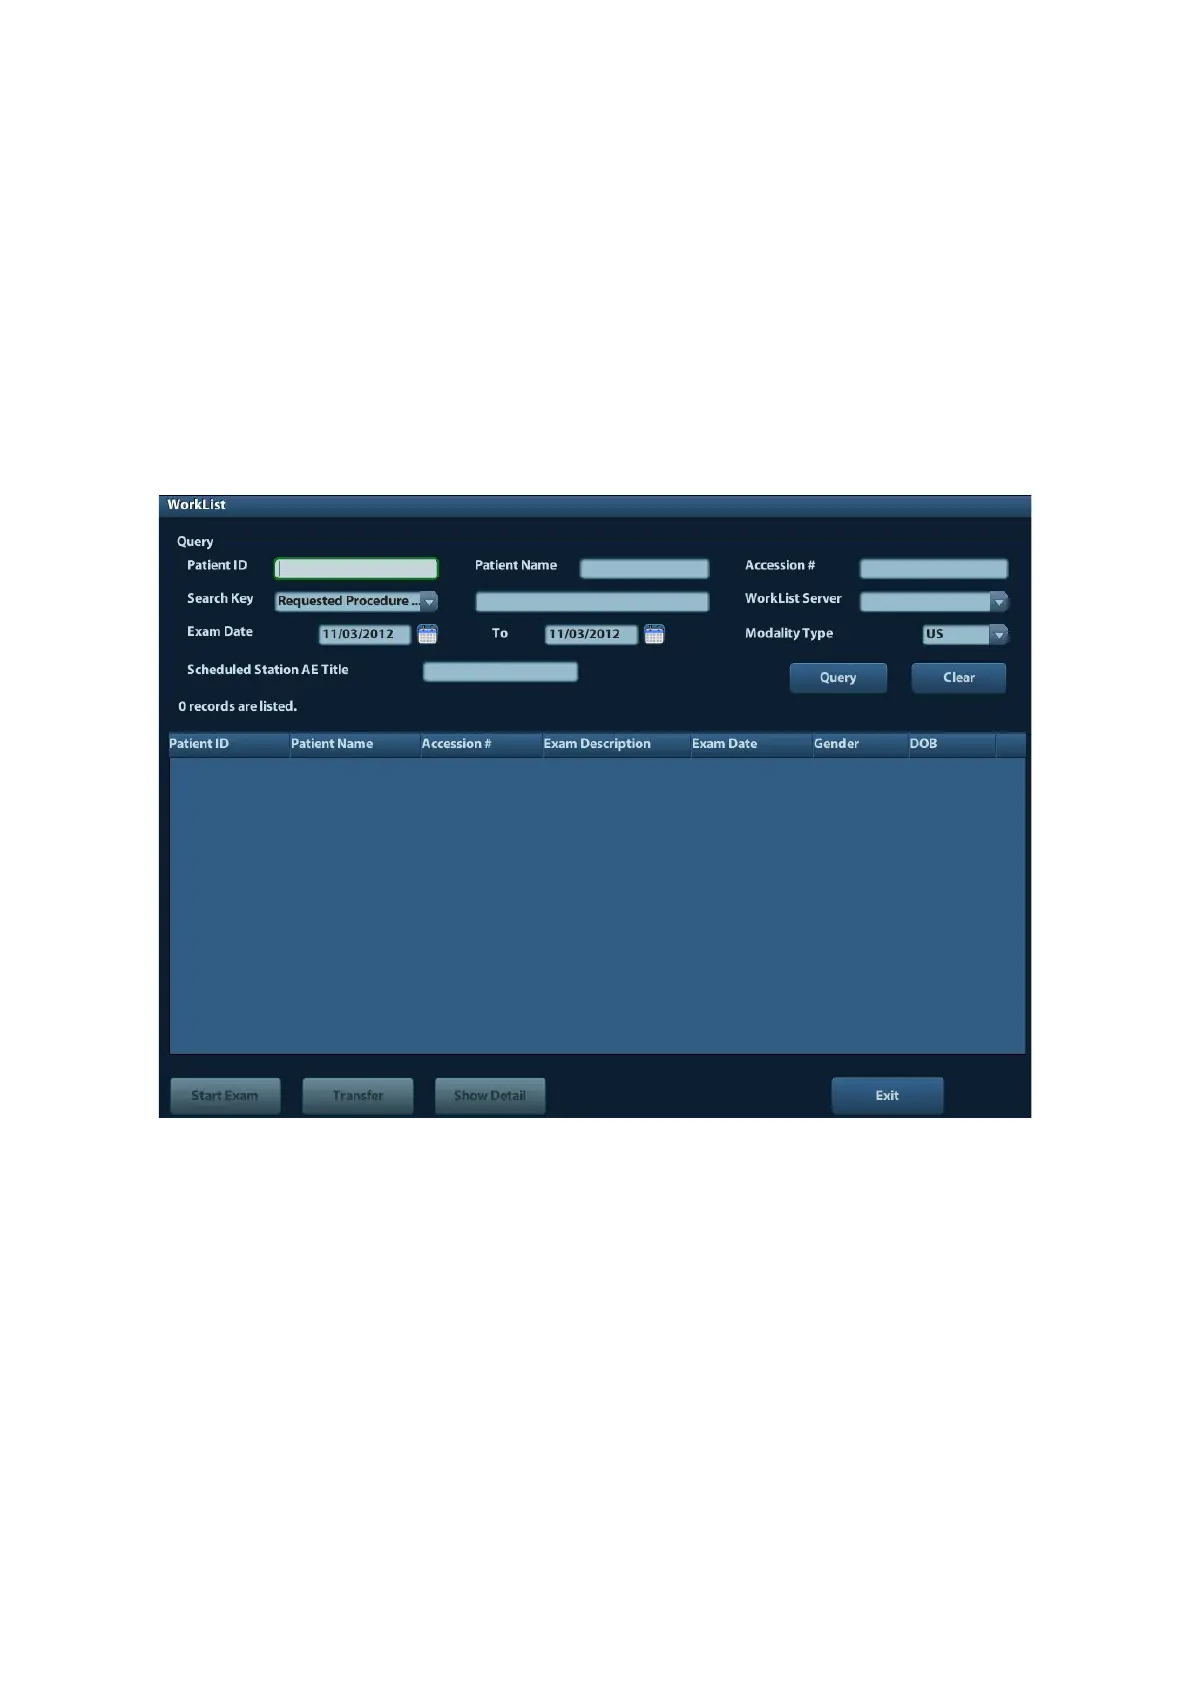
11.3.3 DICOM Worklist
After successfully connected DICOM Worklist server with ultrasound system, you can query
patient records from Worklist server, and then import the desired information to your system.
To query patient information via Worklist server:
(1) Press <Patient> to enter Patient Info screen.
(2) Click [WorkList] to enter the WorkList page.
(3) Retrieve Patient Information
a) Set query criteria among Patient ID, Patient Name, Accession #, Search Key,
Worklist Server or Exam Date. The default exam date is the current date.
b) Click [Query].
c) The scheduled patients, which meet the criteria, are displayed in the lower part of
the screen.
d) After the first query, you can perform the second query based on the preview
results. The scheduled patients in the list will update in real time.
(4) Select the desired patient record in the displayed patient list, and
Select the desired patient and click [Start Exam], the patient information is imported
into the system and then an exam is started.
Click [Transfer], the patient information is imported into the Patient Info screen. Edit
the patient information in the Patient Info screen, and select [OK] to start a new exam.
(5) To show patient information in details:

 Loading...


