5-124
Maintenance and inspection procedures
5 Maintenance and Inspection
(9) RV-4FR/7FR series: Inspection and replacement of J1-axis timing belt
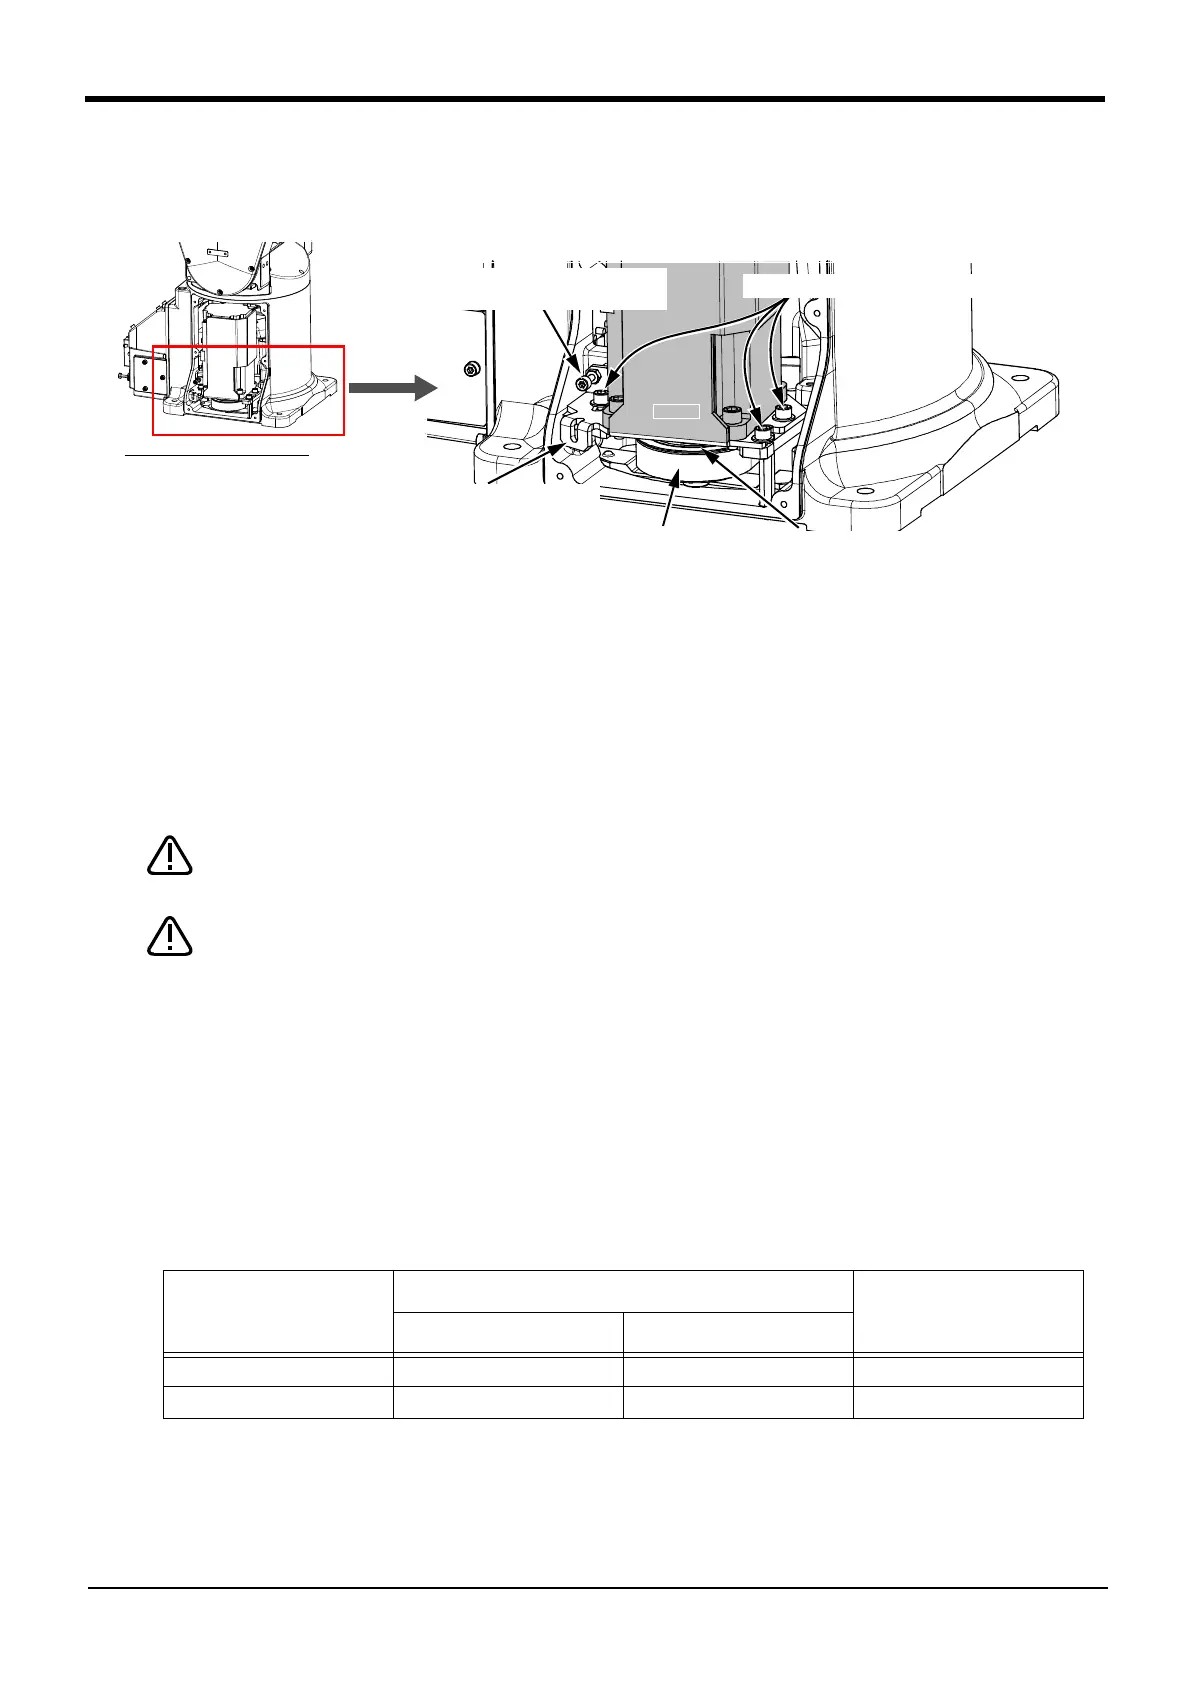
The reference figure at inspection and replacement of the timing belt is shown in Fig. 5-18.
Fig.5-18 : Inspection, maintenance and replacement of J1 axis timing belt (RV-4FR/7FR series)
■ Inspecting the J1 axis timing belt
1) Refer to Page 100, "5.3.2 Installing/removing the cover", and remove the J1 motor cover.
2) Visually confirm that the symptoms indicated in Page 106, "(1) Timing belt replacement period" have not
occurred with the timing belt.
3) Refer to Page 107, "(2) Timing belt tension measurement", and confirm the belt tension.
4) Install the J1 motor cover securely as before and finish inspection.
■ Replacing the J1 axis timing belt
Make sure that the pulleys do not move while replacing the belt. If the pulley A <4>
and B <5> position relation deviates, the position could deviate.
It is possible for the customer to replace the timing belt, but precise adjustment is
needed to prevent malfunction of the relevant parts. To ask for replacement of the
timing belt, contact the dealer.
1) Refer to Page 100, "5.3.2 Installing/removing the cover", and remove the J1 motor cover.
2) Loosen the nut of the tension adjustment screw <3>, and loosen the tension adjustment screw <3>.
3) Remove the three motor plate fixing screws <1>, and remove the timing belt <2> from the timing pulley A <4>.
4) Remove the J1 axis motor, and remove the timing belt <2>.
5) Install the new timing belt to the timing pulley B <5> and timing pulley A <4>, and install the J1 axis motor to
the original position by the motor plate fixing screws <1>.
6) Lightly loosen the three motor plate fixing screws <1>. (Do not loosen too much.)
7) Loosen the nut fixing tension adjustment screw <3>. And lightly loosen tension adjustment screw <3>.
8) Refer to the following and tighten the three motor plate fixing screws <1> while pulling the motor plate hook
<6>.
The tension of J1 axis timing belt is adjusted with this method. Certainly fix the three motor plate fixing
screws <1>. Improper tightening can cause the belt to loosen with vibration.
If the belt is loosened too much when adjusting the tension causing it to come off the timing pulleys <4> and
<5>, or if the belt and pulley teeth engagement is deviated, the machine system's origin will deviate.
Model
Hook pulling force [N]
Motor plate fixing screw <1>
Size: Tightening torque
Existing belt New belt
RV-4FR series 53 to 65 80 to 98 M4: 4.51Nm
RV-7FR series 64 to 78 91 to 112 M5: 9.31Nm
Inside of J1 motor cover
Motor
<2>Timing belt
<1>Motor plate fixing screw (Three screws)
<6>Motor plate hook
Pulls and fixing
<3> Tension adjustment screw
With the fixing nut
<4>Timing pulley A (motor side)
<5>Timing pulley B (joint side)
 Loading...


