To
shoot movies with sound recorded
via
the built-in microphone, select shooting
mode and follow the steps below.
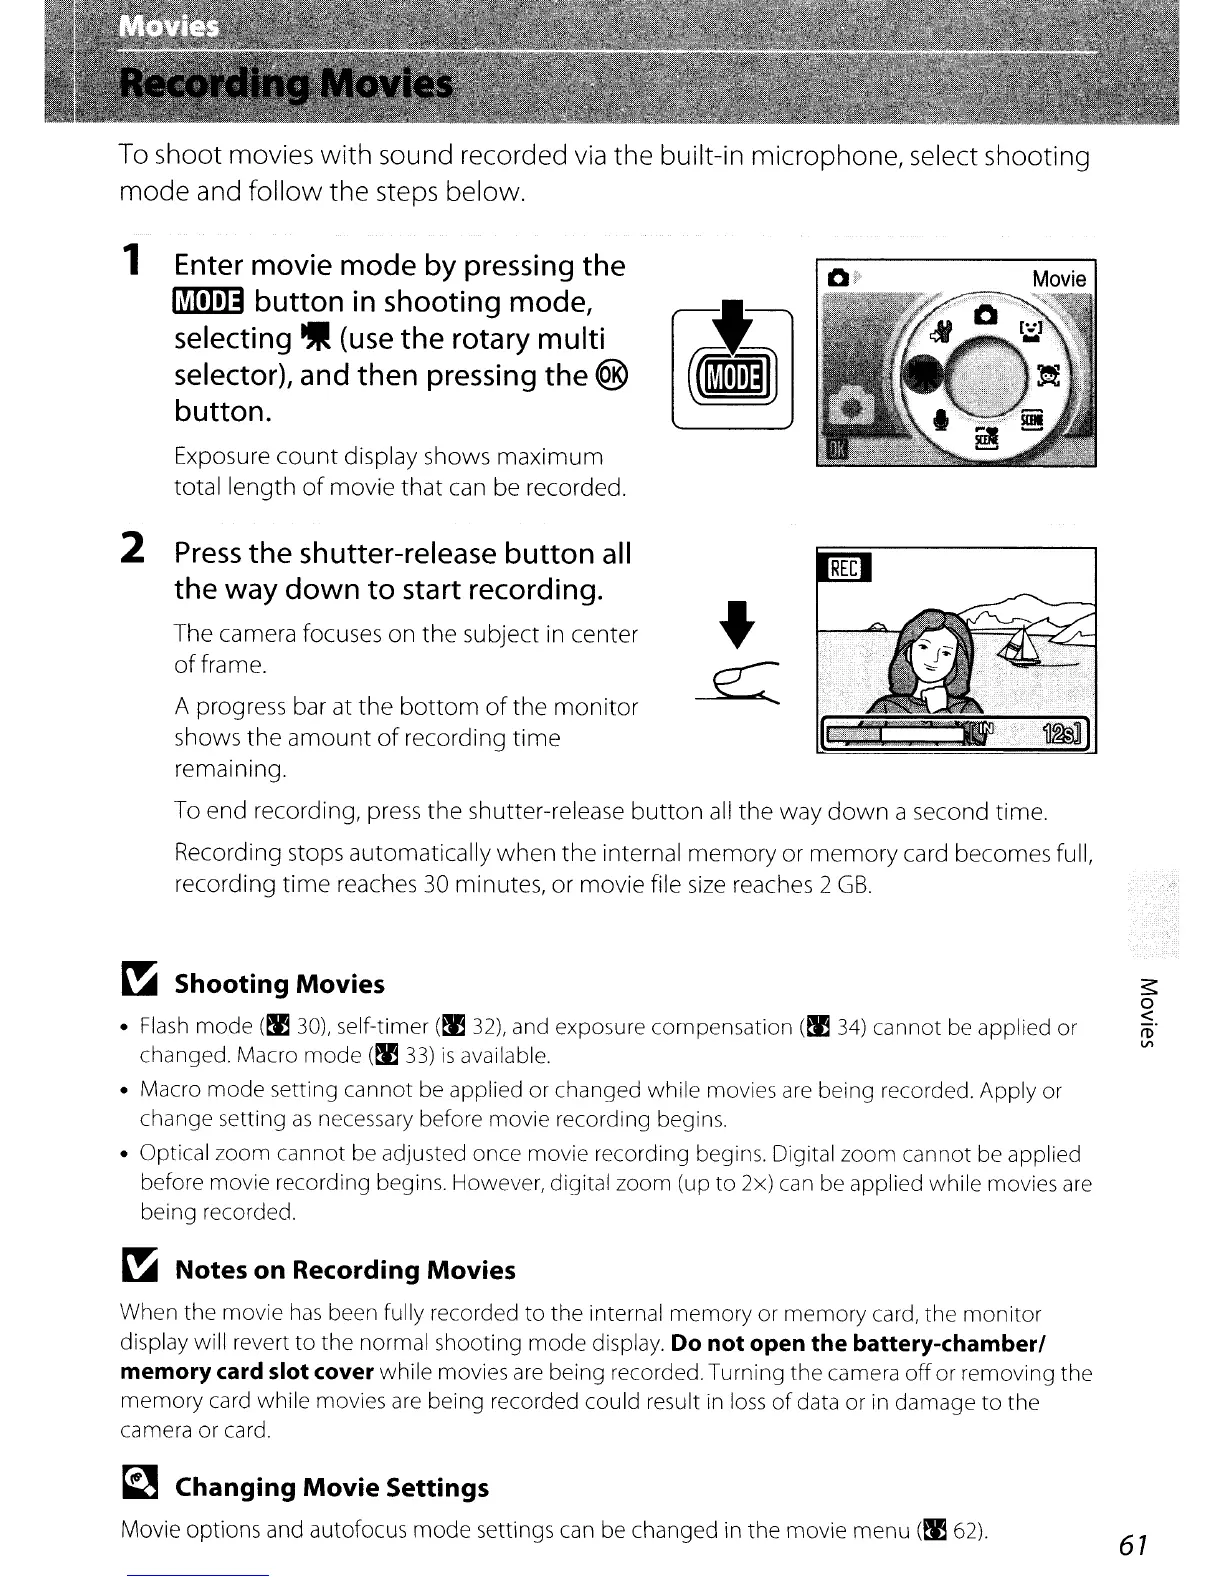
1 Enter
movie
mode
by
pressing
the
~
button
in shooting
mode,
selecting.
(use
the
rotary
multi
selector),
and
then
pressing
the
®
button.
Exposure
count
display shows
maximum
total
length
of
movie
that
can be recorded.
A progress bar
at
the
bottom
of
the
monitor
shows
the
amount
of
recording
time
remaining.
To
end
recording, press
the
shutter-release
button
all
the
way
down
a second time.
Recording stops
automatically
when
the
internal
memory
or
memory
card
becomes
full,
recording
time
reaches 30 minutes,
or
movie
file size reaches 2
GB.
Press
the
shutter-release
button
all
the
way
down
to
start recording.
The camera focuses
on
the
subject in
center
offrame.
2
~
Shooting Movies
•
Flash
mode (!I
30),
self-timer (!I
32),
and exposure compensation (!I
34)
cannot
be
applied or
changed. Macro mode
(!I
33)
is
available.
• Macro mode setting cannot
be
applied or changed while movies
are
being recorded. Apply or
change setting
as
necessary before movie recording begins.
• Optical zoom cannot be adjusted once movie recording begins. Digital zoom cannot
be
applied
before movie recording begins. However, digital zoom (up to
2x)
can
be
applied while movies
are
being recorded.
~
Notes on Recording Movies
When the movie
has
been fully recorded to the internal memory or memory card, the monitor
display will revert
to
the normal shooting mode display. Do
not
open
the
battery-chamberl
memory card slot cover
while movies
are
being recorded. Turning the camera
off
or removing the
memory
card
while movies
are
being recorded could result
in
loss
of
data or
in
damage to the
camera or card.
~
Changing
Movie
Settings
Movie options and autofocus mode settings
can
be changed in the movie menu (!I
62).
61
 Loading...