120 LD Platform OEM User's Guide 11970-000 Rev H1
8.6 Replacing Non-Periodic Parts
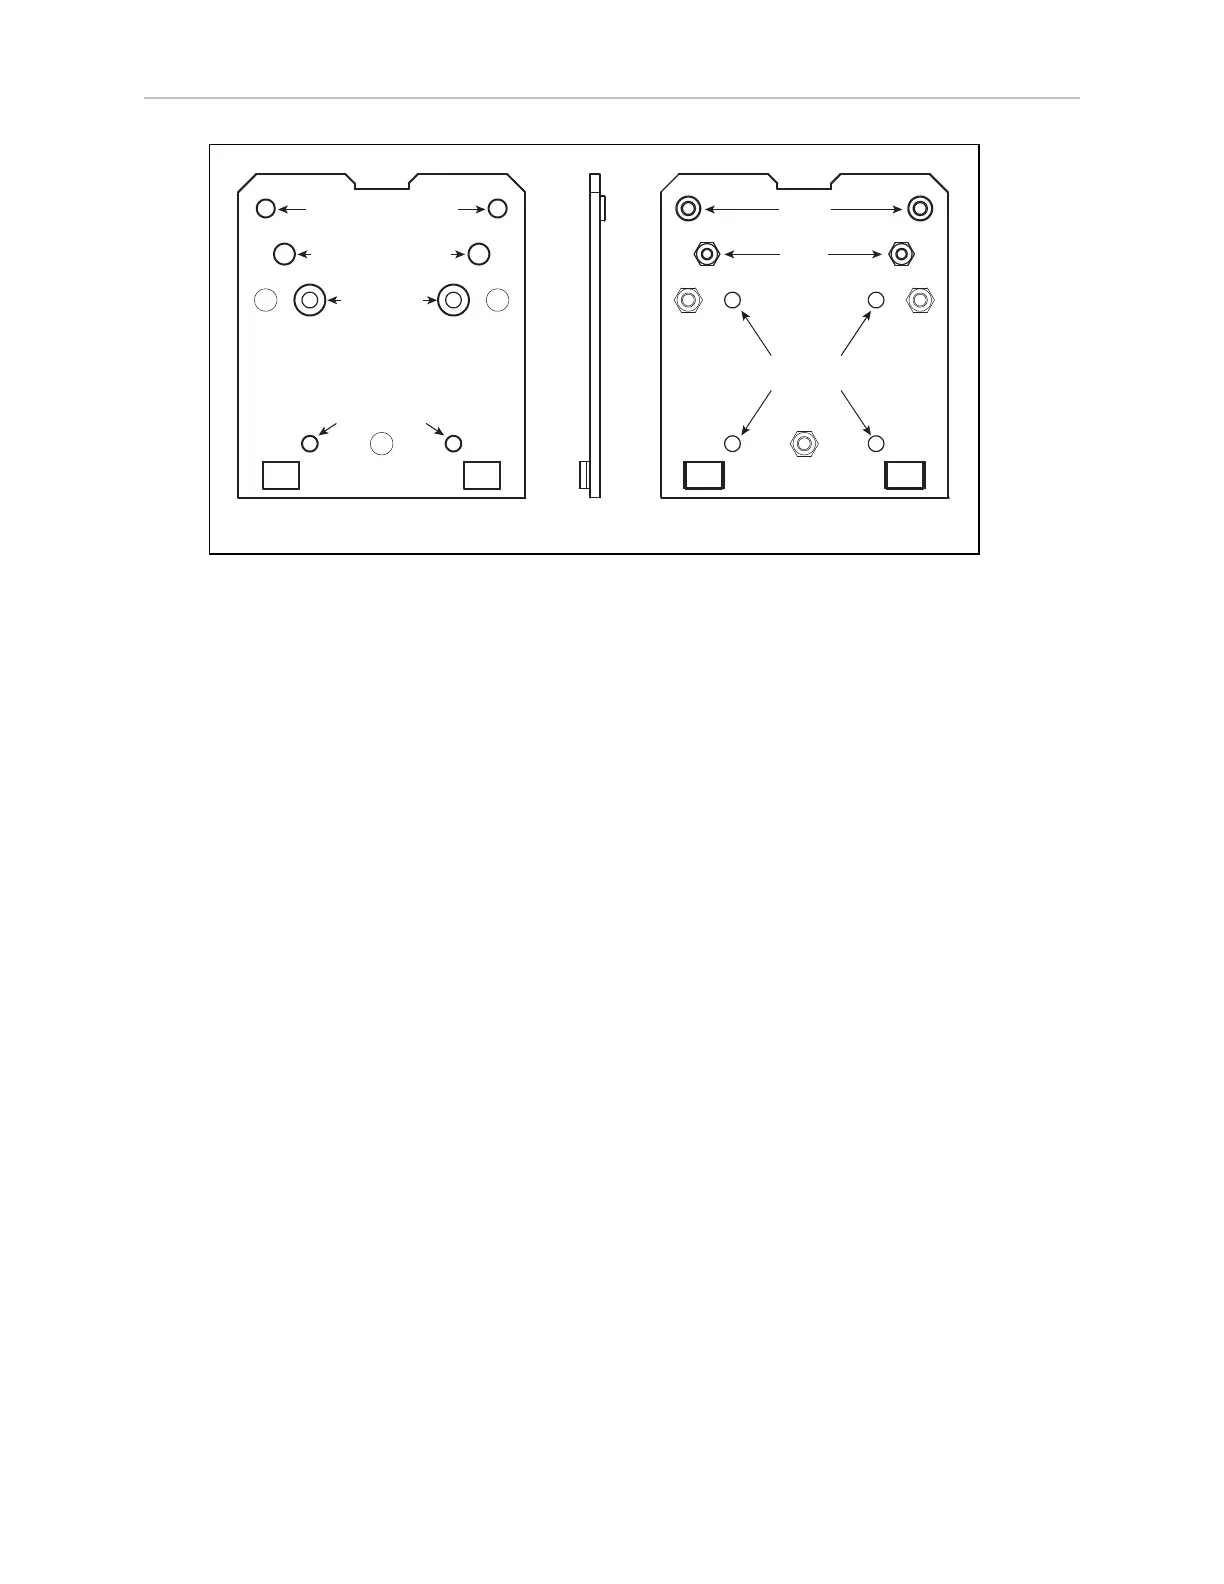
Laser Mount
Guard, Front
Guard, Rear,
to Chassis
NOT USED
NOT
USED
NOT USED
Chassis
M5
M4
THRU
Cable Tie Anchors
Cable Tie Anchors
NOT
USED
Underside Top Side
Figure 8-15. Mounting Plate for Low Front Laser and Guard
6.
Mount the laser guard to the plate with the M5 screws, lock washers, and washers pre-
viously removed.
Take care not to scratch the laser lens during this procedure.
7.
Cable-tie excess cable to the two anchors so it cannot touch the floor or the tires.
LD Platform Core
The LD Platform core is an enclosed unit, with internal fans as the only moving parts.
1.
Move the payload structure out of the way, so you can access the payload bay.
2.
Remove the battery door skin.
3.
Unlatch and open the battery compartment door, at the rear of the platform.
The battery compartment door can be locked. You may need to unlock it.
4.
Disconnect the battery power and data cables from the rear of the battery.
5.
Disconnect all of the cables attached to the top portion of the core.
Refer to Payload Bay Connections on page 59.
6.
Remove the core mounting bracket from around the core.
The bracket is two pieces, held in place with four screws down into the chassis, with
four more going sideways into the core itself. Retain all of these screws for installing the
new core.
See the following figure:
 Loading...