114
Focus, Brightness (Exposure) and Colour tone Settings
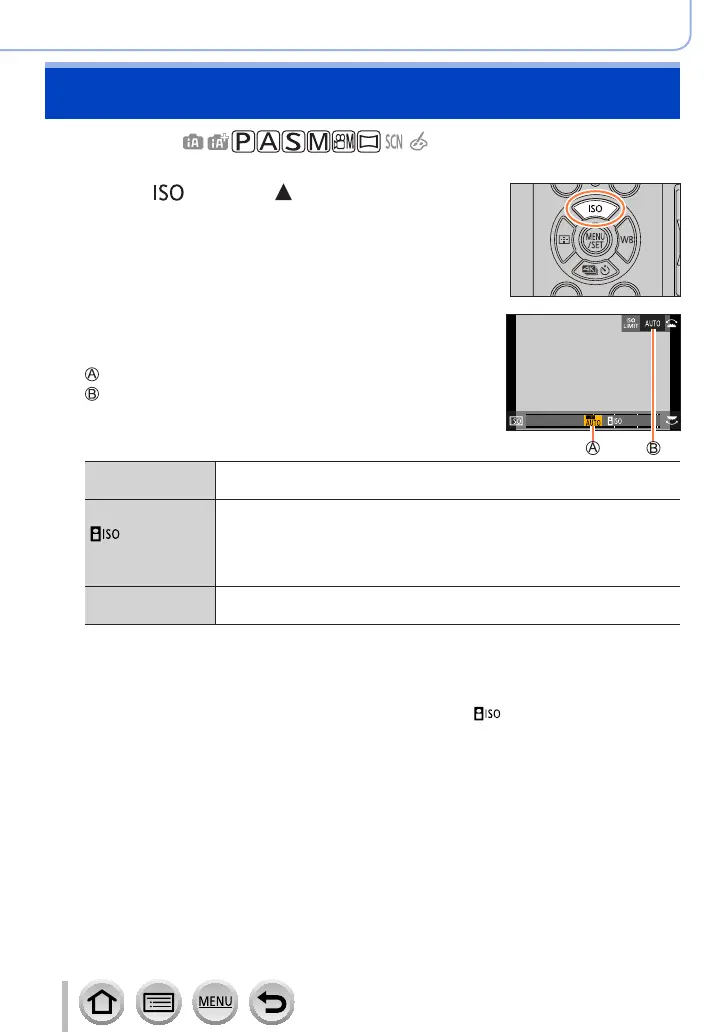
Setting the ISO Sensitivity
Recording mode:
Set ISO sensitivity (sensitivity to lighting).
1
Press [ ] button ( )
2
Select the ISO sensitivity by rotating the
rear dial
ISO sensitivity
[ISO Auto Upper Limit Setting]
2
00
4
0
AUTO
ISO sensitivity is automatically set in a range up to 3200
*
1
depending on
the brightness of a subject.
(Intelligent ISO)
ISO sensitivity is automatically set in a range up to 3200
*
1
depending on
the movement and brightness of a subject.
• The shutter speed is not fixed when the shutter button is pressed
halfway. It is continuously changing to match the movement of the
subject until the shutter button is pressed fully.
[L.100]
*
2
/ from
[200] to [25600]
ISO sensitivity is fixed at the selected setting.
*
1
When [ISO Auto Upper Limit (Photo)] is set to [AUTO].
*
2
Only when [Extended ISO] is [ON].
3
Rotate the front dial to set the [ISO Auto Upper Limit Setting]
• It will work when the [Sensitivity] is set to [AUTO] or [ ].
• You can switch the functions between the rear dial and the front dial by pressing
[DISP.] button.
4
Press the rear dial to set
• You can also press the shutter button halfway to set.

 Loading...