300
Connecting with other devices
Viewing on TV screen
Preparation
Turn off both camera and TV.
1
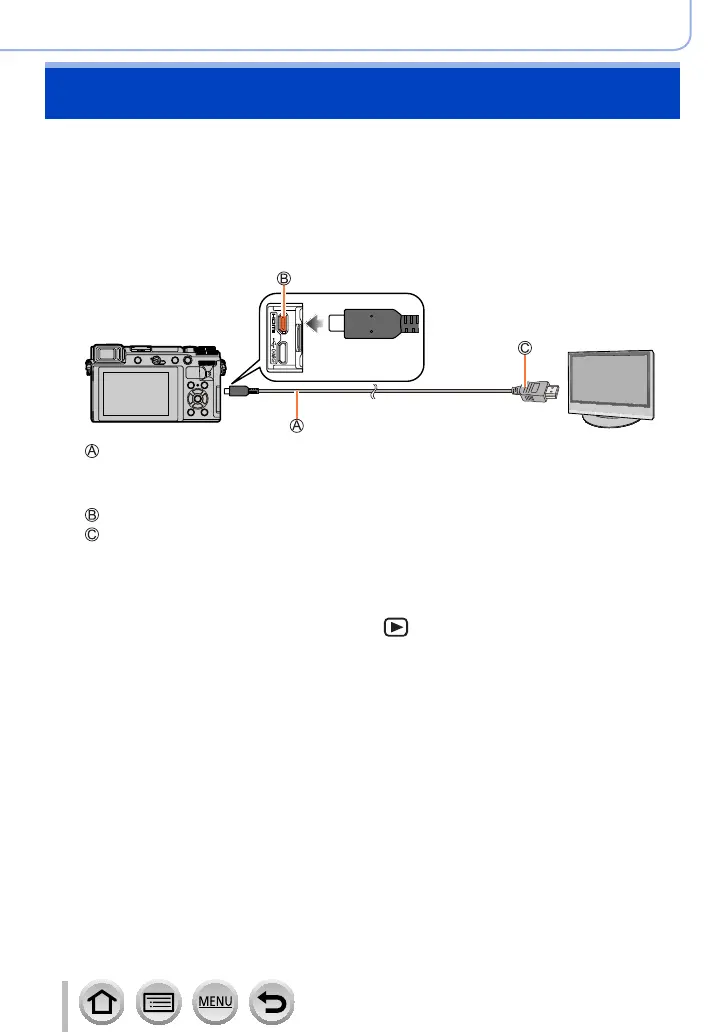
Connect camera to TV
• To open the socket cover (→24)
• Check the plug direction and insert it straight in. (If the cable is inserted in the
wrong direction, the plug could become deformed and cause faulty operation.)
Also, do not insert into the wrong socket. Doing so may cause damage to this unit.
HDMI micro cable
Use a “High Speed HDMI micro cable” with the HDMI logo.
Cables that do not comply with the HDMI standards will not work.
“High Speed HDMI micro cable” (Type D - Type A plug, up to 2 m (6.6 feet) long)
[HDMI] socket
To HDMI video/audio input socket
2
Turn on the TV and switch the TV input source to match the
connection socket
3
Turn on the camera and press [ ] (Playback) button

 Loading...