310
Connecting with other devices
Printing
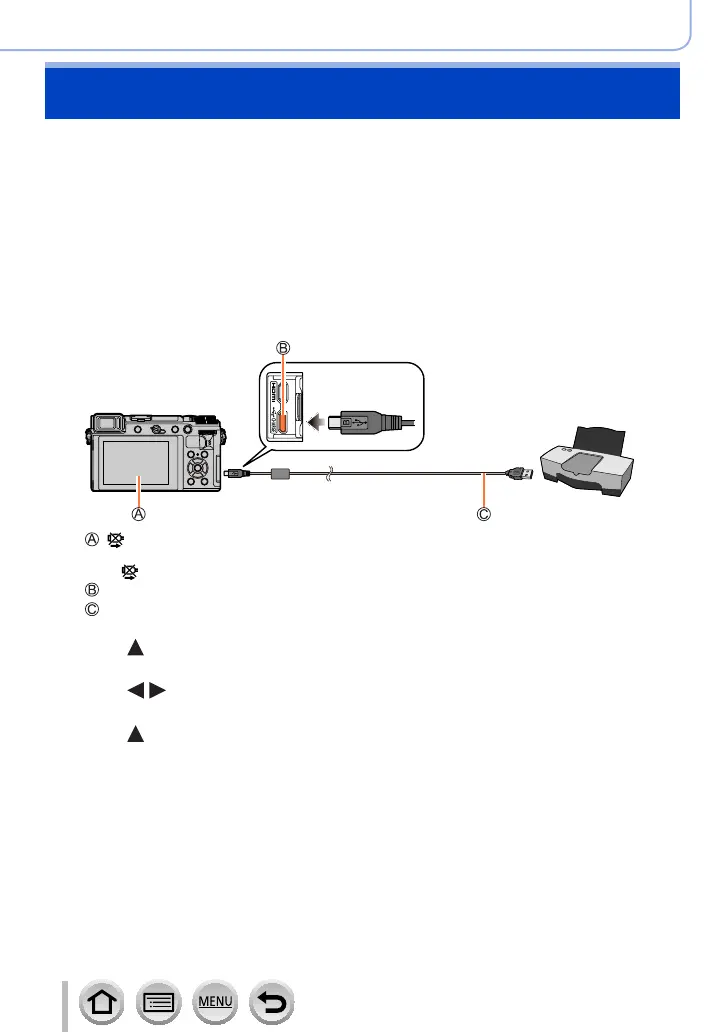
You can connect a camera directly to a PictBridge-compatible printer for printing.
Preparations
• Adjust the print quality or other settings on your printer, as needed.
• Turn on the camera and printer.
1
Connect camera to printer
• To open the socket cover (→24)
• Check the plug direction and insert it straight in. (If the cable is inserted in the
wrong direction, the plug could become deformed and cause faulty operation.)
Also, do not insert into the wrong socket. Doing so may cause damage to this unit.
• Do not use any other USB connection cables except the supplied one.
[ ]
• Do not disconnect the USB connection cable (supplied) when the cable disconnection icon
[
] is displayed (may not be displayed with some printers).
[USB/CHARGE] socket
USB connection cable (supplied)
2
Use to select [PictBridge(PTP)] and press [MENU/SET]
3
Use to select a picture and press [MENU/SET]
4
Use to select [Print start] and press [MENU/SET]

 Loading...