5.20
BODY / STEERING / SUSPENSION
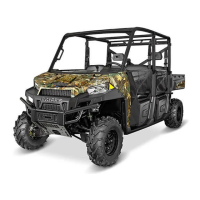
11. Remove the bottom stabilizer bar nut.
12. Loosen two bolts that secure the A-arm bushing to frame
by alternating each about 1/3 of the way until the A-arm can
be removed. The lower A-arm should now be free to
remove.
A-Arm Installation
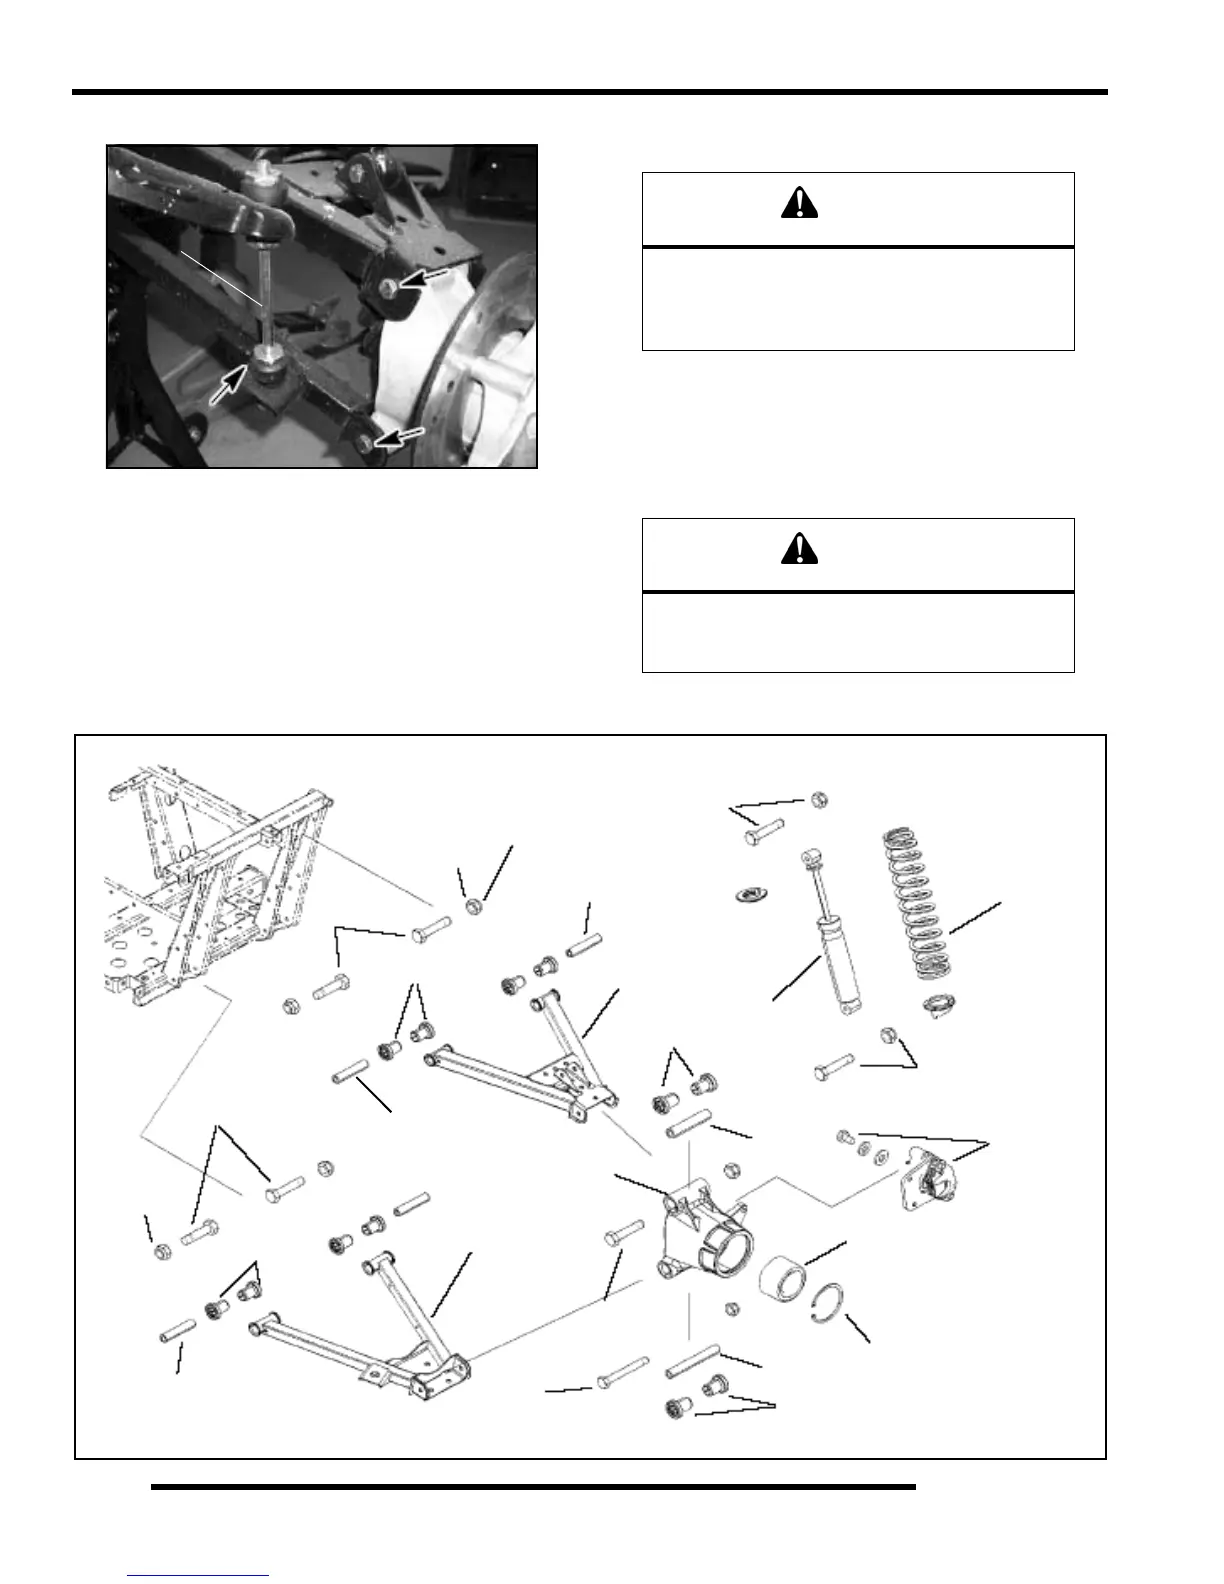
13. Insert new A-arm bushings and new A-arm shaft into new
A-arm.
14. Install new A-arm assembly onto vehicle frame. Torque
new bolts to 30 ft. lbs. (41 Nm).
15. Attach A-arm to wheel bearing carrier. Torque upper and
lower carrier bolts as shown.
16. Install the shock and tighten shock bolt to 30 ft.lbs. (41
Nm).
17. Re-install wheel and caliper. Refer to “Chapter 2” for wheel
toque specifications.
Stabilizer Bar
WARNING
The locking features on the existing bolts were
destroyed during removal. DO NOT reuse old
bolts. Serious injury or death could result if
fasteners come loose during operation.
WARNING
Upon A-arm installation completion, test vehicle
at low speeds before putting
into regular service.
A-arm
Shaft
Upper A-arm
Bushings
Coil
Snap Ring
Bushings
Lower A-arm
Carrier Bolt
30 ft. lbs. (41 Nm)
Shaft
Nuts
Nuts
30 ft. lbs.
(41 Nm)
30 ft. lbs.
(41 Nm)
Shock
30 ft. lbs.
(41 Nm)
Caliper
18 ft. lbs.
(24 Nm)
Bearing
Bushings
Shaft
Shaft
30 ft. lbs.
(41 Nm)
A-arm Bolts
Wheel Bearing
Carrier
Bushings
Bolts
50 ft. lbs.
(68 Nm)
Shaft

 Loading...