3.19
ENGINE
3
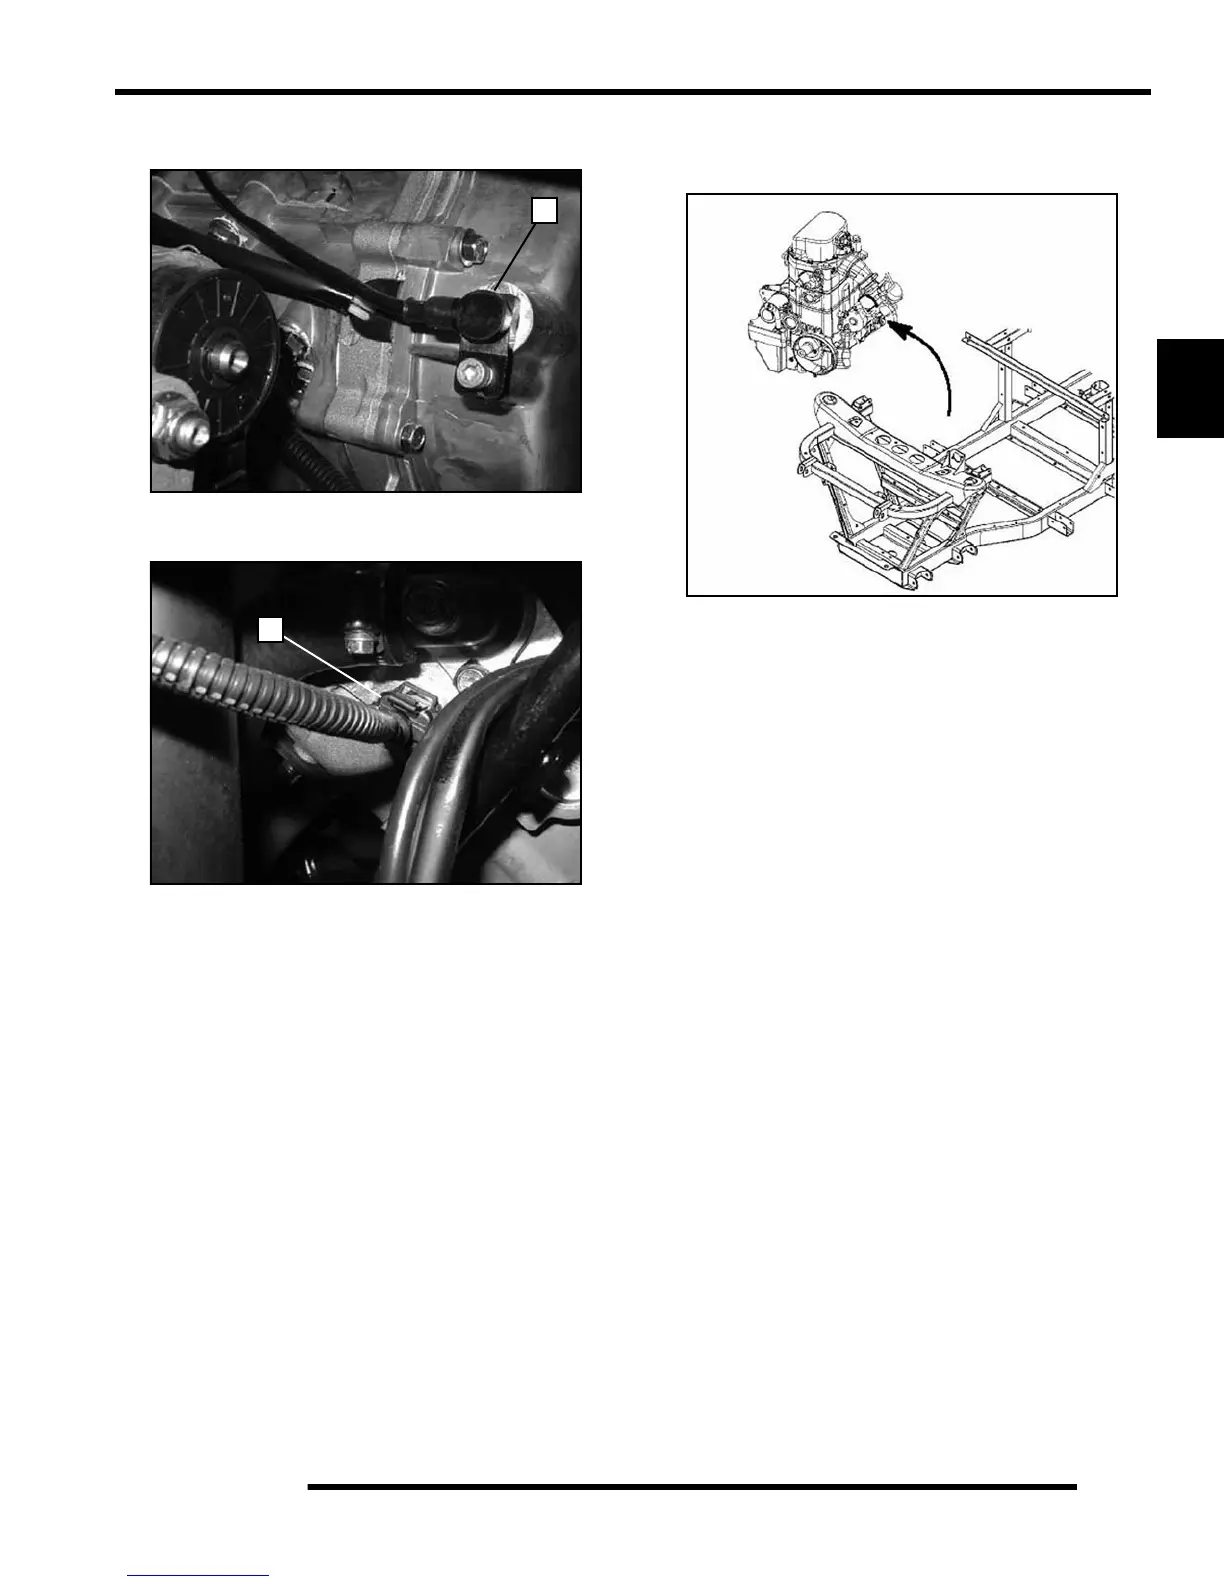
16. Remove the crank position sensor (I) located on the mag
cover.
17. Disconnect the coolant temperature sensor (J) from the left
side of the cylinder.
18. Disconnect the coolant hoses. Properly dispose of any
antifreeze from the engine or hoses.
19. When removing starter cables, note and mark ground cable
and positive (+) cable mounting angle and locations.
Remove the cables.
20. Remove all engine mount nuts and / or engine mount plates.
21. With all hoses and wires disconnected, the engine can be
pulled straight out of the chassis.
NOTE: Rotating the engine to the left 90 degrees
(valve cover facing left), may ease engine removal.
NOTE: Use caution when lifting the engine out of
frame. Use an engine lift or other means if the engine
is too heavy to be lifted manually.
22. For engine installation, reverse procedures.
Engine Installation Notes
After the engine is installed in the frame, review this checklist
and perform all steps that apply:
General Items
1. Install previously removed components using new gaskets,
seals, and fasteners where applicable.
NOTE: Properly route all electrical harnesses and
re-attach any fasteners or protective tubing. Check
for any possible rubbing points of electrical wires.
2. Perform regular checks on fluid levels, controls, and all
important areas on the vehicle as outlined in the daily pre-
ride inspection checklist (refer to Chapter 2 or the Owner's
Manual).
PVT System
1. Adjust center distance of drive and driven clutch.
(Chapter 6)
2. Adjust clutch offset, alignment, and belt deflection.
(Chapter 6)
3. Clean clutch sheaves thoroughly and inspect inlet and
outlet ducts for proper routing and sealing. (Chapter 6)
Transmission
1. Inspect transmission operation and adjust linkage if
necessary. Refer to Chapter 2 and Chapter 8.
I
J

 Loading...