10.17
ELECTRICAL
10
HEADLIGHTS
Headlight Adjustment
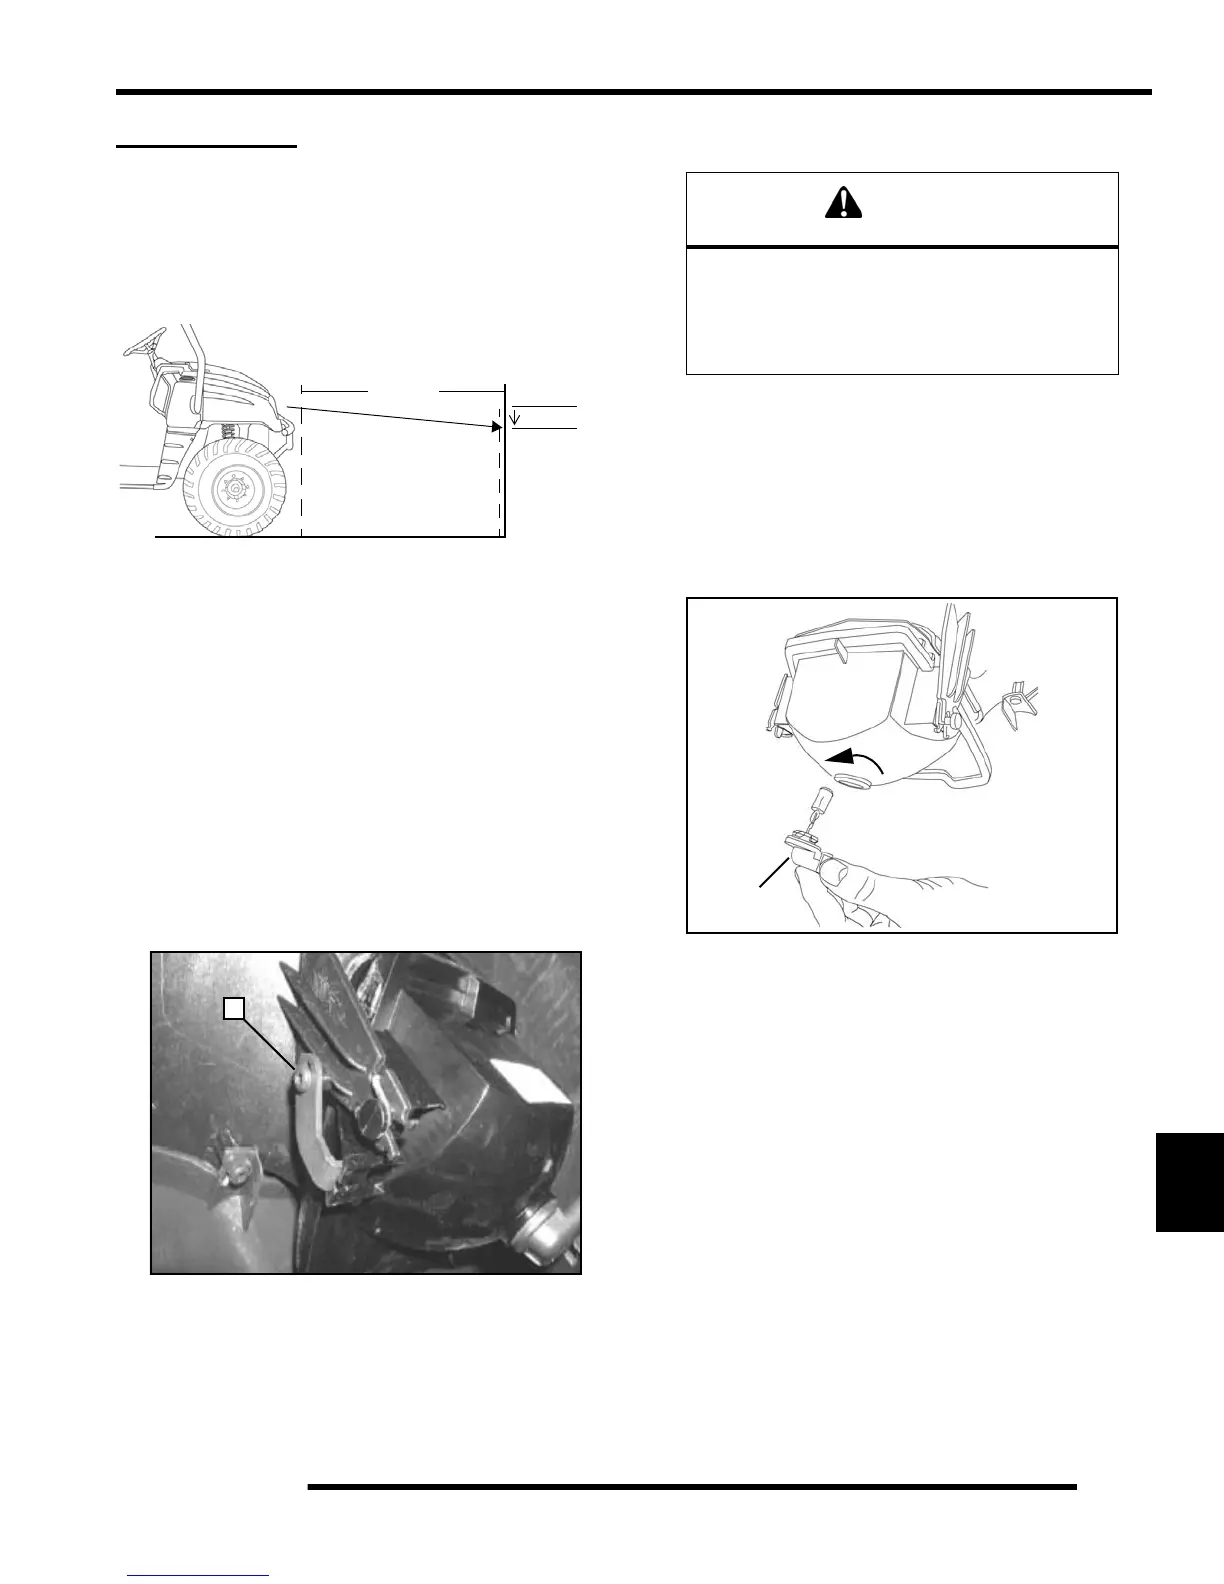
The headlight beam is adjustable.
1. Place the vehicle on a level surface with the headlight
approximately 25 ft. (7.6 m) from a wall.
2. Measure the distance from the floor to the center of the
headlight and make a mark on the wall at the same height.
3. With the machine in Neutral and parking brake applied,
start the engine and turn the headlight switch to high beam.
4. The most intense part of the headlight beam should be
aimed 8 in. (20 cm) below the mark placed on the wall in
Step 2.
NOTE: Rider weight must be included in the seat
while performing this procedure.
5. Adjust the beam to the desired position by loosening the
adjustment screw (A) and moving the lamp to the
appropriate height.
6. Adjust the beam to desired position. Repeat the procedure
to adjust the other headlight.
Headlight Bulb Replacement
1. Open the hood.
2. Unplug the headlight bulb (A) from the wiring harness. Be
sure to pull on the connector, not on the wiring.
3. Turn the lamp counterclockwise to remove it.
4. Insert new bulb. Reinstall the harness assembly into the
headlight assembly.
NOTE: Make sure the tab on the lamp locates
properly in the housing.
Headlight Housing Removal
1. Open the hood.
2. Unplug the headlight from the wiring harness. Be sure to
pull on the connector, not on the wiring.
XX
25 ft.
(7.6 m)
8 in. (20 cm)
A
WARNING
Due to the nature of light utility vehicles and
where they are operated, headlight lenses
become dirty. Frequent washing is necessary to
maintain lighting quality. Riding with poor
lighting can result in severe injury or death.
A

 Loading...


