Breakers,fusesandcircuitprotection
Theinformationbelowisprovidedasguidancetohelpprotect
yourproduct.Theexampleillustrationsprovidedareforcommon
vesselpowerarrangements,ifyouareunsurehowtoprovide
thecorrectlevelofprotectionthenpleaseconsultaRaymarine
authorizeddealerforsupport.
Fuseandbreakerrating
In-LinefuseratingThermalbreakerrating
3A5A
Note:Yourproduct’spowercablemayhaveanin-linefuse
alreadytted,ifnotthenyouwillneedtoaddanin-linefuseto
thepositivewireofyourproductspowerconnection.
Distributionpanelconnection
Itisrecommendedthatyourproductiswiredthroughyour
vessel’sdistributionpanelviaathermalbreakerorfuse.
1.Vesselpowersupplypositive(+)
2.In-linefuse.(Ifyourproductspowercabledoesnothavea
builtinfusethenanin-linefuseshouldbetted.)
3.Productpowercable
4.Vesselpowersupplynegative(-)
5.*Drainwire
6.Vesseldistributionpanel
7.*VesselRFgroundpointconnection
Note:*Onlyapplicabletoproductsthatincludeadrainwire
ontheproduct’spowercable.
BatteryconnectionwithRFground
Ifyourvesseldoesnothaveadistributionpanelthenyour
productmaybewireddirectlytothebatterywiththedrainwire
connectedtothevessel’sRFgroundpoint.
1.Vesselpowersupplypositive(+)
2.Vesselpowersupplynegative(-)
3.In-linefuse(Ifyourproductspowercabledoesnothavea
builtinfusethenanin-linefuseshouldbetted.)
4.*Drainwire
5.Productpowercable
6.Vesselbattery
7.*VesselRFgroundpointconnection
Note:*Onlyapplicabletoproductsthatincludeadrainwire
ontheproduct’spowercable.
BatteryconnectionwithnoRFground
IfyourvesseldoesnothaveadistributionpaneloranRFground
pointthenyourproductmaybewireddirectlytothebatterywith
thedrainwirealsoconnectedtothebattery’snegativeterminal.
1.Vesselpowersupplypositive(+)
2.Vesselpowersupplynegative(-)
3.In-linefuse(Ifyourproductspowercabledoesnothavea
builtinfusethenanin-linefuseshouldbetted.)
4.*Drainwireconnectedtovesselnegativepowersupply.
5.Productpowercable
6.Vesselbattery
Note:*Onlyapplicabletoproductsthatincludeadrainwire
ontheproduct’spowercable.
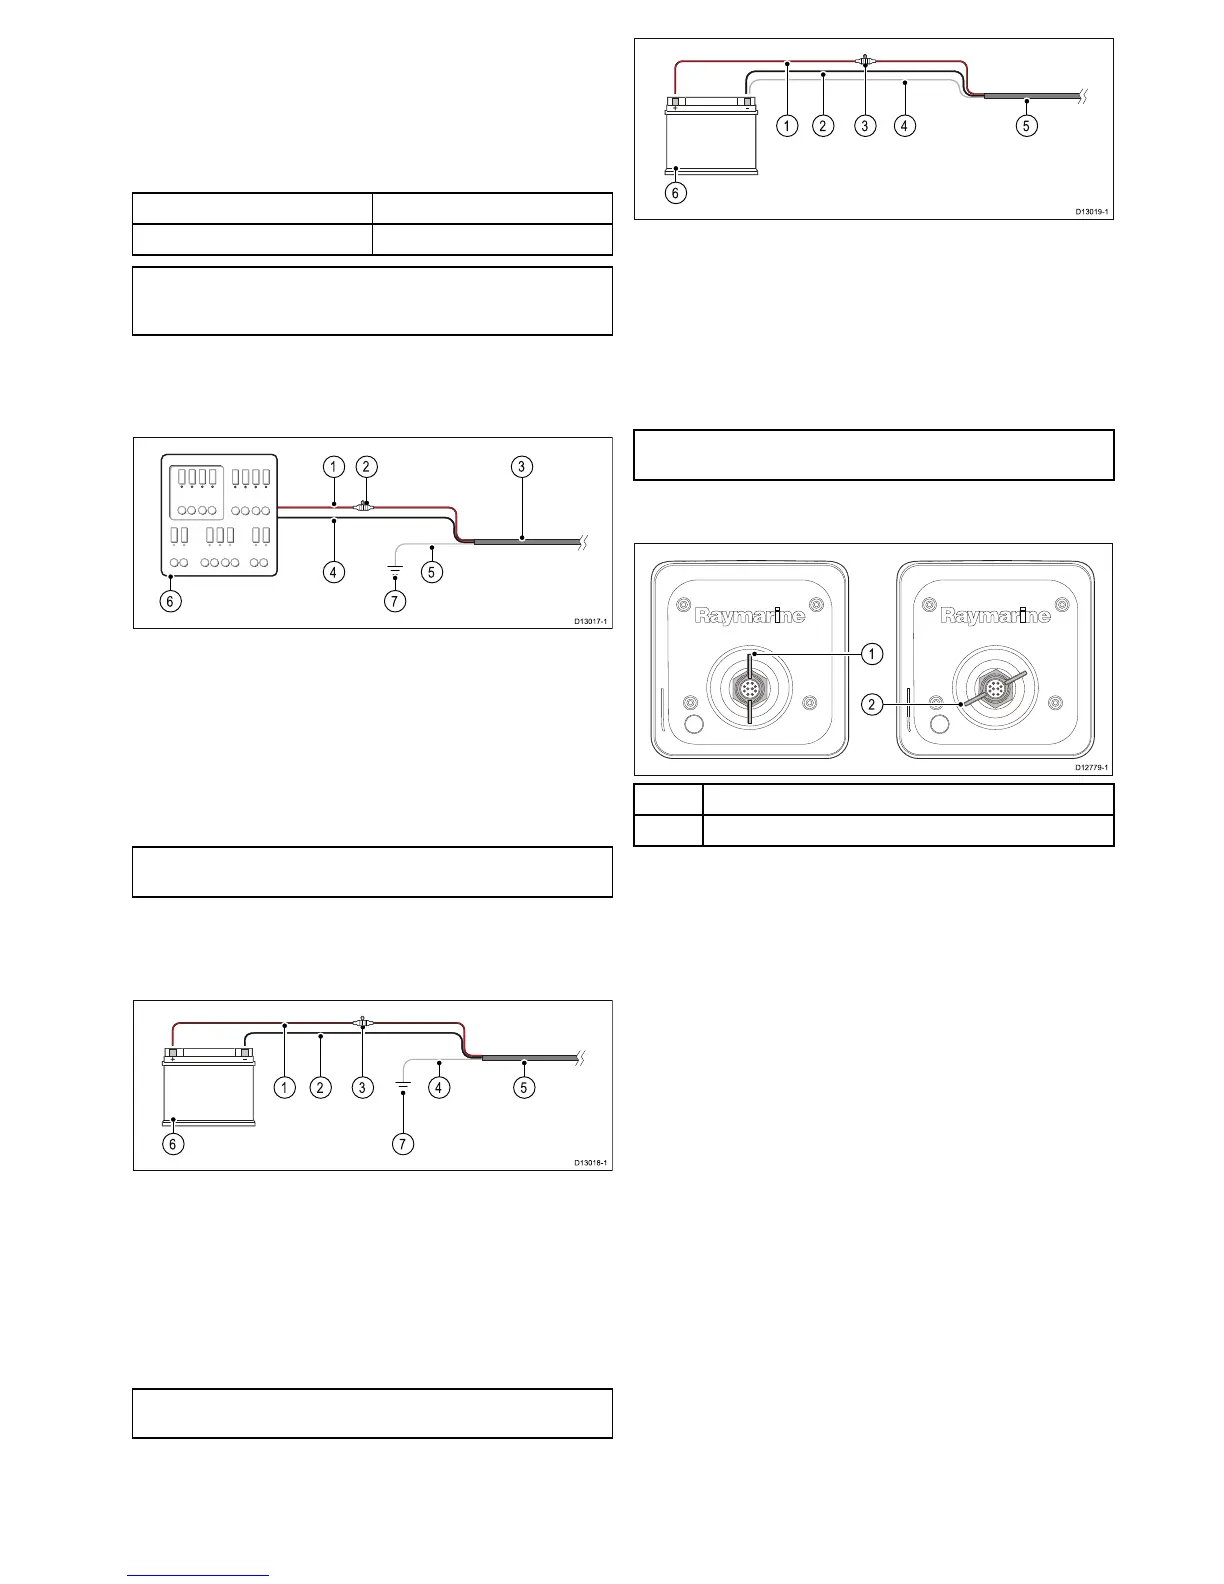
Connectingthecabletothedisplay
1Unlockedposition.
2Lockedposition.
1.Ensurethedisplay’srearconnectorlockingcollarisinthe
un-lockedposition.
2.Orientatethecableconnectorsothattheguidelinesupwith
theguideinthedisplay’srearconnector.
3.Pushthecableconnectorallthewayintothedisplay
connector.
4.Rotatethelockingcollarclockwisetolockintoposition.
Cablesandconnections33
 Loading...