Feature Highlights
17
1
❖ Preparation for sending scanned files to an FTP server
A Connect the machine to the network.
For details, see p.42 “Connecting with Network Cable”.
B Configure the IP address, subnet mask, and gateway address using the
control panel.
For details, see p.46 “Configuring the IP Address Settings”.
C Register the destinations to the Address Book using Web Image Monitor.
For details, see p.134 “Registering Scan Destinations”.
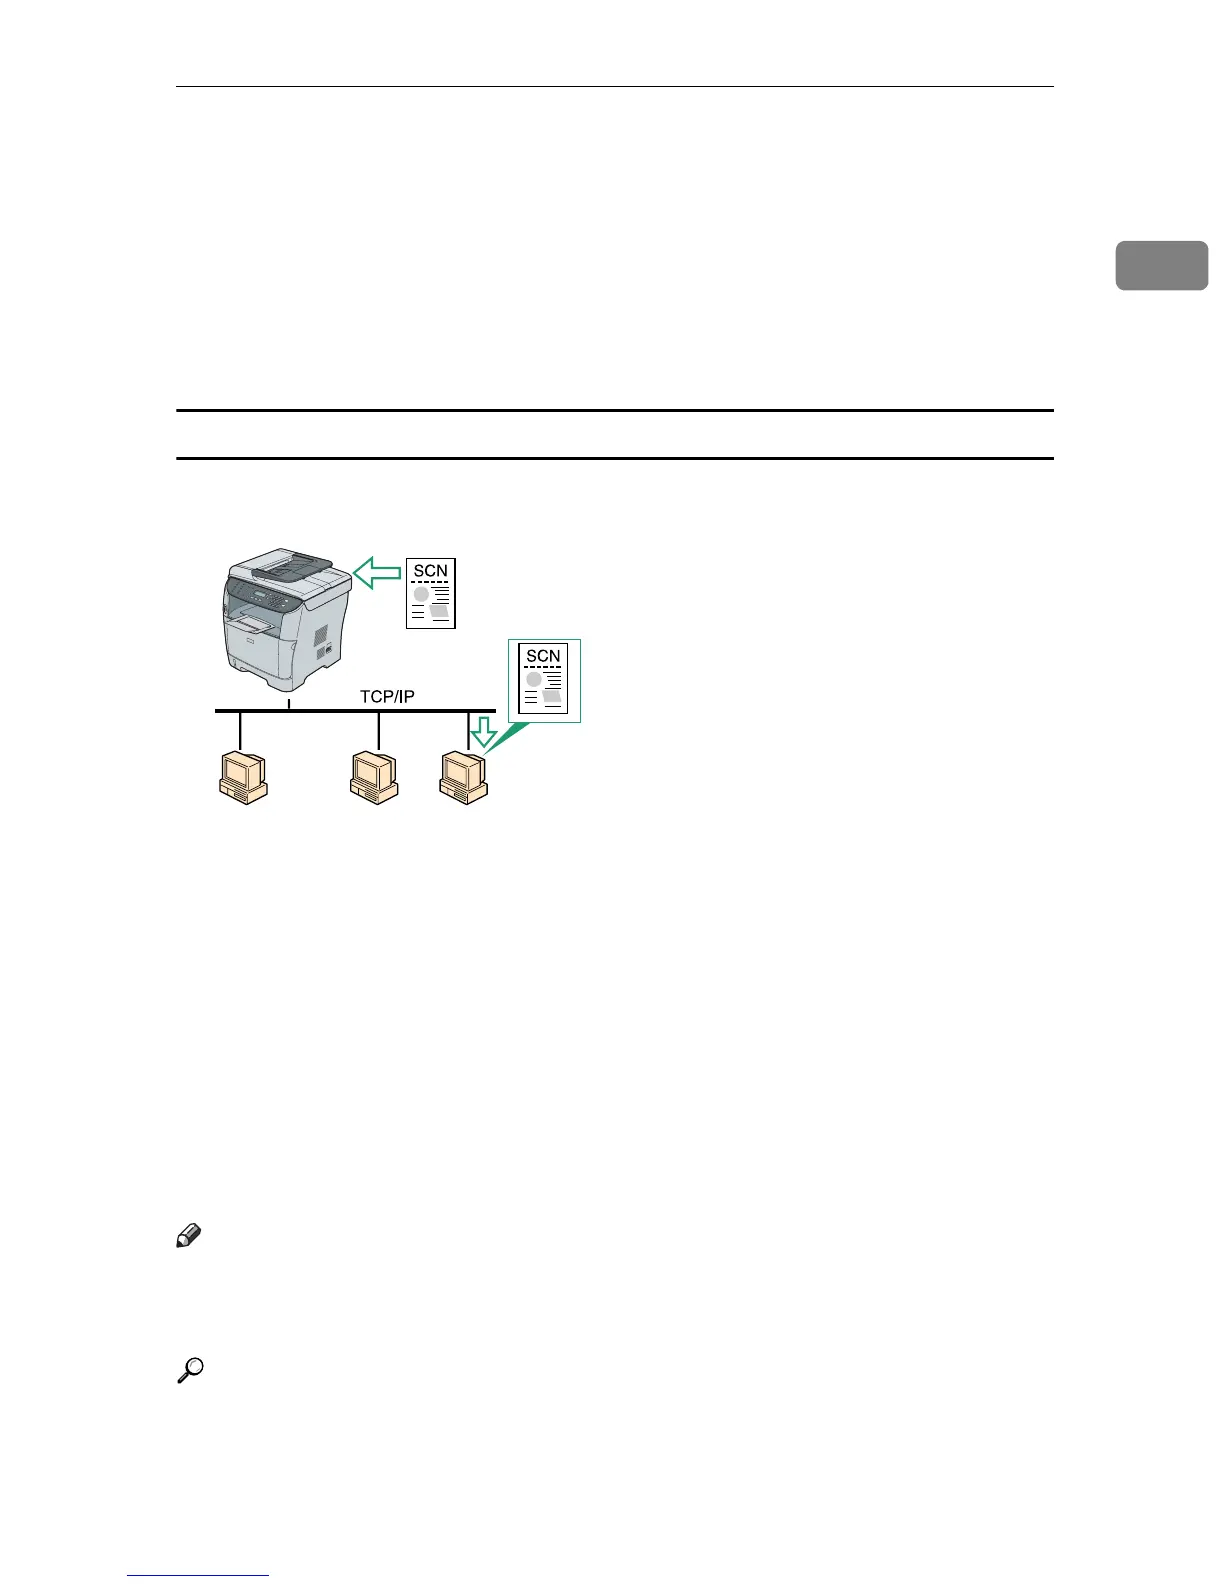
Sending scanned files to a computer's shared folder
You can send scanned files to the shared folder of a computer on a network us-
ing the control panel.
❖ Preparation for sending scanned files to a computer's shared folder
A Connect the machine to the network.
For details, see p.42 “Connecting with Network Cable”.
B Configure the IP address, subnet mask, and gateway address using the
control panel.
For details, see p.46 “Configuring the IP Address Settings”.
C Create a destination folder on the computer's hard disk drive, and config-
ure it as a shared folder.
For details, see your operating system's documentation.
D Register the destinations to the Address Book using Web Image Monitor.
For details, see p.134 “Registering Scan Destinations”.
Note
❒ If you are using the Scan to Folder function on a network that uses Active Di-
rectory, you must specify the server name and domain name in the DNS set-
tings.
Reference
For details about the DNS settings, see p.258 “Configuring the DNS Settings”.
BSP012S

 Loading...