12
Basic Operation
Moving the Cursor
Multiple setting items (parameters) or selection items are
shown in a single screen or window. To edit them using the
[INC] / [DEC] buttons or the [VALUE] dial, move the cursor to the
location of the item you want to edit.
The shape of the cursor differs depending on the screen or the
parameter. (For example, it could have a red or blue border, or
be highlighted in red or yellow, etc.) You can move the cursor in
the following ways.
Cursor
Cursor
Cursor
Cursor
Cursor
Cursor
Cursor [H] [I] [K] [J] Buttons
Press a cursor button to move the cursor in the corresponding direction.
Purpose Operation
Moving the cursor
continuously
Hold down the cursor button.
Moving the cursor rapidly
While continuing to hold down one cursor button,
hold down the cursor button of the opposite
direction.
Display (Touch Panel)
By directly touching a parameter value, knob icon, or slider icon in the screen,
you can move the cursor to that location.
NOTE
Some icons do not move the cursor.
Confirming or Canceling the Value
[ENTER] Button
Use this button to confirm a value or execute an operation. When you move
the cursor to a tone or parameter and press the [ENTER] button, a list appears,
allowing you to change the setting.
[EXIT] Button
This button returns to the previous screen, or closes the open window.
Display (Touch Panel)
Indication such as <OK> or <SELECT> shown in a confirmation screen
have the same operation as the [ENTER] button, and <EXIT> has the same
operation as the [EXIT] button.
Use <CANCEL> to cancel an operation, or to return an edited value to its
original value and exit the screen.
[SHIFT] Button
This is used in conjunction with other buttons.
By holding down the [SHIFT] button and pressing another button, you can
move to the related edit screen for the button that you pressed (shortcut).
Shortcut Explanation
[SHIFT] +WHEEL1, 2
The setting screen for the corresponding
controller appears.
[SHIFT] +S1, S2, S3
[SHIFT] + [ASSIGN] 1, 2 The Assign setting screen appears.
[SHIFT] + [SPLIT/KEY RANGE] The Key Range setting screen appears.
[SHIFT] + [PAD MODE]
The setting screen or related screen for the
currently selected pad mode appears.
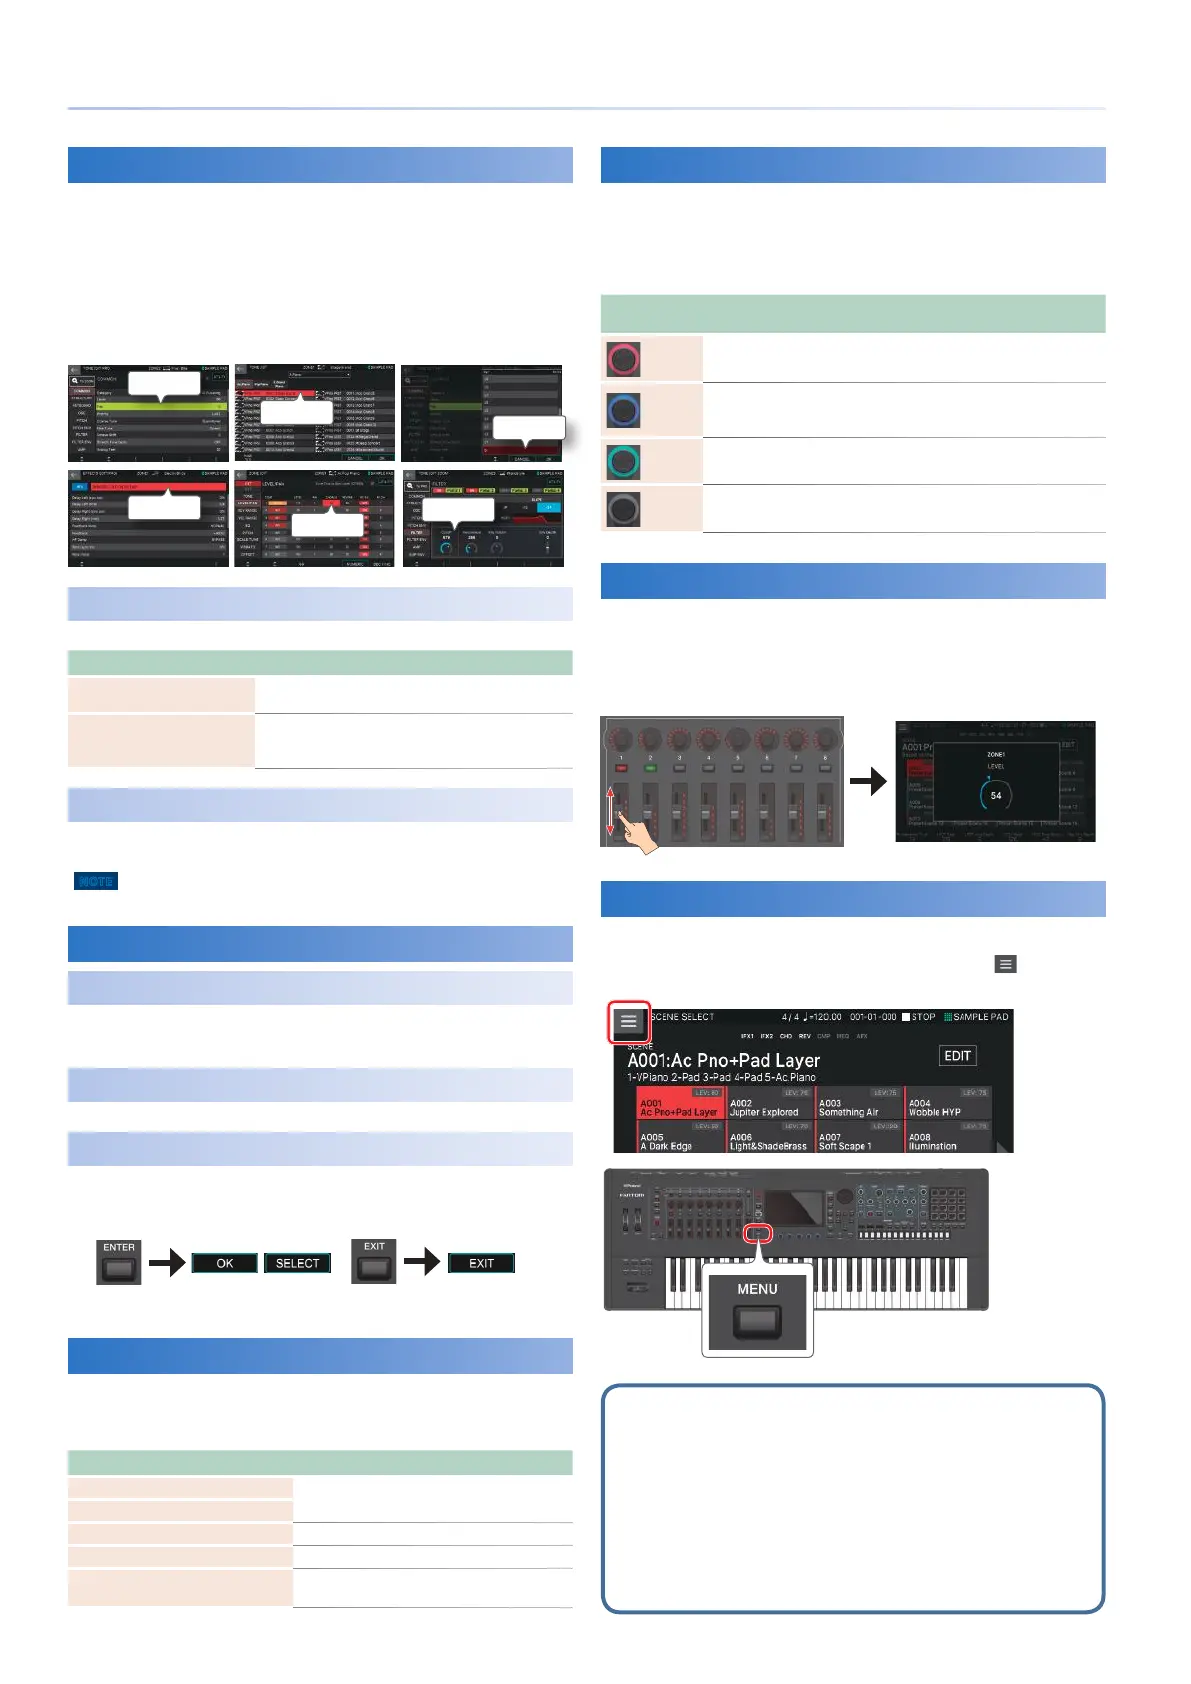
FUNCTION Knobs [E1]–[E6]
These knobs perform the functions that are assigned to them
in each screen, such as editing parameters or scrolling lists or
tabs. By pressing a knob, you can edit a value with a button-like
operation.
Knob border
color
Explanation
red
Turn the knob to scroll the tab or parameter cursor.
blue
Turn the knob to edit the value of the corresponding parameter.
For a parameter whose value is “on/off,” you can press the knob to
switch the parameter on/off.
green
Press the knob to execute or cancel a function, or to move to
another page.
unlit
No function is assigned to a knob in this state.
Knob and Slider Operations
When you use a knob or slider to edit a setting, the edited
parameter and its value are shown in a popup screen.
The popup screen closes automatically after a time.
Some parameters don’t show a popup screen.
[MENU] Button
Allows you to make detailed settings for a function, or system settings.
You can also access the menu screen by touching the <
> icon
located in the upper left of the SCENE SELECT screen.
Operating procedures in this manual
On this unit, operations such as “editing a value,” “moving the cursor,”
“setting/cancelling a value,” or “moving to a screen” can be performed
on multiple ways, as explained earlier. (For example, “button
operations,” “touch panel operations,” “dial operations,” etc.)
To prevent the explanations from becoming cluttered, subsequent
explanations in this document use a simplified form such as “move the
cursor to __ and edit the value” or “choose __,” rather than describing
all of the possible methods for doing so. For actual operation, you can
use your preferred method of the various multiple methods described
above.

 Loading...