96
Creating a Group
In advance, select a scene and create patterns in several tracks
as described in the procedure for recording a pattern (p. 86).
1.
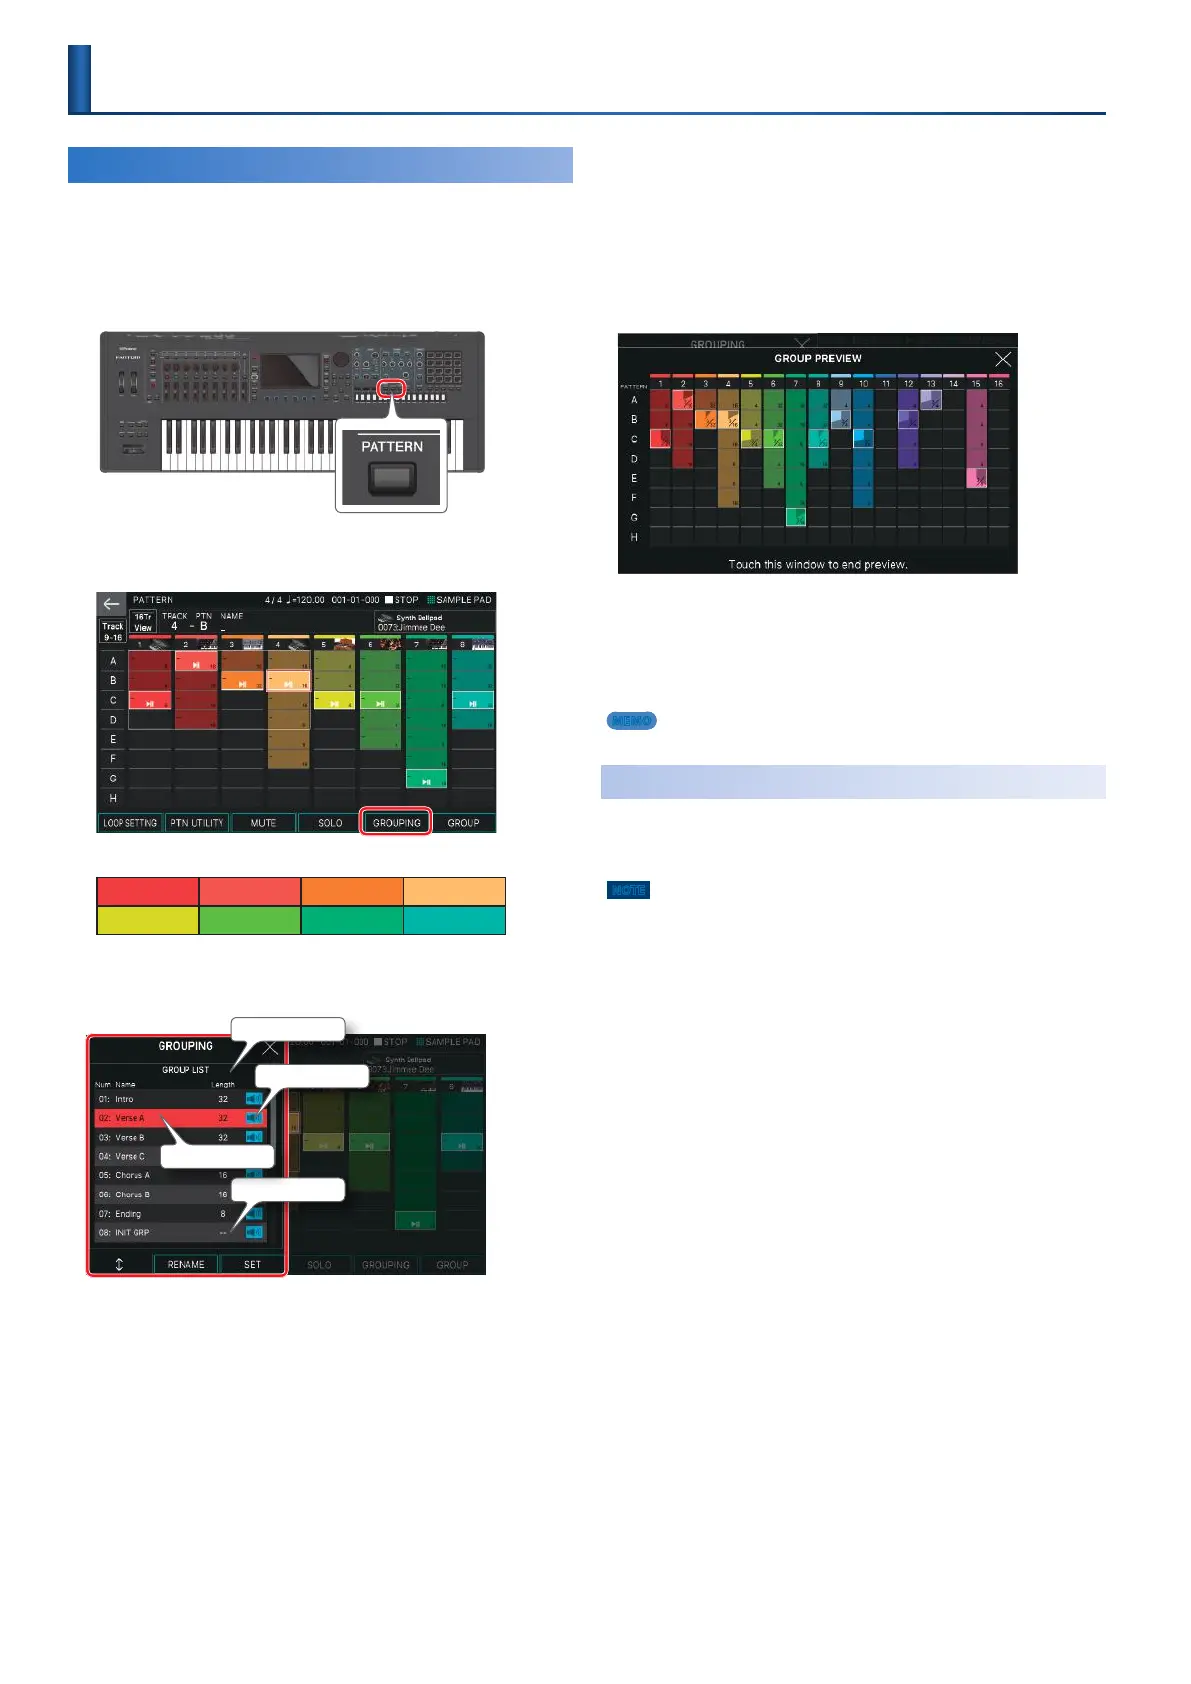
Press the [PATTERN] button.
The PATTERN screen appears.
2.
Select a pattern for each track to specify the
combination.
In this example, the current pattern of each track is as follows.
Track 1-C Track 2-A Track 3-B Track 4-B
Track 5-C Track 6-C Track 7-G Track 8-C
3.
Select [E5] GROUPING.
The GROUPING screen appears.
Group list
Play icon
Empty group
Cursor
Groups whose “Length” field is “–” are empty groups that are not
grouped.
4.
Use the [E1] to move the cursor to the number
that you want to assign.
5.
Select [E3] SET.
A confirmation message appears.
If you decide to cancel, choose [E6] CANCEL.
6.
To execute, select [E5] OK.
The current combination of each track’s patterns is registered as
a group.
7.
Press the [APLAY] button.
You can audition the group you created to verify that it is the
combination that you chose.
You can also audition by touching the <play icon> in the group
list.
The GROUP PREVIEW screen is shown during audition. Like
the PTN screen, the GROUP PREVIEW screen shows the current
patterns of each track at a glance.
8.
To stop playback, press the [9STOP] button.
You can also stop by touching the GROUP PREVIEW screen.
9.
As necessary, repeat steps 2–6 to create the
group.
MEMO
A maximum of 16 groups can be created in each scene.
Naming a Group (RENAME)
You can assign a name to each group. Assigning an informative
name helps you tell the groups apart. It’s a good idea to assign a
name to a group that you create.
NOTE
5 You can’t rename a group before creating it.
5 The group name is a maximum of eight characters.
1.
In GROUP LIST, select the group that you want
to rename, and then select [E2] RENAME.
The RENAME screen appears.
2.
Edit the group name as described in the
procedure for the RENAME screen (p. 13).
3.
Select [E6] OK.
If you decide to cancel, choose [E5] CANCEL.
How to Create a Group

 Loading...