89
Using Insertion Effects
■ Insertion Effect Parameters and their functions
■ EFX Type (Effect Type) 0–64
Choose the type of the insertion effects.
For details about effect types, refer to p.91.
■ EFX Parameter (Effect Parameter)
If you change the EFX type, the parameters of that effect are displayed.
For details about effect parameters, refer to p.91.
■ EFX To Rev 0–40–127
Adjust the send level of the sound that comes after the insertion effect to Reverb.
■ EFX To Cho 0–127
Adjust the send level of the sound that comes after the insertion effect to Chorus.
■ EFX To Dly 0–127
Adjust the send level of the sound that comes after the insertion effect to Delay
Turning the Insertion Effect On/Off
After you set the insertion effect settings, you have to activate each part to use the
effects.
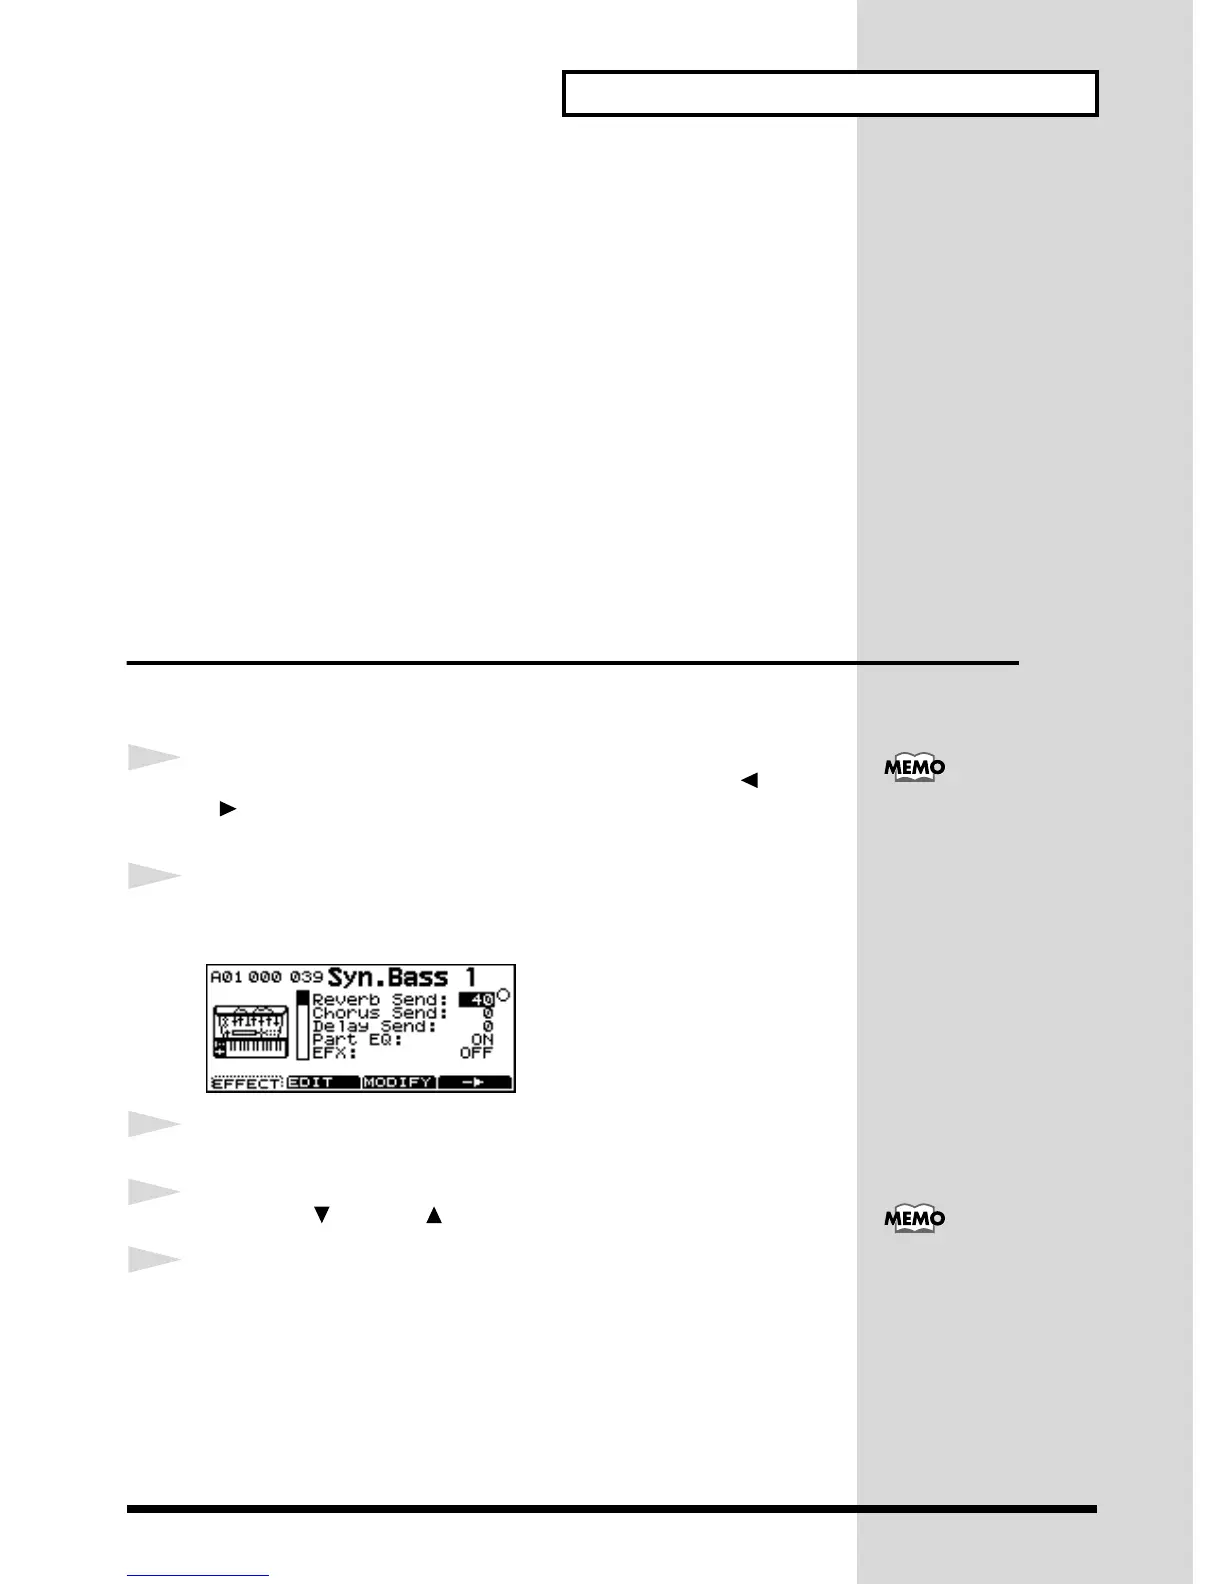
1
Make sure that the Part Basic screen is selected, and use PART [ ] or
[ ] to select the part.
2
Press [EDIT] to turn it on.
The editing screen will appear.
fig.9-72g
3
Press [EFFECT] ([F1]).
4
Press VAR. [ ] or INST [ ] to move the cursor to EFX.
5
Rotate the [VALUE] knob, or press [DEC] or [INC] to turn the Insertion
Effects ON/OFF.
Part Basic screen (p.29)
After you have finished
setting the value in step 5,
you can simultaneously
press [DEC] and [INC] to
transmit the currently
displayed parameter value.
(p.135)
 Loading...