Installing and Wiring the C7-613
2-3
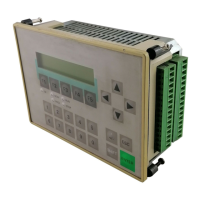
C7-613 Control System
A5E00138934-03
2.2 Mechanical installation
Mounting
The C7-613 is intended for stationary and enclosed installation; for example, in a
control cabinet door.
Note
You can only achieve the degree of protection IP65 if you follow steps 1 through 4
during installation.
!
Caution
Before mounting and unmounting the device, remove the MMC, and during
mounting and unmounting of the device, be careful not to damage the memory slot
and the connectors for the MPI bus and the backplane bus.
To install the C7-613:
Step Action
1 Cut out a cutout with the dimensions (198 + 1.0) mm x (148 +1.0) mm in the
control cabinet door. Refer to Figure 2-3.
2 Place the C7-613 in the prepared cutout in the control cabinet door. Please
make sure the seal rests evenly on all parts of the steel plate.
3 Guide the mounting hooks of seven of the provided mounting supports À into
the provided recesses in the C7-613 housing . See Figure 2-2. Mounting
supports can not be affixed on the narrow side near the X11 connector (on the
right side in Figure 2-2).
4 Using a screwdriver, tighten the C7-613 evenly and crosswise from behind in
the control cabinet door until the front panel of the C7-613 rests on the control
cabinet door Á. Position the device so that there is even spacing on all sides
between the housing and the cut-out section.
!
Caution
Condensation may develop on the device when you take it from a cold
environment to the operating area.
Before starting up the device, bring it up to room temperature. If there is
condensation, device must not be switched on until it is completely dry.
 Loading...
