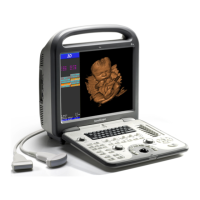
S6 Portable Digital Color Doppler Ultrasound System
Service Manual
8.3.2 Run Tests from 8.2.2 and 8.2.9
a) Move the cursor to the check box next to “System Memory", or any other
test items mentioned from 8.2.2 to 8.2.9, and press SET key. You can
also check the “Select all” check box to test all these items at the same
time.
b) Click ▷ PLAY button to execute the tests selected. It automatically stops
if the Repeat check box is not selected.
c) The testing status will be updated on the information panel on the
screen during the test process. All the reports will be saved as log files
on the hard disk drive at the end of the tests.
d) To browse the log file, click (LOG) button and use ⇑ and ⇓ keys to
select. (Click the LOG button again to return to test mode.)
e) Click Exit button to exit from the test mode to the system menu.
8.3.3 Run Tests from 8.2.10 to 8.2.11
a) Run Test 8.2.10 (Receive Channel Test)
b) In test mode, click Real-Time Test button, move the cursor to the check
box next to “Power Measurement”, and press SET key. This brings to
the EXAM screen.
c) Select a linear array probe, and enter the first diagnostic mode (carotid).
d) Press “PRINT” key, the Power Measurement menu pops up.
e) Check the box next to "ADCT" by pressing ENTER key. A signal is sent
to the 64 channels on the RBF board, a white mask is overlaid onto the
diagnostic window. You may control the signal frequency with the left
and right arrow keys.
f) The system will display 128 white lines (192 lines for high density
probe). The ADC channels are considered as working properly if either
of the follow two is true:
• These white lines are evenly distributed.
• Some of these lines are distorted slightly, i.e. line density varies
slightly at different parts. The system has passed the ADC test (Rx
on) at 8.2.7.
P/N: 4720-0034-01A
8-5

 Loading...