17
(E)
Chapter 1 Overview
This manual explains the location and function of parts
and controls of the BVM-D14H5U/D14H5E/D14H5A.
The explanation also applies to the optional BKM-
10R/11R Monitor Control Unit.
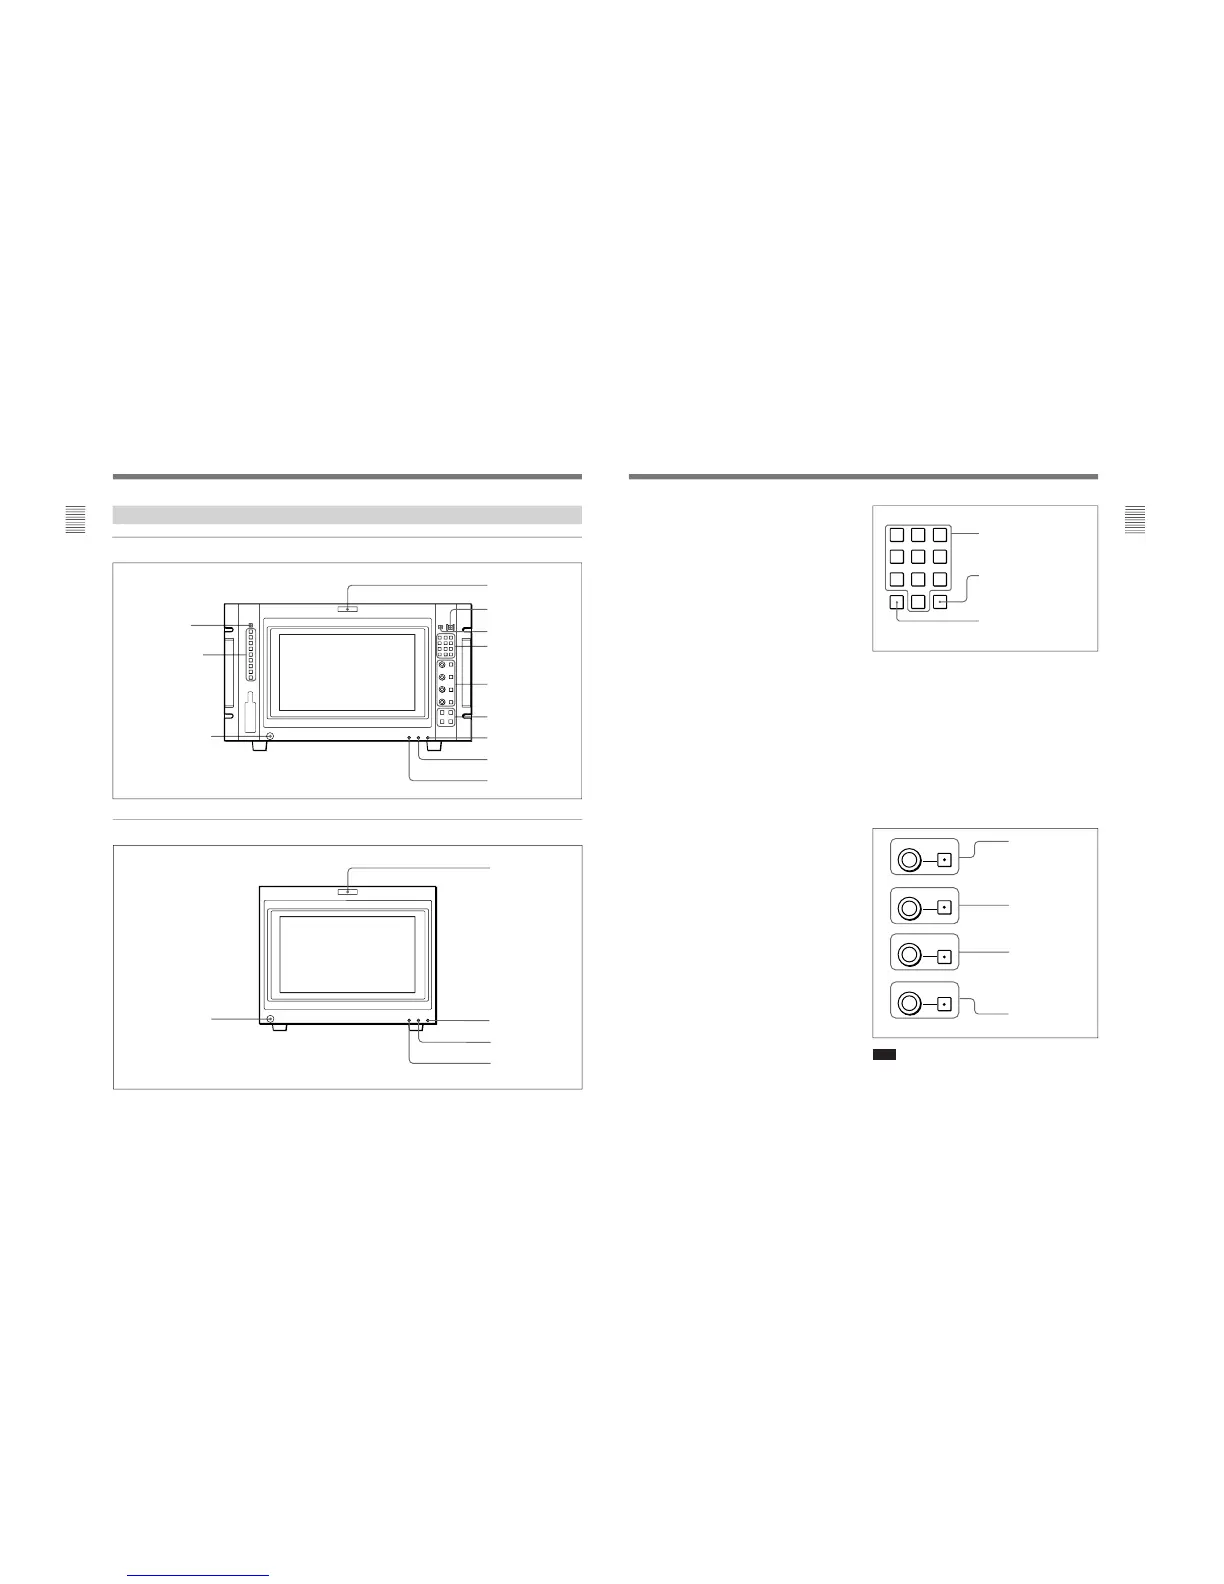
1 Tally lamp
With factory settings, the tally lamp lights as follows
when the pins of the PARALLEL REMOTE [1]
connector on the rear panel are shorted:
– in red, when pins No.3 and No.9 are shorted.
– in green, when pins No.4 and No.9 are shorted.
– in amber, when pins No.3, No.4 and No.9 are
shorted.
The tally lamp lights as follows when the pins of the
PARALLEL REMOTE [2] connector on the rear panel
are shorted:
– in red, when pins No.3 and No.5 are shorted.
– in green, when pins No.4 and No.5 are shorted.
– in amber, when pins No.3, No.4 and No.5 are
shorted.
By changing the setting in the REMOTE menu,
different pins on the remote connector can be used to
control the tally lamp.
For information about the REMOTE menu, see “[D]
Assigning the Remote Control Functions
— REMOTE Menu” on page 37(E).
2 POWER switch
Press to turn on/off the monitor. By setting with the
ADDRESS menu, it is possible to turn on/off the
power of the specified monitors only, or of all
monitors at the same time.
For information about the ADDRESS menu, see “Selecting
the Monitor to Control — ADDRESS Menu” on page 45(E).
3 DEGAUSS button
Press to degauss the CRT (every time the monitor is
turned on, the CRT is degaussed automatically). To
degauss again, wait for more than five minutes.
4 Numeric keypad
Use to designate the channel number for the input
signal to be monitored, or to enter the setting values
with the menus.
5 MANUAL adjustment buttons and knobs
Each press of one of these buttons turns the button’s
green LED on or off. When the corresponding button
is on (lit), it is possible to manually adjust the contrast,
brightness, chroma and phase by turning the
corresponding knobs. The PHASE knob is also used to
enter the setting values with the menus. It is possible to
set the preset value for each adjusting item with the
CONTROL PRESET ADJ menu.
For Information about the CONTROL PRESET ADJ menu,
see “ [A] Preset Adjustment of the Picture Level Control
Knobs — CONTROL PRESET ADJ menu” on page 31(E).
Note
The PHASE and CHROMA knobs may not be
adjusted due to the signals. However, these knobs are
used for selecting the items or entering the setting
values with the menus.
(continued)
Numeric buttons
Ent button: Confirms the
values and characters entered
(ENTER button of the menu
operation buttons 6 has the
same function).
Del button: Deletes the values
and characters entered.
 Loading...


