Series 4180 Powerhead 29
N Hold end cover (32) with gasket (31) and pump
diaphragm (30) up and fit it on the carburetor body –
making sure the gasket (31) and pump diaphragm
(30) do not move out of position.
N Move the end cover (32) carefully back and forth until
its pegs engage the holes in the carburetor body.
N Insert and tighten down the screws (33).
N Install the carburetor, @ 10.2
11.8 Adjusting Screws
There are three adjusting screws on the carburetor:
– High speed screw H (14)
– Low speed screw L (13)
– Idle speed screw H (12)
If the carburetor cannot be adjusted properly, the problem
may be the adjusting screws.
Removing
N Remove the carburetor, @ 10.2
N Unscrew the high speed screw (H) (14) and low
speed screw (L) (13).
N Check tips (arrows) of high speed screw H (14) and
low speed screw L (13) for damage or wear and
replace the screws if necessary.
N Remove and inspect the idle speed screw (12),
replace if necessary.
Installing
N Fit the adjusting screws (12, 13, 14) and carry our
basic setting, @ 11.2.
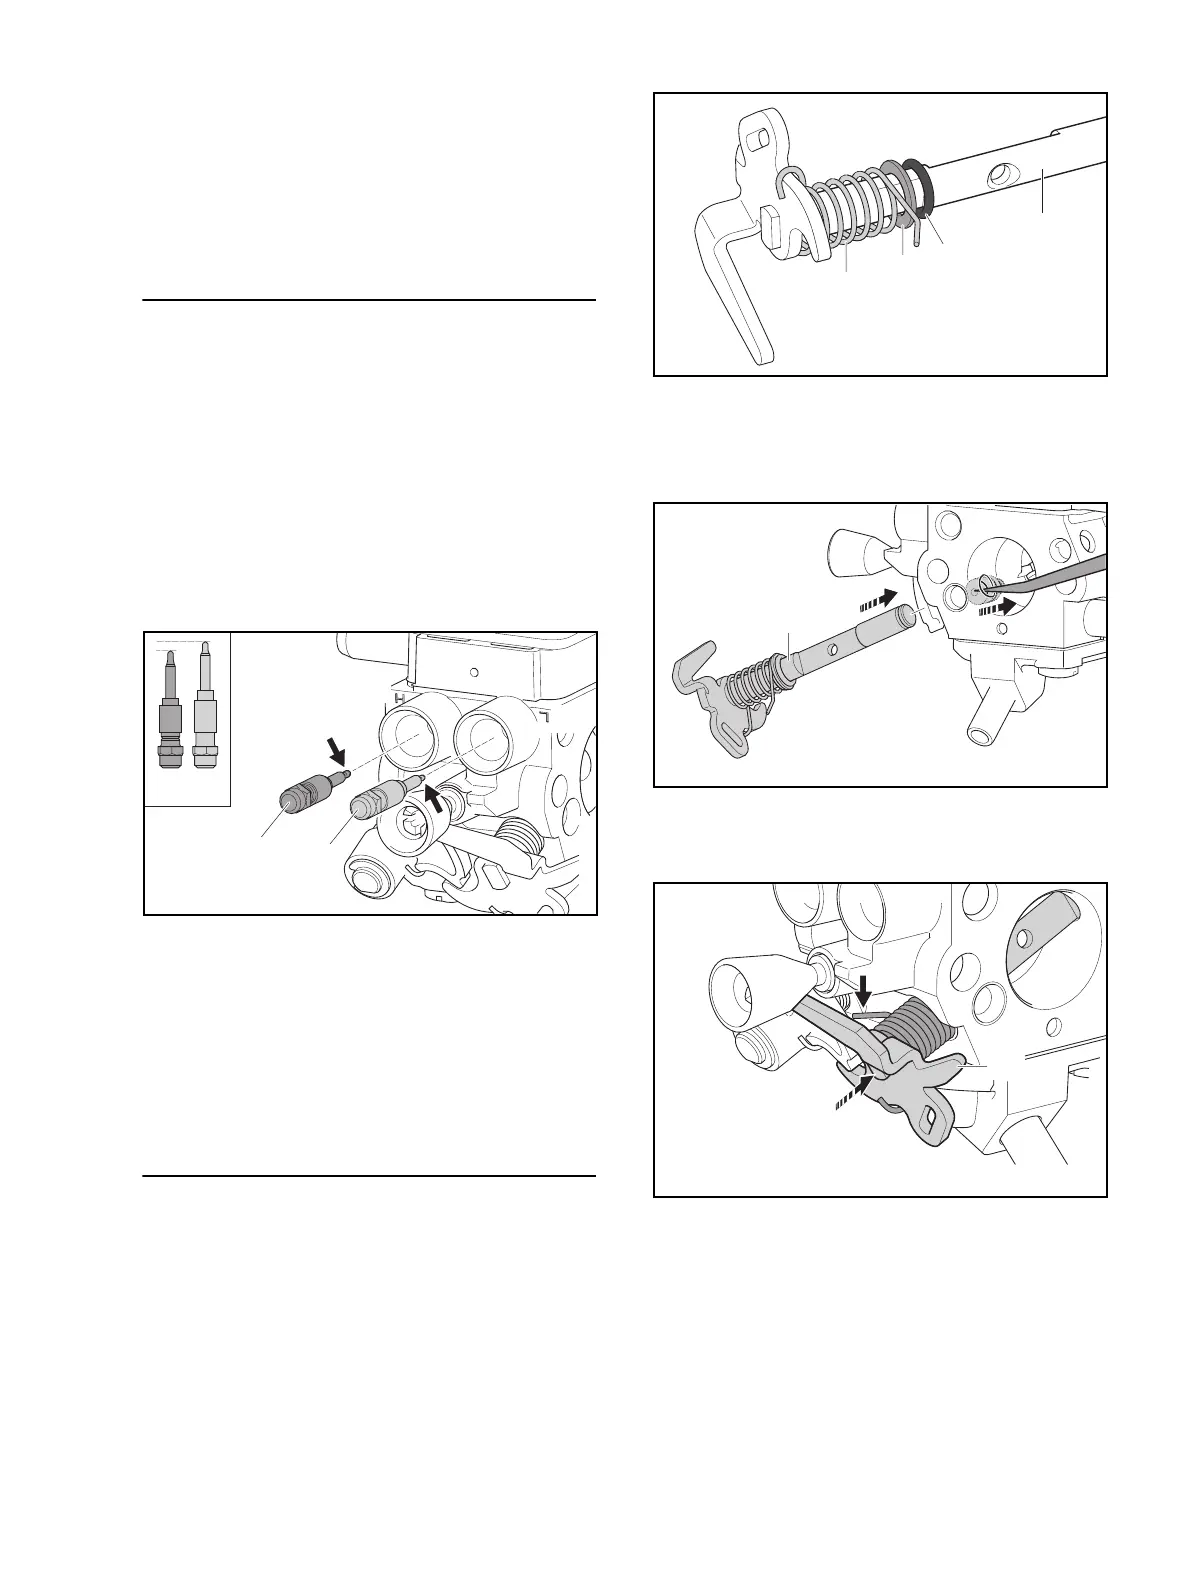
11.9 Throttle Shaft with Lever
Removing
N Remove the screw (27) from the throttle shutter (45)
and take out the shutter.
N Remove the E-clip (28).
N Pull out the throttle shaft (43).
N Remove the sealing ring (42), washer (18) and spring
(44) from the throttle shaft (43).
Installing
N Push the spring (44) onto the throttle shaft (43) so that
it locates in the notch on the lever.
N Push the washer (18) and sealing ring (42) onto the
throttle shaft (43) and up to the spring (44).
N Use a scriber to push back the pump piston and push
the throttle shaft (43) into the carburetor at the same
time.
N Push the throttle shaft (43) into the carburetor until the
long leg of the spring (44) engages the recess in the
carburetor (arrow).
N Fit the E-clip (28).
H
H L
L
13
14
0000-GXX-2423-A0
42
18
44
43
0000-GXX-2426-A0
43
0000-GXX-2427-A0
 Loading...