Series 4180 Powerhead 43
N Insert assembly drift 1108 893 4700 (23) in the
impulse hose (24).
N Push on the test flange 5910 850 4200 (22) and
secure it with the filter housing mounting nuts.
N Connect hose of pump 0000 850 1300 (24) to the
nipple on the test flange.
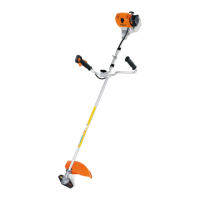
Vacuum Test
N Push the ring on pump 0000 850 1300 (23) to the left
(vacuum).
N Operate the pump 0000 850 1300 until gauge
indicates a vacuum of 0.5 bar (7.25 psi).
If the pressure reading does not drop any further than 0.3
bar (4.35 psi) within 20 seconds, the oil seals (5) are in
good condition.
Pressure Test
N Push the ring on pump (25) 0000 850 1300 to the right
(over-pressure).
N Operate the pump (25) 0000 850 1300 until pressure
of 0.5 bar (7.25 psi) is indicated.
If the pressure reading does not drop any further than 0.3
bar (4.35 psi) within 20 seconds, the engine is airtight.
To find a leak, coat the suspect area with soapy water and
repeat the pressure test. Bubbles will appear to show the
position of the leak.
After finishing the test:
N Disconnect hose of pump 0000 850 1300 from the
test flange 5910 850 4200.
N Unscrew the nuts and remove the test flange 5910
850 4200.
N Loosen the screws on the muffler and pull out the
sealing plate 0000 855 8106 (20).
N Tighten down the muffler screws.
N Install the carburetor, filter housing, air filter and filter
cover, @ 10.2.
N Install the shroud, @ 4.5.
16.3 Performing Pressure Loss Test
If there is a loss of engine power, the cause may be
carbon deposits or combustion residue. They accumulate
primarily on valve seats and valve heads. The combustion
chamber is cannot be sealed properly in such a case. The
combustion chamber has to be decoked.
The piston must be set to top dead center on the power
stroke for the pressure loss test. Only in this position are
the inlet and exhaust valves both closed, and no pressure
can be lost if the engine is in order.
N Remove the cover, @ 4.3.
N Remove the rewind starter, @ 5.2.
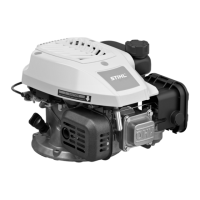
N Set the piston to top dead center on the power stroke,
@ 15.3.
N To block the crankshaft, fit the retainer (25).
N Pull boot off the spark plug.
N Unscrew the spark plug.
N Screw hose (29) of leakage tester 5910 850 0300
into spark plug hole.
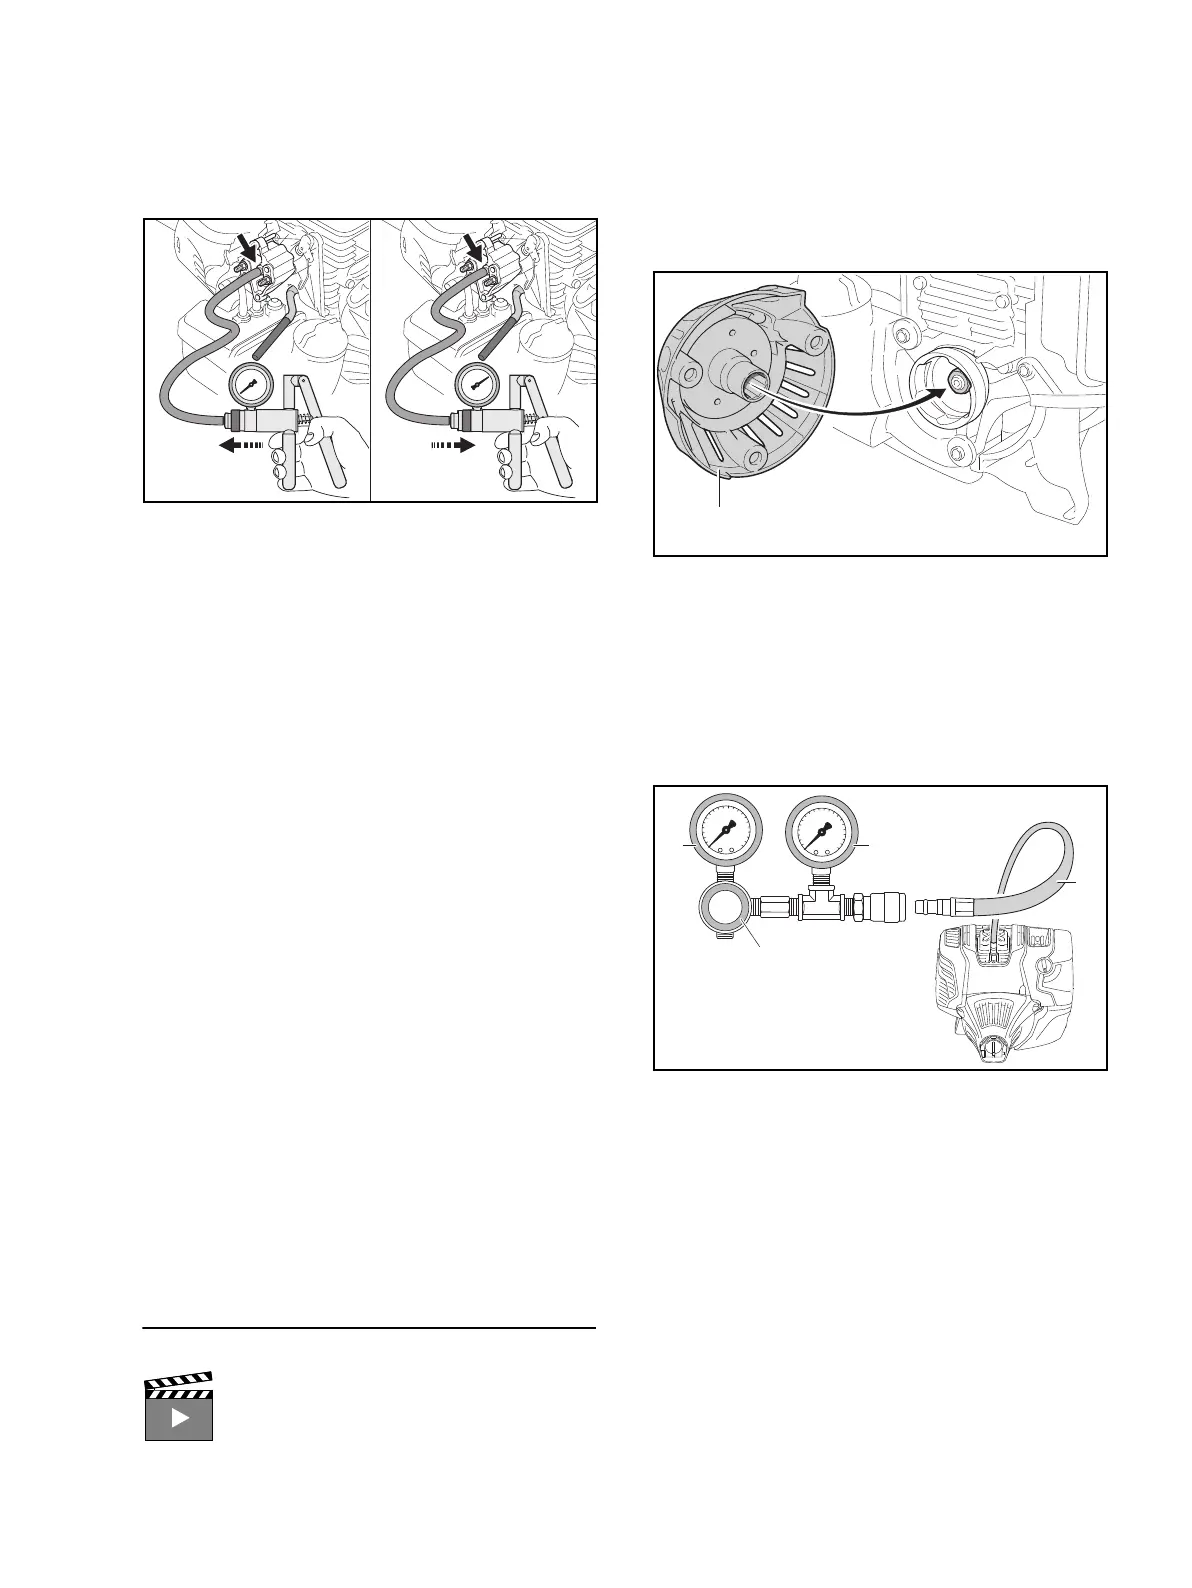
N Close valve (28) on leakage tester (rotate
counterclockwise as far as stop). This prevents the
engine from being suddenly pressurized.
N Connect leakage tester to compressed air supply (6-
8 bar).
N Slowly open the leakage tester’s valve (28) clockwise
until the needle of the left-hand pressure gauge (26)
is in the red range (vertical). The needle on the right-
hand pressure gauge (27) must be on zero.
N Connect the hose (29) to the leakage tester.
If the right-hand pressure gauge (27) shows a value
greater than 10%, the combustion chamber is leaking.
Interactive video “Pressure Loss Test”
0000-GXX-2314-A0
25
0000-GXX-1963-A0
27
29
28
26
0000-GXX-1964-A0
 Loading...