Component Access / Removal
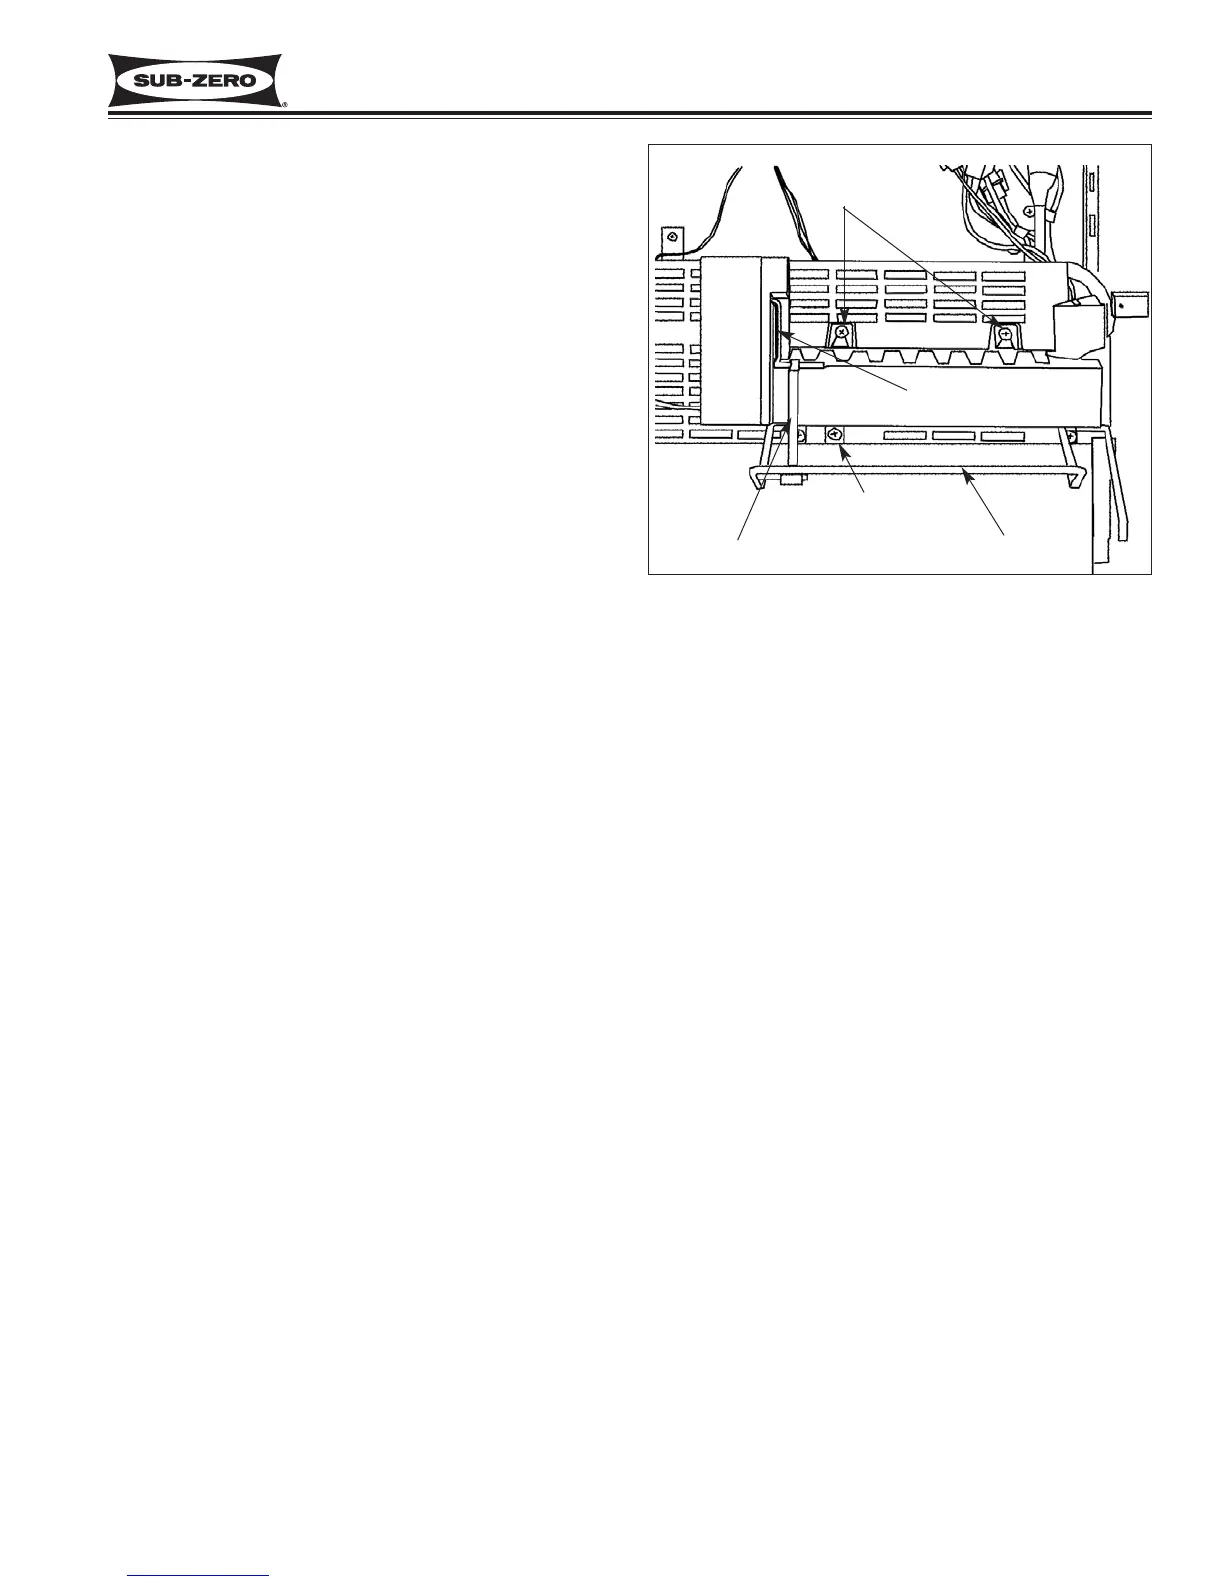
Figure 7-51. Model 632, 642 Icemaker
Icemaker (Models 632, 642)
NOTE: It is recommended, but not necessary, to
remove the air duct/shelf in order to remove the ice-
maker.
To remove the icemaker, the ice level mechanism
needs to be detached from the icemaker. This is done
by sliding the connecting rod to the right, off of the ice-
maker shut-off arm, allowing the ice level arm to drop
out of the way. Now remove the mounting screw at the
bottom left of the icemaker which secures the icemaker
bracket to the evaporator cover assembly. Then extract
the two mounting screws at the top rear, above the ice-
maker mold. Pull the icemaker assembly forward and
disconnect the electrical leads from the icemaker. (See
Figures 7-50 & 7-51)
Fill Tube Heater (Models 632, 642)
To access and remove the icemaker fill tube heater, first
remove the air duct/shelf. Now disconnect the heater
wire leads from the wire harness and pull the fill tube
and heater out as one. Then, cut the cable tie which
holds the heater to the fill tube. (See Figure 7-50)
Freezer Evaporator Fan Assembly
(Models 632, 642)
To access and remove the freezer evaporator fan
assembly, first remove the air duct/shelf. Now discon-
nect the fan motor wire leads from the wire harness.
Then, extract the two retaining screws which secure the
evaporator fan shroud to the evaporator brackets; pull
the fan assembly up, slightly forward, and out. (See
Figure 7-49 & 7-50)
Shut-off Arm
Screws
Screw
Connecting Rod
Ice Level Arm
600 Series
(Prior to #1810000)
7-25
#3756270 - Revision B - January, 2006
 Loading...