Component Access / Removal
600 Series
(Prior to #1810000)
7-26
#3756270 - Revision B - January, 2006
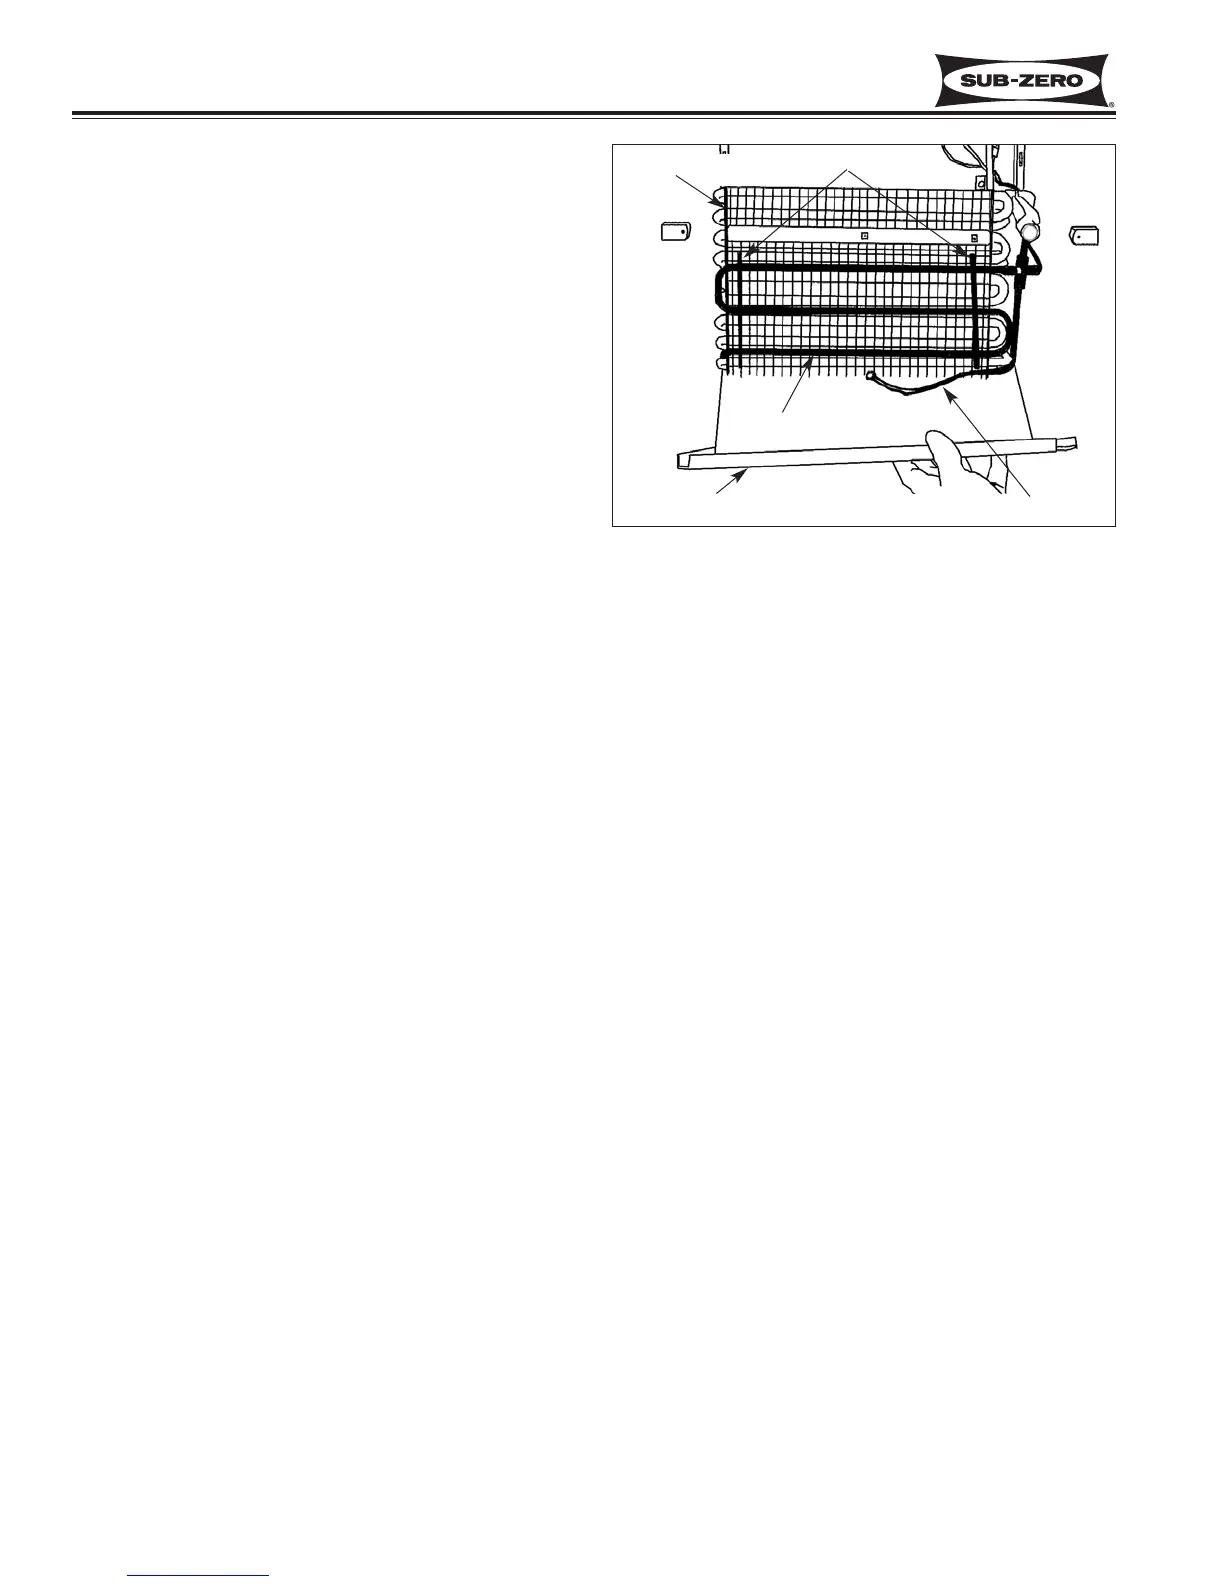
Figure 7-52. Model 632, 642 Evaporator Access
Defrost Terminator (Models 632, 642)
The defrost terminator is attached to the evaporator out-
let, after the accumulator.
To access and remove the freezer defrost terminator,
first remove the air duct/shelf. Now, disconnect the
defrost terminator wire leads from the wire harness, and
pull the terminator off of the tubing. See Figures 7-50 &
7-52)
Ice Bucket Carriage Assembly (Models 632, 642)
The rollers of the ice bucket carriage assembly are cap-
tivated by the ice bucket slides attached to each side
wall. To remove the carriage assembly, push it as far
back as possible so that the screws in the ice bucket
slides are accessible. Extract the two front most
screws from each ice bucket slide. Then, pull the slides
and carriage assembly forward and out.
NOTE: It is not necessary to completely remove the ice
bucket slides rear retaining screws. They fit into slots
at the top rear of each slide.
Freezer Evaporator Cover (Models 632, 642)
NOTE: Depending on the purpose for gaining access to
this area, it is recommended, but not necessary, to
remove the air duct/shelf assembly first, in order to
remove the evaporator cover assembly.
A grounding screw secures the evaporator cover to a
bracket at the front of the evaporator. The evaporator
cover also bends back underneath the evaporator to act
as the drain trough.
To access and remove the evaporator cover, the ice
bucket carriage assembly and icemaker will need to be
removed first. Now disconnect the ice level mechanism
and extract the ground screw at front center of the
evaporator cover. Then, tilt the evaporator cover for-
ward to gain access to the drain tube heater. Pull the
drain tube heater from the drain tube. Then, pull the
evaporator cover forward while pulling the drain tube off
of the drain spout. (See Figures 7-51 & 7-52)
Defrost Heater (Models 632, 642)
To access and remove the evaporator defrost heater,
the air duct/shelf assembly, ice bucket carriage assem-
bly, icemaker and evaporator cover will need to be
removed first. Now, disconnect the heater wire leads
from the wire harness. Then, dislodge the heater clips
by pulling the tab of the heater clips down and out.
Gently pull the heater from the fins of the evaporator.
(See Figure 7-52.)
Freezer Drain Tube Heater (Models 632, 642)
To access and remove the drain tube heater, the air
duct/shelf assembly, ice bucket carriage assembly, ice-
maker and evaporator cover will need to be removed
first. Now, disconnect the drain tube heater wire leads
from the wire harness. Then, extract the screws which
secure the evaporator to the rear wall of the freezer
compartment. Pull the bottom of the evaporator up
while rotating to the left to gain access to the clamp
holding the heater at the bottom right rear of the evapo-
rator. Extract the screw holding the clamp and pull
heater up. (See Figure 7-52.)
Thermistor
Heater Clips
Defrost Heater
Evaporator Cover
Drain Tube Heater
 Loading...