Component Access / Removal
Compressor (Models 601R, 601F)
NOTE: When replacing compressor, the filter-drier
must also be replaced.
NOTE: Compressor and tubing may be hot and could
cause minor personal injury.
The compressor is secured to the unit tray by bolts into
grommets. To remove the compressor, the upper and
lower section of the unit grille along with the compres-
sor baffle must be removed first. Then, after capturing
the refrigerant from the sealed system, remove the
compressor electrical cover and disconnect the electri-
cals from the compressor. Now, remove the bolts from
the grommets at each corner of the compressor base,
and pull compressor forward and rotate to the right to
gain access to the suction and discharge lines. Using
a tube cutter, cut the suction and discharge lines
approximately one inch from the compressor, then pull
compressor out. (See Figure 7-68)
Drain Pan Condensate Heater Loop (Model 601R)
NOTE: When replacing the condensate heater loop,
the filter-drier must also be replaced.
NOTE: It is recommended that a suction line drier be
added to the sealed system when replacing the con-
densate heater loop.
On the model 601R, the drain pan condensate heater
loop is located in the compressor area, and sits in the
drain pan. To remove condensate heater loop, the
upper and lower section of the unit grille along with the
compressor baffle must be removed first. Then, after
capturing the refrigerant from the sealed system,
remove the bolts from the grommets at each corner of
the compressor base and pull compressor forward and
rotate to the right. Un-braze or cut the condensate
loop inlet and outlet, and pull condensate loop out.
(See Figure 7-68)
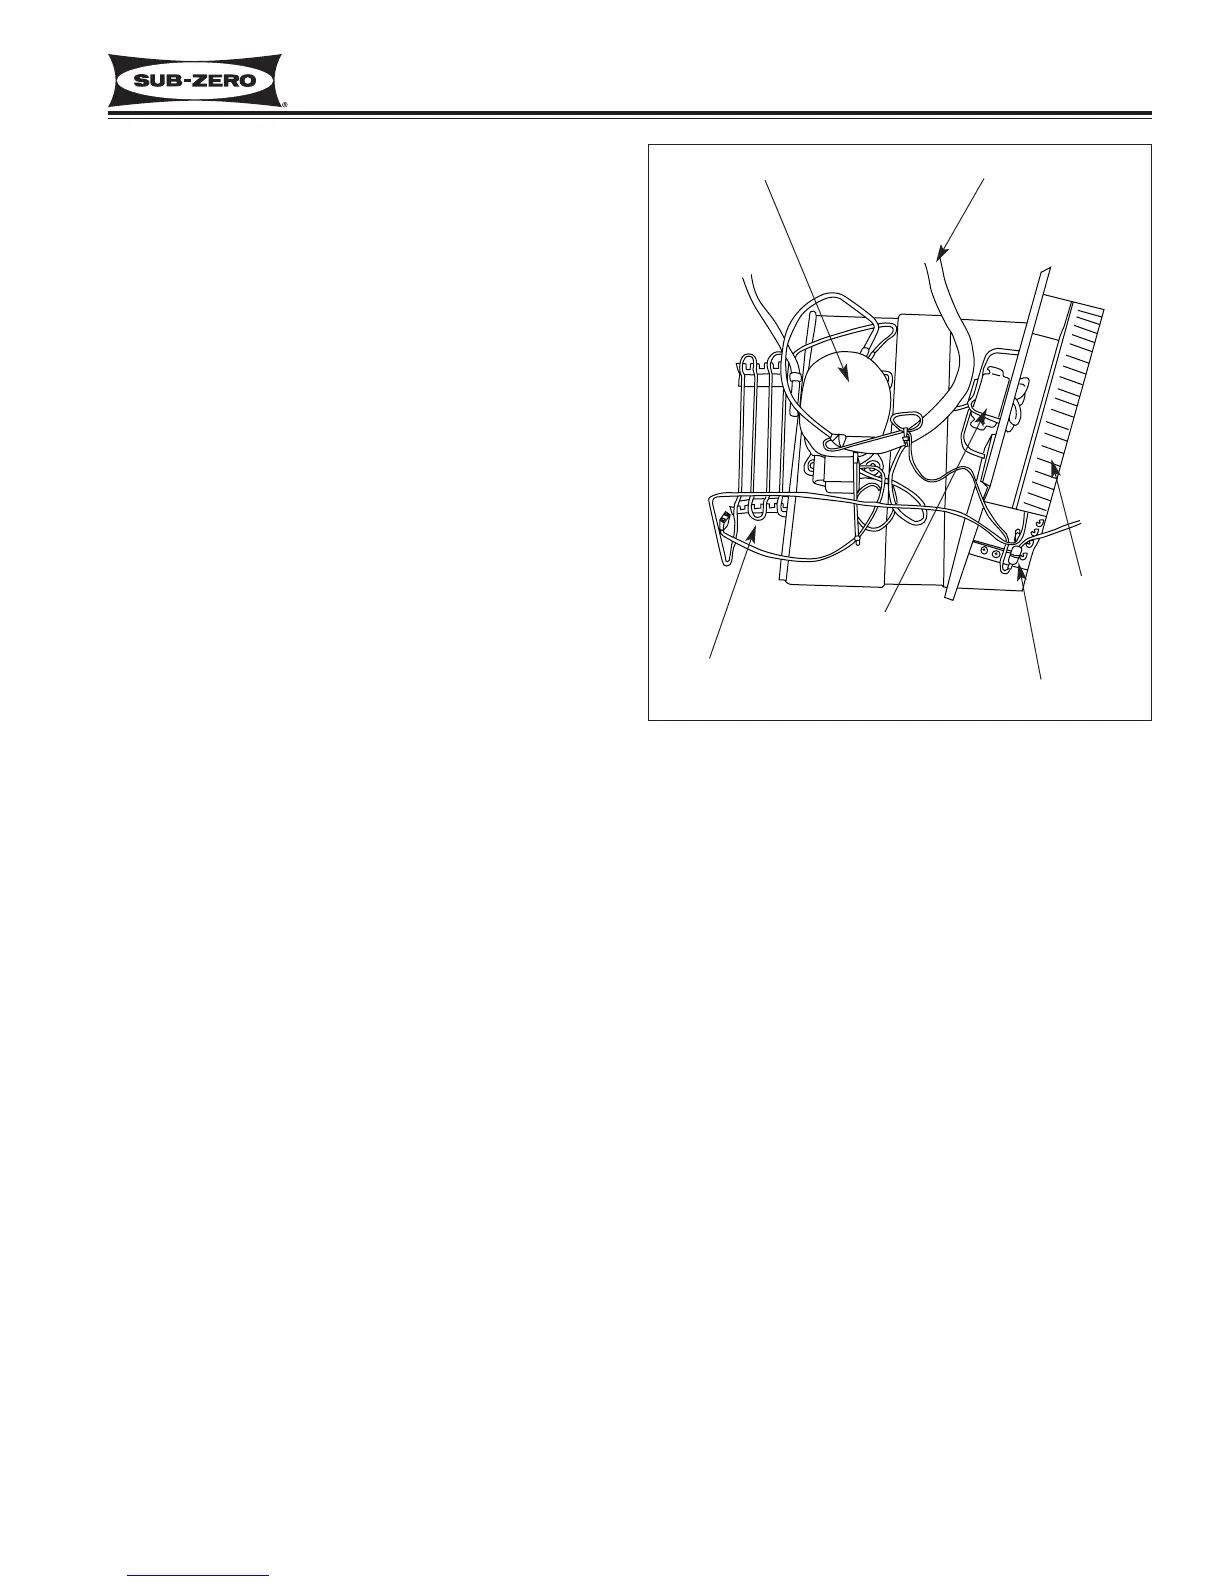
Figure 7-68. Model 601R Compressor Area Layout
Compressor
Condenser
Condenser Fan
Heat Exchanger
Drain Pan
Heater Loop
Filter-Drier
600 Series
(Prior to #1810000)
7-37
#3756270 - Revision B - January, 2006
Condenser (Models 601R, 601F)
NOTE: When replacing condenser, the filter-drier must
also be replaced.
To remove the condenser, the upper and lower section
of the unit grille along with the compressor baffle must
be removed first. Then, after capturing the refrigerant
from the sealed system, remove the screws which
secure the condenser fan shroud to the condenser.
Now, un-braze or cut the condenser inlet and outlet tub-
ing. Extract the mounting screws which secure the con-
denser side brackets to the unit tray. Slide the con-
denser to the right, then pull forward. (See Figure 7-68)
NOTE: The 601F compressor layout is basically the
same,minus the drain pan condensate heater loop.
 Loading...